Liferay
Overview of Object Model Builder

Prishita Rojivadiya•May 31, 2024
Introduction:
An object model is a visual interface that makes it easier to design and organize these complex structures. This will provide a feature to create folders to organize objects and create them in the folder. One can create, manage, and relate object definitions with drag-and-drop capabilities using this feature.
Prerequisites:
- Liferay 7.4+
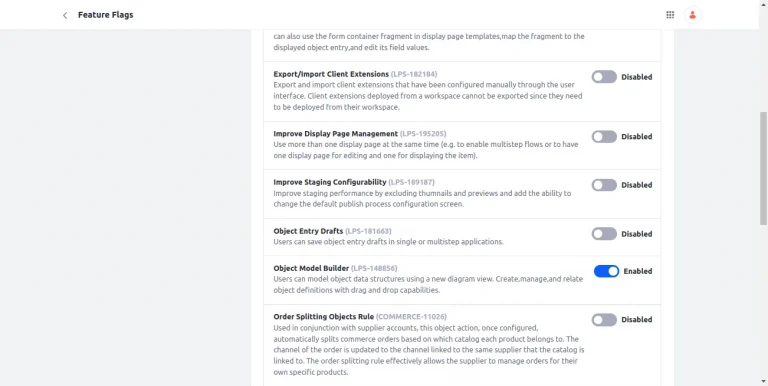
Step 1: Enable Object Model Builder
- To enable Object Model Builder Navigate to the Control Panel > Configuration > Instance Settings > Feature Flags.
- Enable Object Model Builder
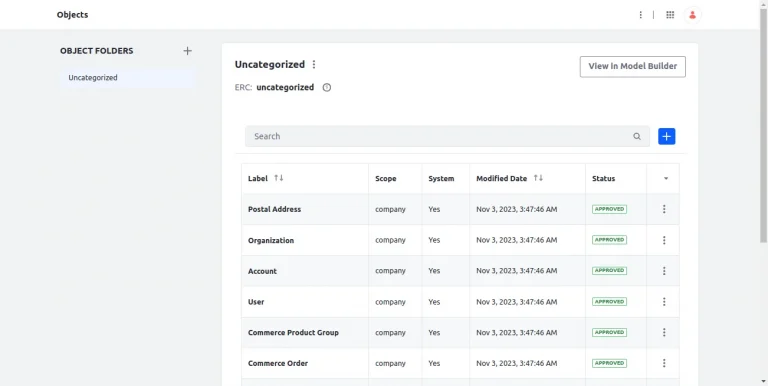
Step 2: Access Model Builder View
- Navigate to Control Panel > OBJECT > Objects On the left side of the screen, click on the “View in Model Builder” button.
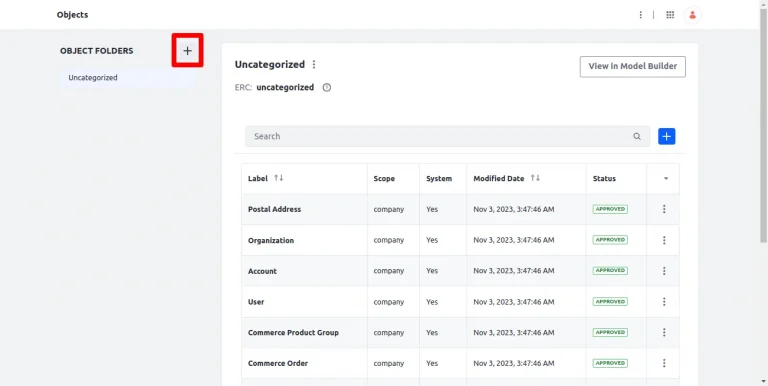
Step 3: Create a Folder
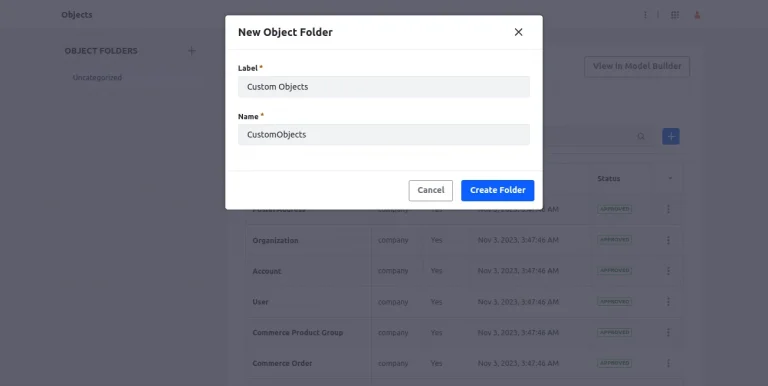
- On the same page, there is a button highlighted below. Clicking it will open a pop-up screen to create a folder.
- Add the label and name of the folder, and create the folder.
Step 4: Create an Object
- Go inside the created folder and click “View in Model Builder” It will render to the model builder GUI.
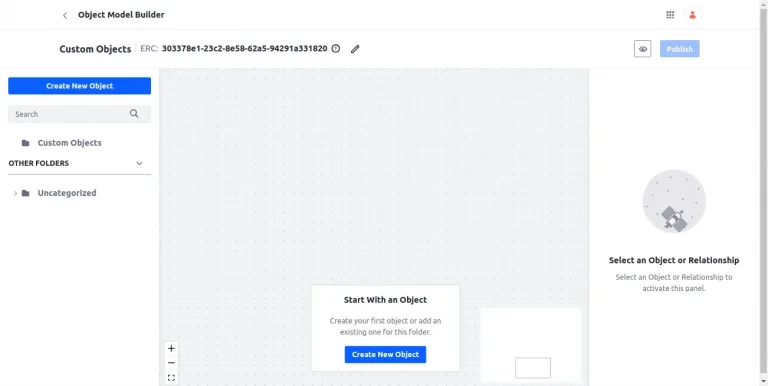
- Click the “Create New Object” button.
- To create an object, type the object name, a label, and a plural label. Then, click the save button.
- Label: This field will identify the object in the Liferay UI.
- Plural label: This field will help to determine the display name for the display name in the UI.
- Object name: This represents the object’s definition name. It will not change after the object is published.

- The object will be visible in card format on the screen. Click “Add Field or Relationship” and then choose “Add Field” or “Add Relationship” based on the requirements to create new fields or relationships.
- Add Field
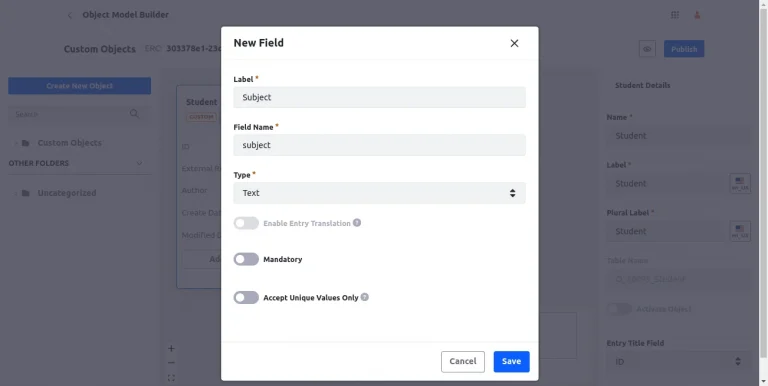
- Label: This will represent the field in the Liferay UI.
- Field Name: This will determine the fields in the backend. The value of this field will not change after publishing the object.
- Type: This field will determine the type of input this field will allow.
- Add Relationship
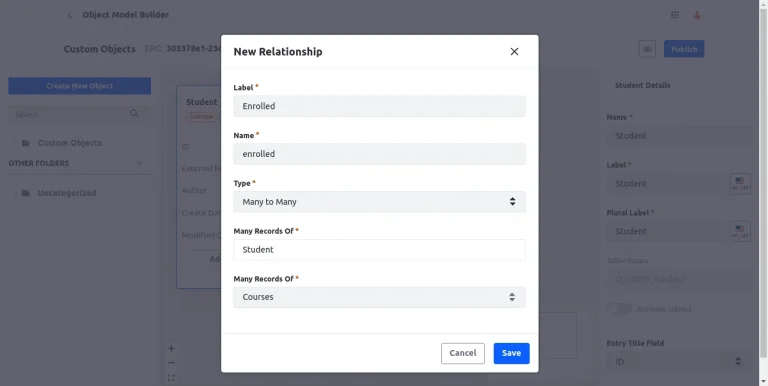
- Label: This will represent the relationship in the Liferay UI.
- Name: This will determine the relationship in the backend. The value of this field will not change after publishing the object.
- Type: Select the relationship type, either one-to-many or many-to-many.
- One to many
- This relationship works like one object entry from the parent object being connected to multiple object entries from the child object.
- Many to many
- This relationship works as multiple object entries from the parent object are connected to the many object entries from the child object.
- One to many
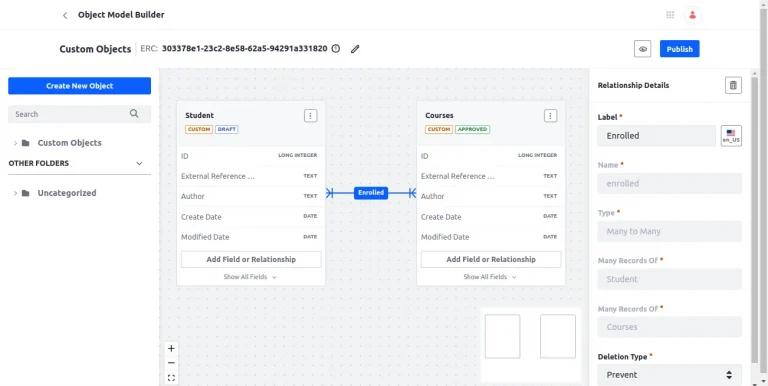
- Relationships in object model builder look like the below image.
Step 5: Managing Objects
- Move to the desired folder and click action from another object’s action button from the left sidebar.
- Select “move to the current folder” to change the folder of object definition. It will not affect the relationship.
- Access additional management options by clicking on Action for an object card.
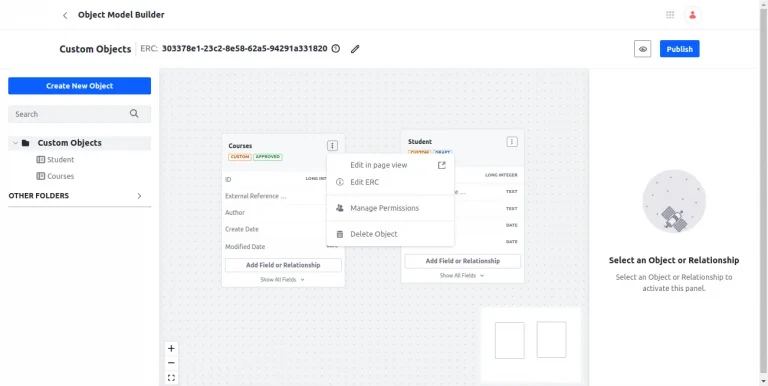
- Edit in page view: This will redirect to the default object UI.
- Edit the ERC: This will enable editing of the External Reference Code.
- Manage Permissions: This will allow users to set permissions to manage objects.
- Delete Object: This will delete the object definition.
Step 6: Publish the objects
- After making all the changes to objects, the object model builder provides this feature to publish individual objects or all the objects according to the need.
- Open the model builder by navigating to the object draft folder.
- When clicking on “Publish,” a box containing a list of objects in draft form appears. Choose the draft object that has to be published, then publish the objects.
