Objects in Liferay 7.4

Introduction
Liferay 7.4 came with a new feature Object. With the help of Object, you can build an application without writing a single line of code or deploying a module.
Prerequisites :
- Liferay DXP/Portal 7.4+
- Basic knowledge of Liferay
Environment Requirements :
- Liferay Portal or DXP
Liferay 7.4 came with a new feature Object. With the help of Object, you can build an application without writing a single line of code or deploying a module.
- Create Object
Follow these steps to create an Object:
- Click On the Admin Control Menu, go to the Control Panel tab, and click on Objects. Here You can see all created Objects.
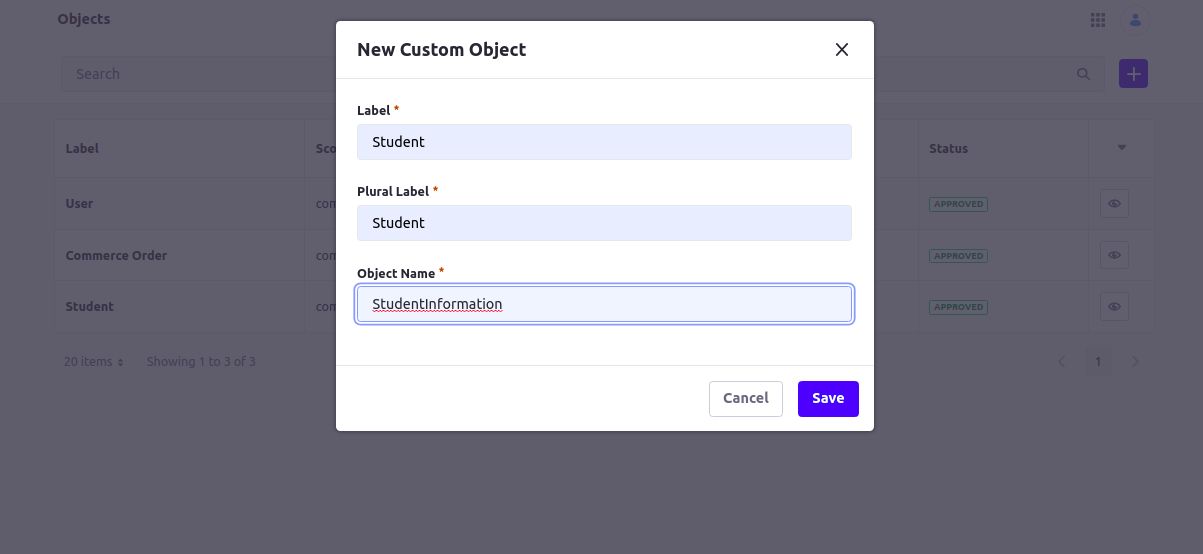
- To create objects click on the add button () and add your object details.
- Label: Add label name for the Identity of an object in terms of object portlet and supported application (e.g., Workflow, Display Page Templates, Forms).
- Plural Label: Add a plural label to Display the name of your Object in the Portal UI.
- Object Name: Determines the Object’s definition. name. It cannot be changed once you publish the Object.
- Click on Save.
- Once Your object is successfully saved, A new object draft is created without any fields, relationships, layouts, actions, or a defined scope. Once you complete the creation process, you must edit the object and publish it.
Note: Once you publish an Object you can't change the name, entry display, and scope of an object
2. Editing Object Drafts
Follow these steps to edit the Object draft:
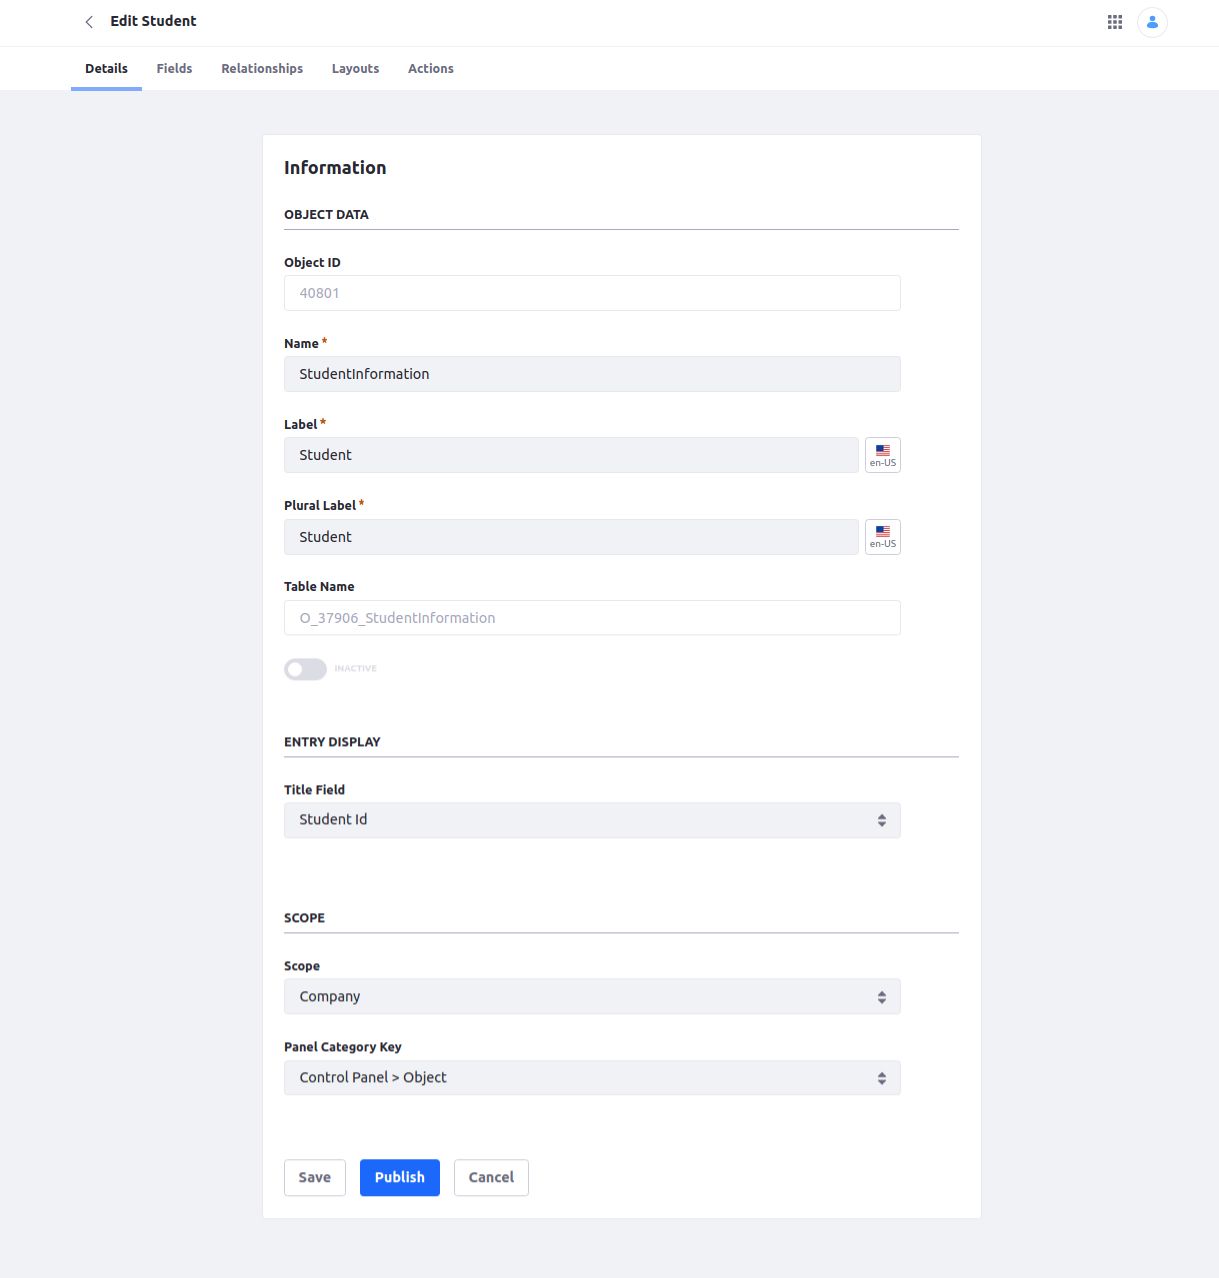
- In the Object section, click on your newly created object draft. This redirects you to the edit Object tab. If you want to modify the Object Name, Label, and Plural Labels, you can do it here.
- Select a Panel Category Key to determine where the Object appears in the Liferay UI.
- Select the Object’s scope. This decides where the Object’s data is stored and published. Here Liferay provided two options.
- Company: When scoped by Company, the Object’s data is stored per Liferay instance. Liferay by default selects a company. If you select Object is scoped by Company, you can see it in the Global Menu ().
- Site: When you select scoped by Site, the Object’s data is stored per Site. If the Object is scoped by the Site, you can see it in the Site Menu ().
3. Adding Fields in Objects
Follow these steps to add field in Object:
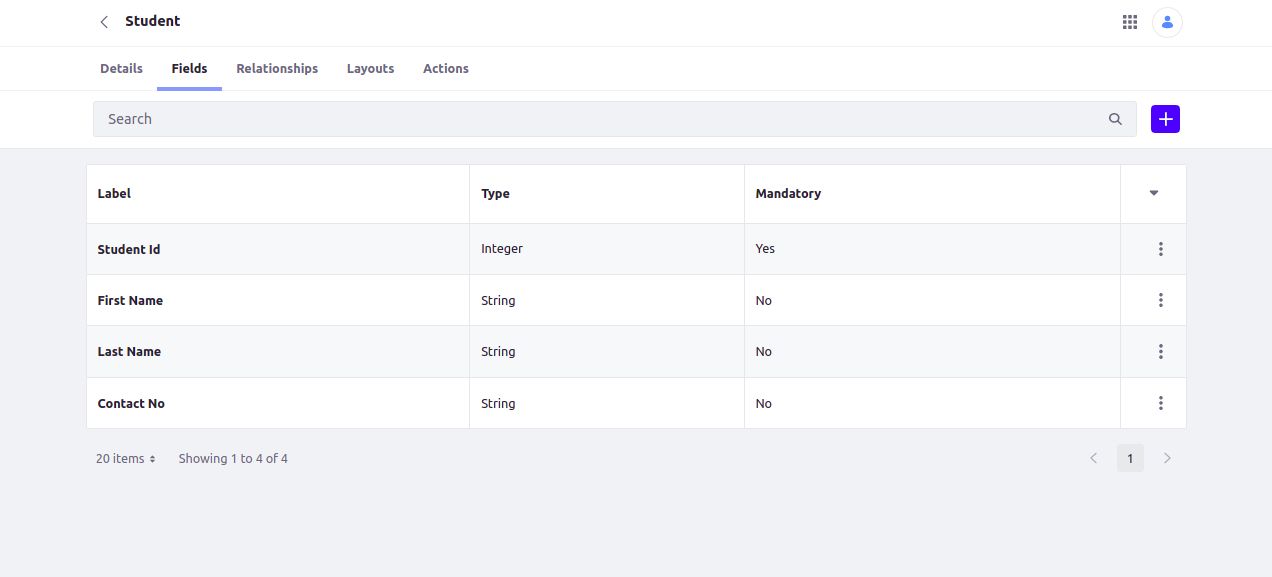
- Click on the Fields tab in your object and click on the Add button ().
- Enter a Label and Field Name.
- Label: This value identifies the field in the Objects UI. you can be localized after the field is created.
- Field Name: This value determines the field’s name in the back-end(Database) and uses a camel case. Once a field is published, this value cannot be changed.
- Select a Field Type according to your required DataType.
- Select whether the field is mandatory.
- Click on Save.
Once you’ve added an all field to an Object, you can go to the Object Details tab and select an Entry Title. This determines the field used as the title for an Object’s entries.
4. Relationships in Object
- Adding New Relationships in Objects
Follow these steps for adding relationship in Object:
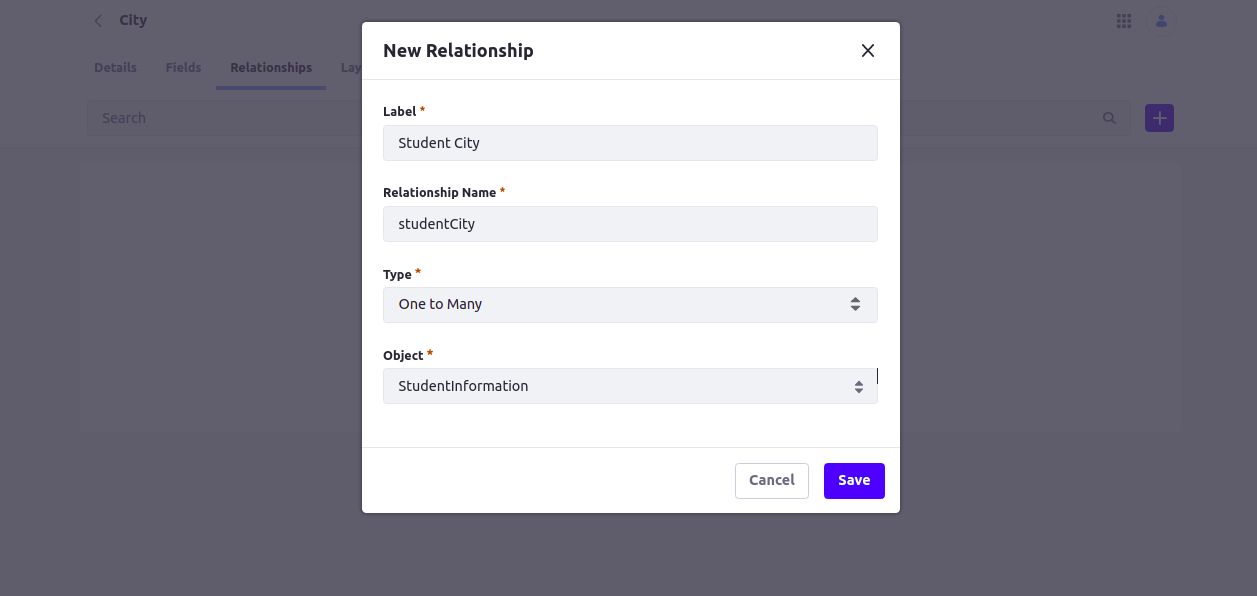
- Click on the Relationships tab in your object, and click on the Add button ().
- Enter a Label and Relationship Name.
- Label: It identifies the relationship in the Objects UI and can be localized after the relationship is created.
- Relationship Name: Determines the relationship’s name in the back-end and uses camel case. Once the relationship is published, this value cannot be changed.
- Select a relationship Type: Objects provide two types of relationships.
- One to Many: You can relate one of the current Object entities to multiple entities of another Object. When selected one to many, a new field is added to entities on the child side of the relationship.
Many to Many: You can relate multiple entities from the current Object to multiple entities in another Object.
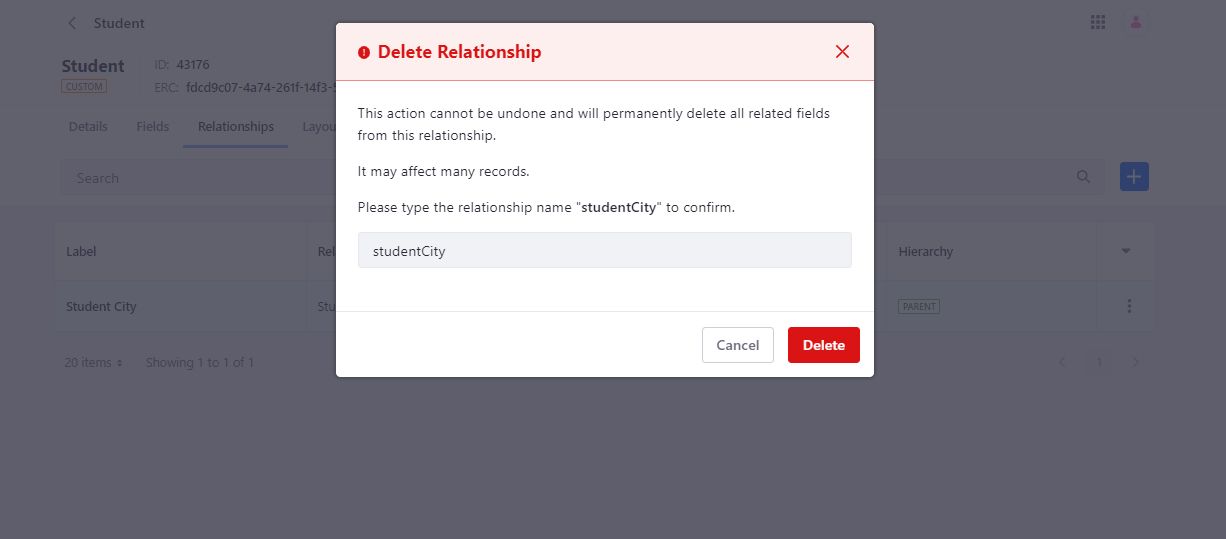
b. Delete Relationships in Objects
In the Liferay versions 7.4 U26+ and GA26+, You can remove relationships from both draft and published objects. Removing a relationship permanently deletes its field from the related object.
For published object, this can affect many records.
Follow these steps to remove a relationship from an object:
i. Go to the desired object for which you want to remove the relationship and click on the Relationship tab.
ii. Click the Actions button () for the desired relationship and select Delete.
iii. In the dialog window, enter the relationship’s name and click on the Delete button.
5. Designing Object Layouts for our object
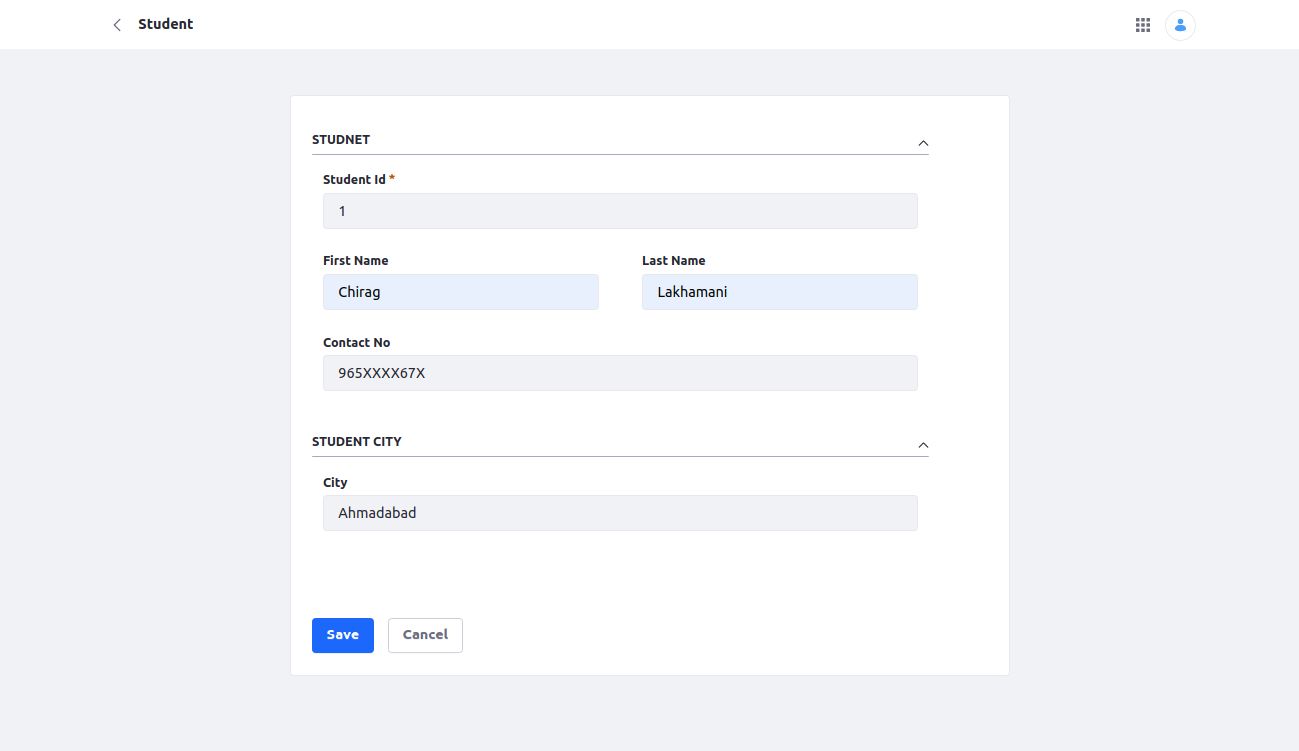
An Object layout decides how its fields and relationships are displayed when the user creates or edits an entry. This layout has a single tab that displays all Object fields in alphabetical order.
Note: The automatically generated layout does not display Object relationships. To display relationships, you must create a custom layout with a dedicated relationship tab.
Follow these steps for adding Object Layouts:
a. Adding Object Entry Layout
- Click the Layout tab and select the Add button ().
- Enter a Name and click on Save.
Once saved, a new blank layout is created. Click on the newly created layout and now add tabs to your custom layout and determine how the Object’s fields and relationships are organized for entry creation and editing.
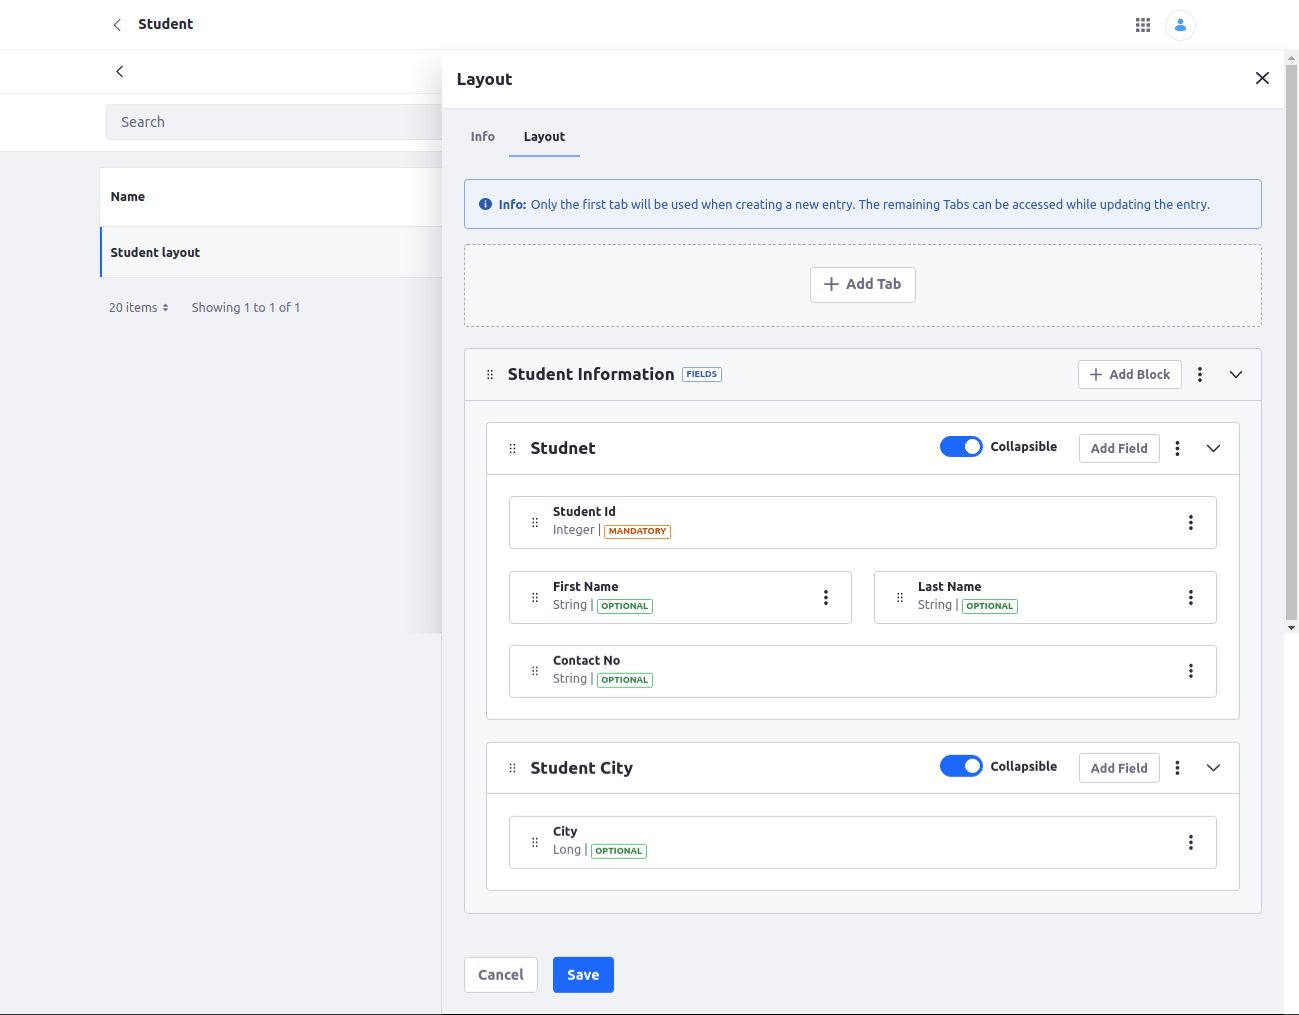
b. Adding Layout Tabs
- Object elements can be organized into two types of tabs:
- Fields: Displays Object entry fields.
- Relationships: Displays relationship tables and must be used for showing the parent side of One to Many relationships and both sides of Many to Many relationships.
The first tab in a layout cannot contain relationships, and a Relationships tab can only be added to a layout after it has a Fields tab.
2. Fields Tabs
- Click on the desired layout and go to the Layout tab.
- Click on Add Tab, enter a Label, select the Fields, and click on Save. The Label value determines the tab’s display name in the Liferay UI.
- Click on Add Block, enter a Label, and click on Save.Fields cannot be added directly to a tab; they must be organized into blocks.
- Click Add field, select the desired field, determine if the field is displayed in one, two, or three columns, and click save.
- Click Add Field to add more fields to the block, or click Add Block to add a new block to the tab for additional fields.
- Use the toggle switch to determine whether the block is collapsible.
c. Relationships Tabs
- Select the desired layout and go to the Layout tab.
- Click on Add Tab, enter a Label. This value determines the tab’s display name in the Liferay UI.
- Click on Relationships and then select from available, One to Many or Many to Many relationships.
- Choose relation in available options and click on save.
d. Set Default Layout
- Click on the created layout.
- In the Basic Details tab, check the Default box.
- Click on Save.
e. The layout is now used when creating and editing the Object’s entries.
6. Defining Object Actions:
you can define actions that are triggered under specified conditions. When an action is active, Liferay listens for when an Object’s data is added, deleted, or removed and then performs the set action.
Follow these steps to define actions for an Object:
- Click on the Actions tab and click the Add button (Add Button).
- Enter a name.
- For When you perform the actions trigger.

4. Then, select Webhook. This determines the type of action performed.
5. Enter a URL for the webhook.
6. Click Save.
7. Publishing Object:
Publishing an Object creates and activates your new application. When activated, users can access it in the Portal UI according to its scope and panel category key.
a. Before publishing your Object, review the following information to understand the consequences of publishing a draft.
- A database table is created for the Object.
- A new Headless API is automatically created for CRUD operations.
- A Collection Provider is created for displaying the Object’s entries.
- A Page widget is created for the Object.
- The Object is integrated with the Info framework, so you can select the Object as a content type for a Display Page Template
- The Object is integrated with the Permissions framework, so you can manage permissions for the object and its resources.
- The Object is integrated with the Workflow framework, so you can configure a custom workflow for the Object.
- The Object is integrated with Forms, so you can select the Object as a data storage option.
b. Configuration Restrictions for Published Objects
- To prevent data loss and system conflicts, some configuration options are removed for Objects, fields, and relationships after they are published.
- Published Objects cannot be deleted or unpublished.
- The name and scope of a published Object cannot be changed.
- Any fields or relationships included in an Object at the time of publishing cannot be removed.
- Most configuration options for published fields and relationships cannot be changed
8. Delete Objects
Note: Delete object option is only available on Liferay 7.4 U26+ and GA26+. In the previous Liferay versions 7.4 U25 and GA25, the user could not delete a published object or remove the relationships contained in the object.
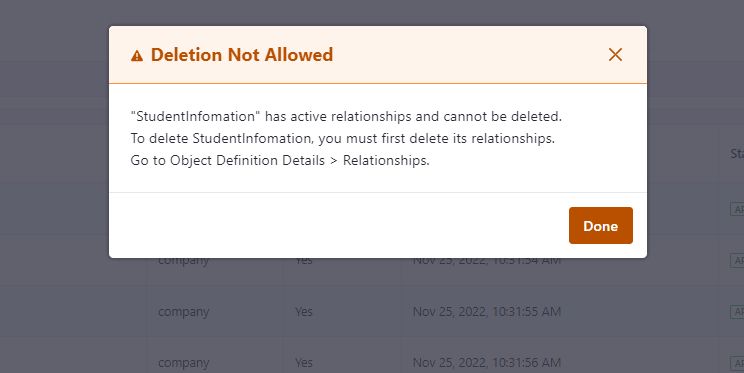
You can delete both draft and published Object at any time. Deleting an Object removes all associated data. This includes all stored entries for published Object.
If your object has active relationships, you must remove all relationships before you can delete the object. for more information see Removing Relationships at the upper side of this blog.
When you delete all relationships from an object, then follow these steps to delete the custom Object.
1. Click On the Admin Control Menu, go to the Control Panel tab, and click on Objects
2. Click the Actions button () for the desired Object you want to delete and select Delete.
3. In the dialog window, enter the name of the Object and click on delete Button.
9. Object APIs
- Object Headless APIs
- Once you have published an object, Liferay has automatically generated your object headless API for CRUD operation.
- Follow these steps for using object headless API
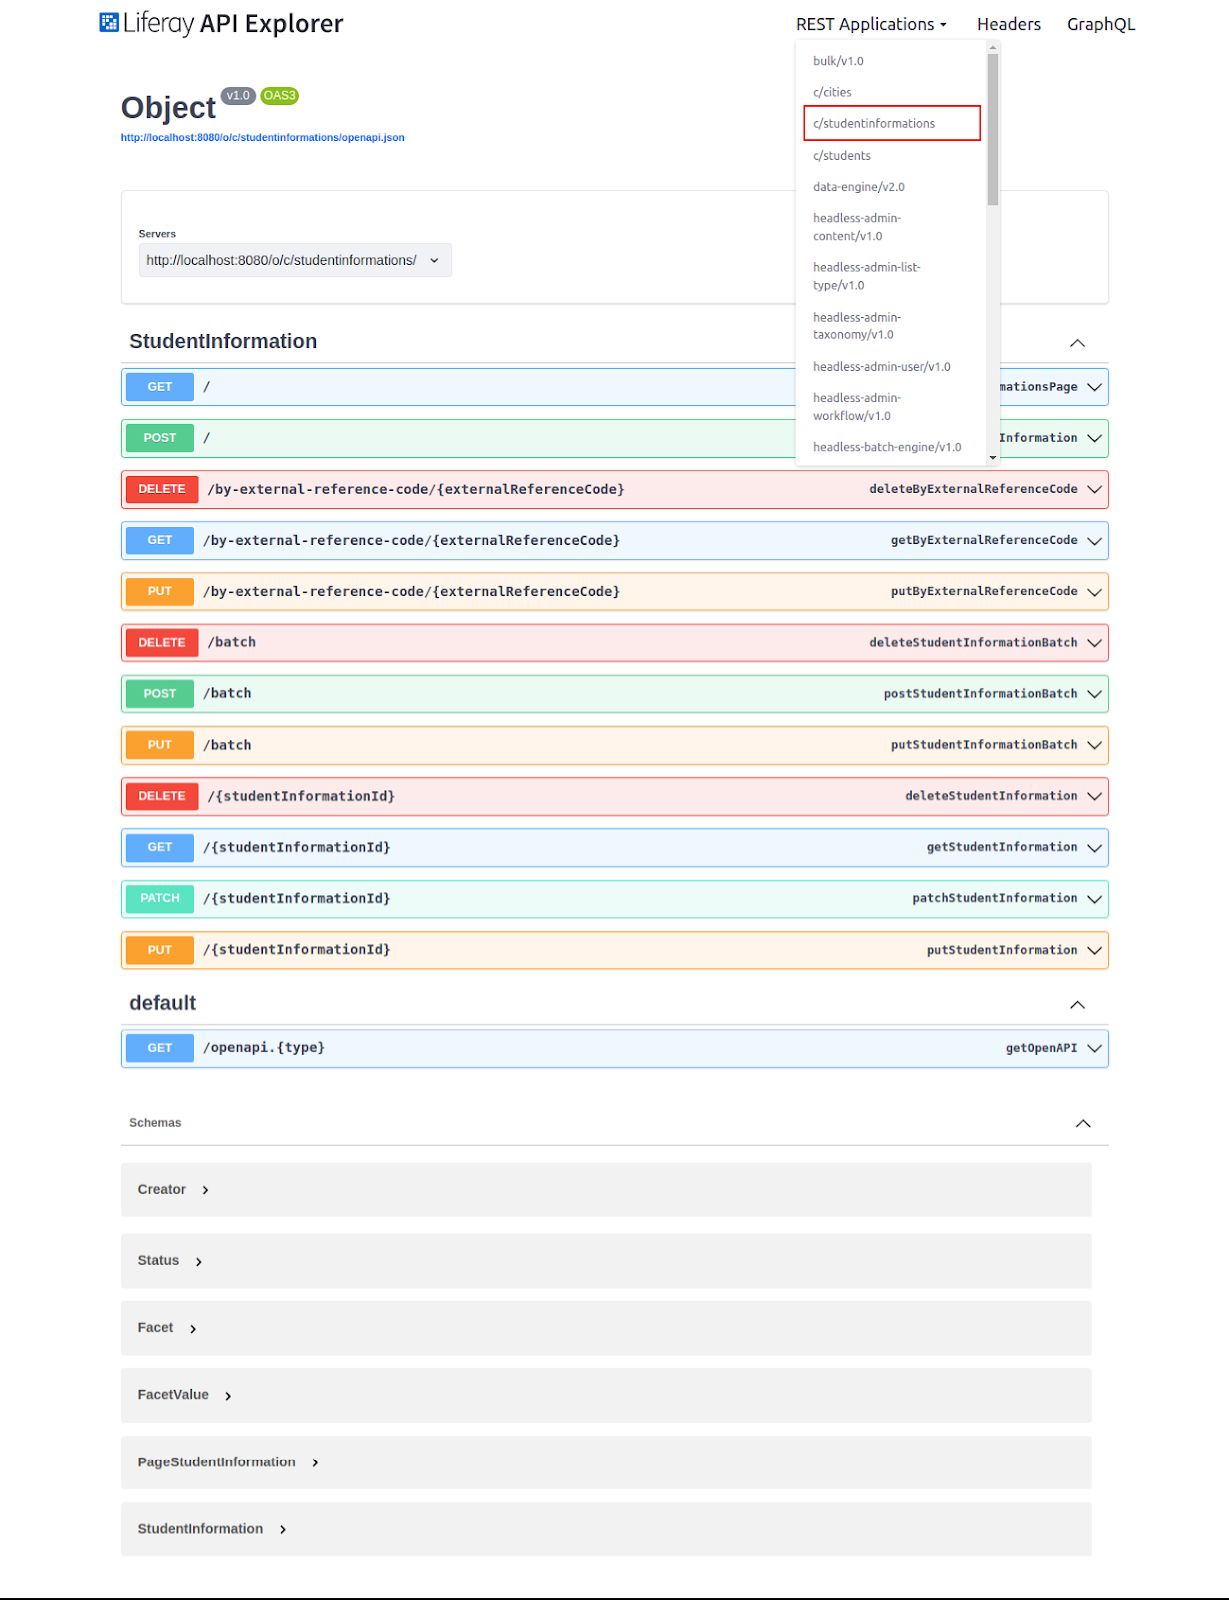
- Open Liferay Headless API, Hit this URL (“https://<liferay-host>:<port>/o/api”)
- Click on the REST Applications and find and select your object API.
- Inside this page, you can see your object APIs click and use it.
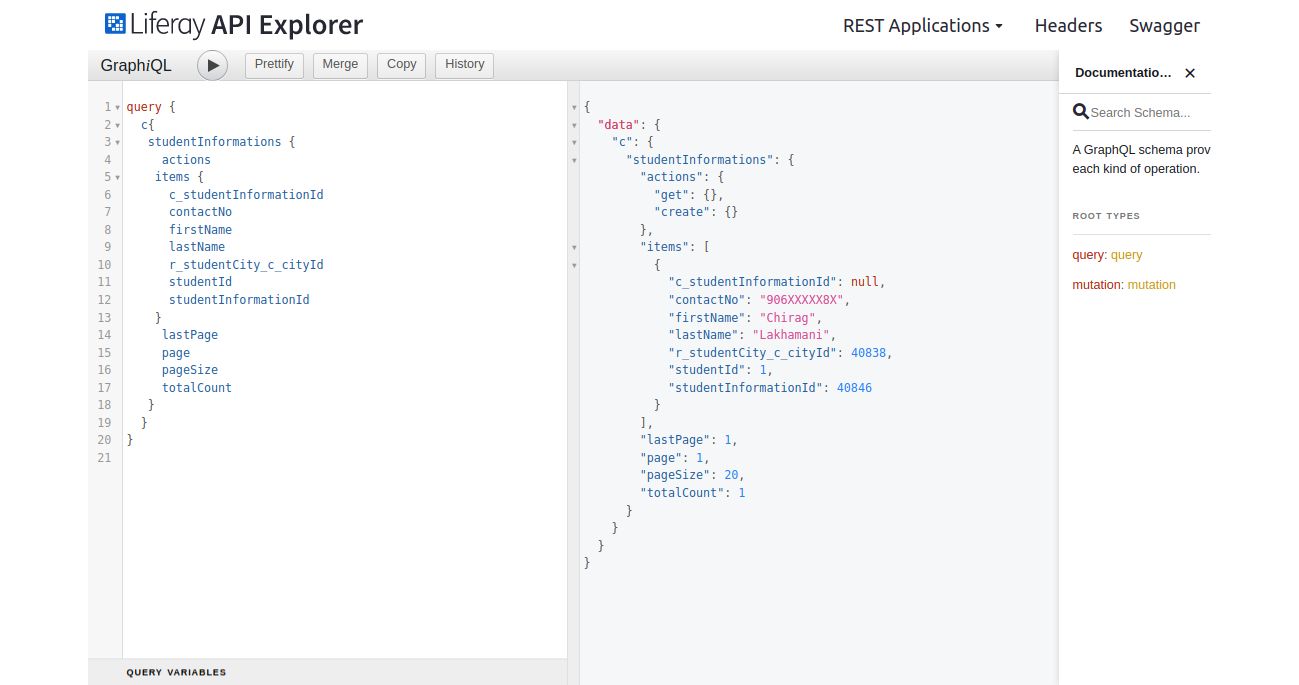
b. Object GraphQL APIs
- Once you have published an object, Liferay has automatically generated your object GraphQL API for CRUD operation. With the GraphQL APIs, you can both query and mutate Object data.
- Follow these steps for using object headless API
- Open Liferay Headless API, Hit this URL (“https://<liferay-host>:<port>/o/api”)
- Click on the GraphQL.
- Here you can perform your object work with GraphQL