Protecting Liferay Headless APIs Using OAuth2 and Role-Based Access

Introduction
Liferay’s Headless APIs are powerful tools that let you connect portals with external systems, mobile apps, or modern frontends like React and Angular. They allow finding it simple to fetch, update and manage data without having to be used to traditional Liferay UI.
However, the issue is that, when these APIs are not secured, everyone who knows the endpoint URL will be able to access the sensitive data or even to update the important data. This is a common mistake freshers and new developers make, they successfully expose data through APIs but forget to secure them properly.
That’s where OAuth2 and Role-Based Access Control come in. Together, they make a two-layer security layer :
- OAuth2 makes sure only authenticated applications or users can get access through tokens.
- Role-Based Access ensures that even if you have a valid token, you can only perform actions your role permits (for example, view-only vs. edit access).
In this guide, we will walk step by step through securing a Liferay custom object API. You will learn how to :
- Secure it using OAuth2.
- Use Postman to request tokens and API calls.
- Implement role-based permissions for access control.
So, let us go through a practical example. We are going to create custom object API in Liferay and through a step by step process, secure it using OAuth2 and role based access.
Step 1 : Create a Custom Object in Liferay
To demonstrate API security, we’ll begin by creating a custom object :
- Go to Control Panel → Objects and click Create Custom Object.
- Add required fields (e.g., Title, Description).
- Click Publish.
- Add sample entries to your custom object for testing.
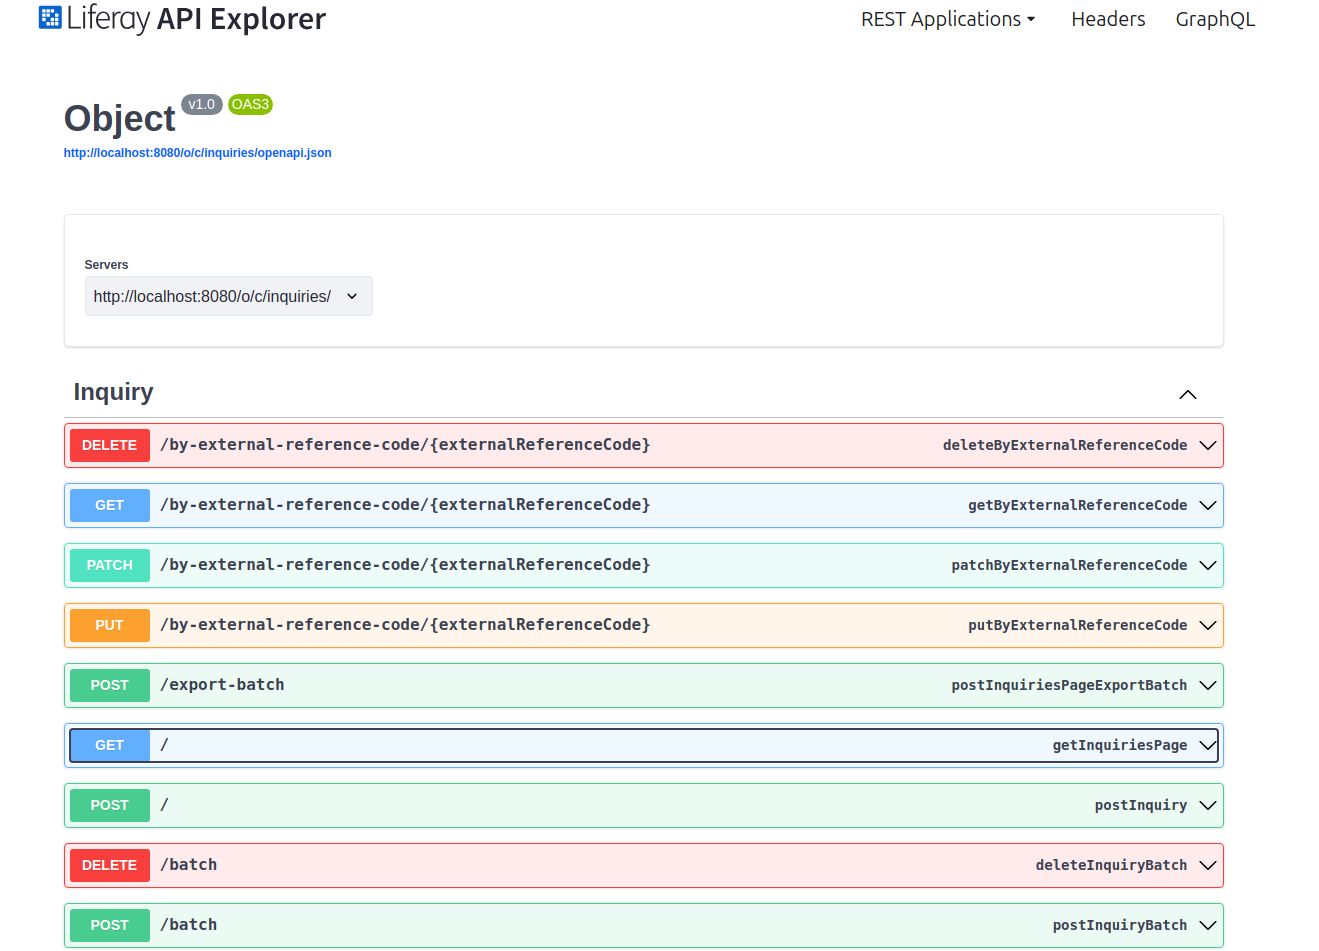
Test the API:
Visit [your-domain]/o/api and locate your object API. Try fetching data. it will return all entries.

Step 2: Secure the API Using OAuth2 Authentication
Now let’s add OAuth2-based security to the API.
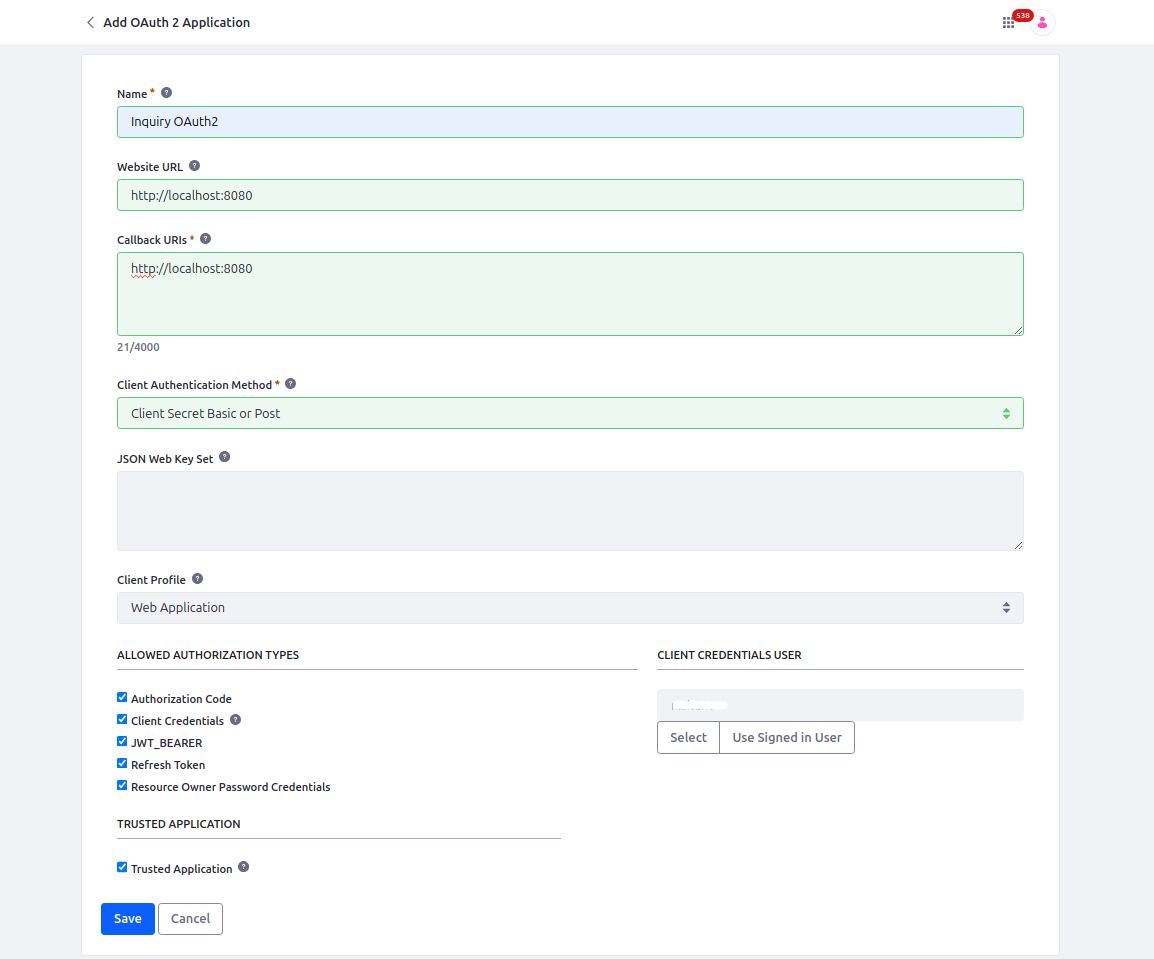
Create an OAuth2 Application
Navigate to: Control Panel → Security → OAuth2 Administration
Click Add OAuth2 Application, and enter following information:
Name:A unique name for your OAuth2 Application
Website URL: A valid URL for your app (can be a placeholder in dev)
Callback URIs: URI which the user is sent afterwards authentication
Client Authentication Method: Select between: None, Client Secret (Basic/Post), Client Secret JWT, or Private Key JWT
Allowed Authorization Types: Choose the flows your application supports (e.g., Client Credentials)
Client Credentials User:Required if using Client Credentials grant type
Once saved, you’ll see additional fields:
- Client ID – Auto-generated
- Client Secret – Click Edit to view or generate a new one (auto-generated by default).
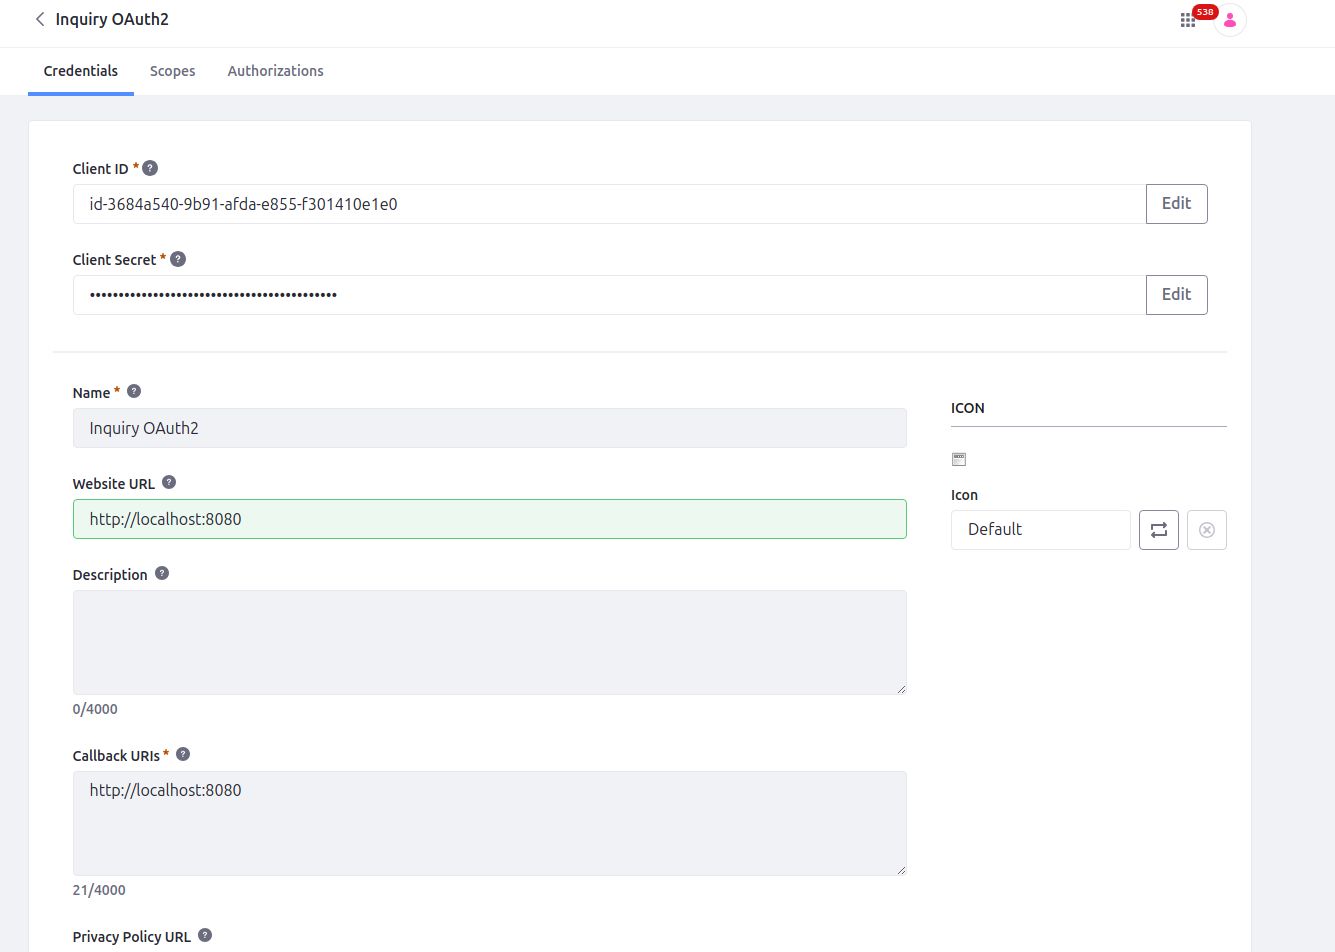
Keep both these values safe for future API calls.
Step 3: Define OAuth2 Scopes for the Custom Object
To control access at the object level:
- Go to the Scopes tab within your OAuth2 Application.
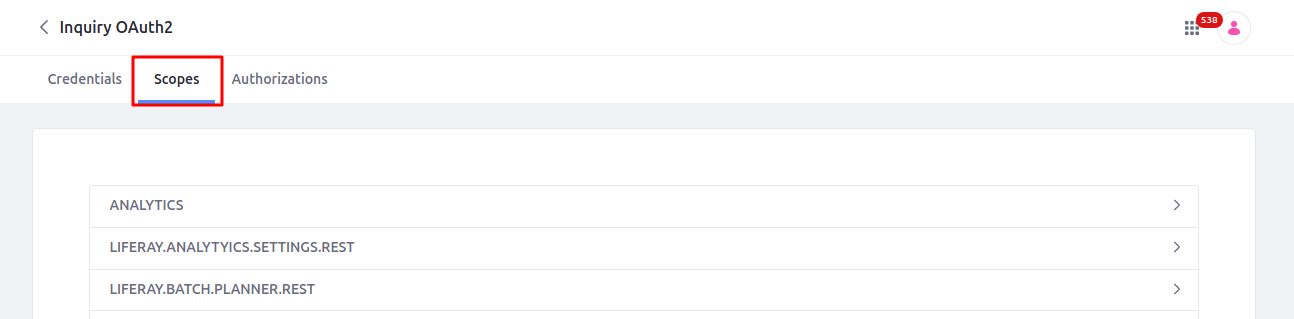
- Add a new scope for your custom object API (e.g., C_YourObjectName.everything).
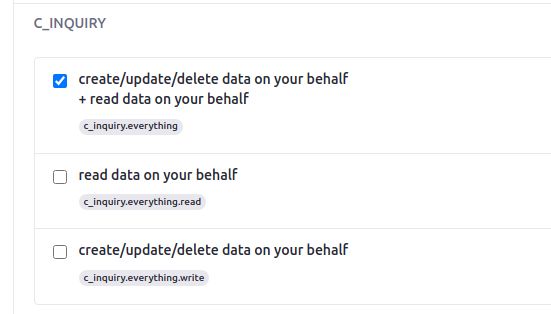
- Associate it with the appropriate resource action (GET, POST, etc.).
This determines the type of access that the OAuth2 application will have on the API access.
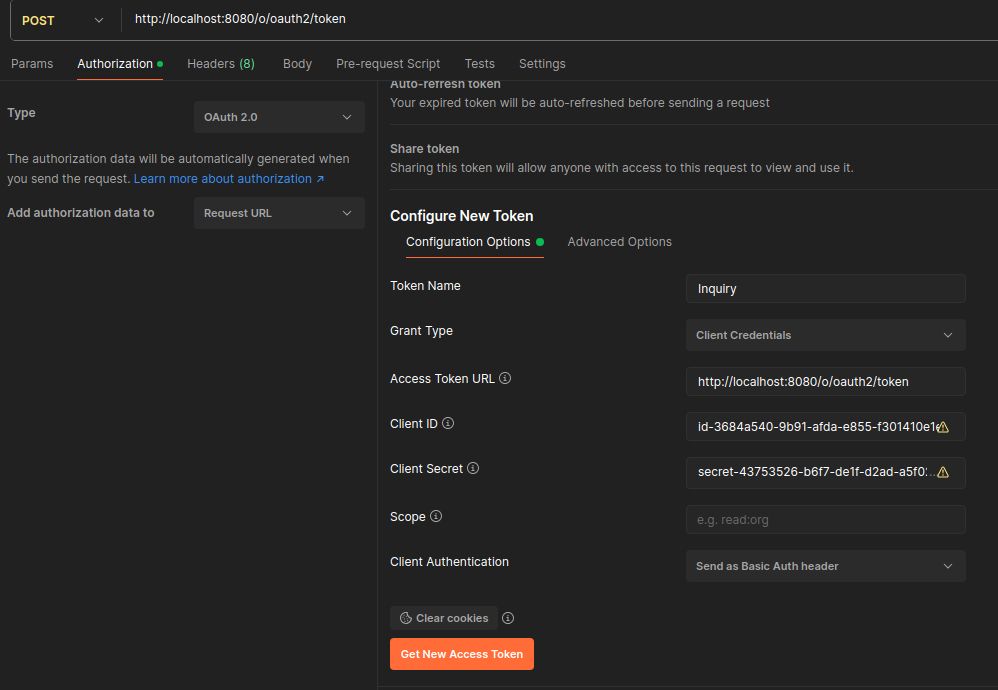
Step 4: Get an OAuth2 Access Token (Simplified with Postman)
You can use Postman’s OAuth2 flow:
- Open Postman → Create a new Request.
- Go to the Authorization tab → Select OAuth 2.0.
- Click Get New Access Token and fill in:
- Token Name: Inquiry (any label)
- Grant Type: Client Credentials
- Access Token URL: https://[your-domain]/o/oauth2/token
- Client ID: [your_client_id]
- Client Secret: [your_client_secret]
- Click Request Token.
- Postman will fetch the token from Liferay.
- You’ll see a token like eyJhbGciOi...
- Click Use Token → Now Postman automatically adds it to the Authorization: Bearer header for every API call in this request.
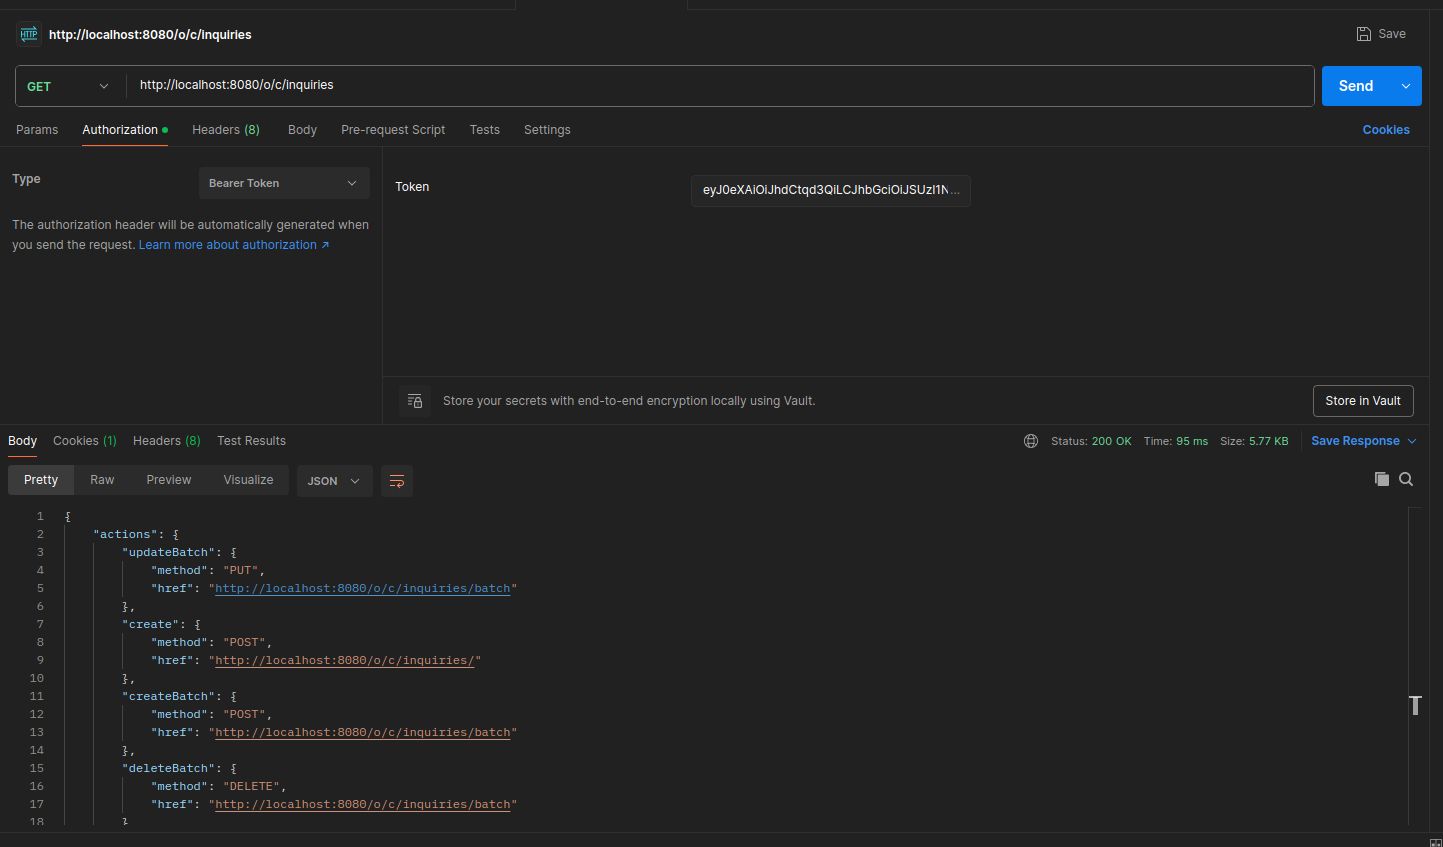
Step 5: Access Your Secured Headless API
Once the token is set in Postman:
- Create a new request:
- Method: GET
- https://[your-domain]/o/c/yourobjectname/
- Postman would automatically add Authorization: Bearer [access_token] header.
- Click Send → If configured properly, you’ll see your object entries.
Step 6: Implement Role-Based Access
Scopes control what the app can do. Roles control what the user can do.
- Go to Control Panel → Users & Organizations → Roles.
- Create a role (e.g., API Reader).
- Define Permissions → Objects → Your Object → Assign actions (e.g., View only).
- Assign this role to users/groups.
Now, even if a token is valid, users without the right role will be blocked.
Conclusion
By protecting your Liferay headless APIs with OAuth2 and role-based access, you make sure that only trusted apps will access it and only specially-privileged users can do specific actions. In this guide, we learned how to secure the API access with OAuth2 tokens and how to secure it with roles, using permissions. In this way, your integrations will be secure, more trustworthy and fit to serve the enterprise.