Create Localization Web Content Using Liferay's Headless API

Problem
Creating webcontent with the help of the rest api.
Solution
We can use the Liferay Rest API, which creates the web content programmatically.
Benefits
- Liferay provides the REST API for the creation of web content with localization.
- With this API, we are able to create our own custom implementation to create the web content as per our needs.
Prerequisites
- Java
- Liferay portal 7.2 +
- Basic knowledge of Liferay
Environment Requirements
- Liferay Portal
- Postman
Follow the following steps to post a webcontent on the Liferay Site.
- We have two ways to post a webcontent in liferay which are as follows.
a. From a postman.
b. From the Liferay Rest API editor
- From the postman:-
1. Add a new request and make the request type "post".
2. Enter the following URL in the “Enter Requested URL”.
1http://localhost:8080/o/headless-delivery/v1.0/sites/${siteId}/structured-contents- You have to enter the site Id in the url in which site you have to create the webcontent.
3. Now we have to assign the authorization.
I. Select the type as Basic Auth.
II. Enter the username and password of the admin user.
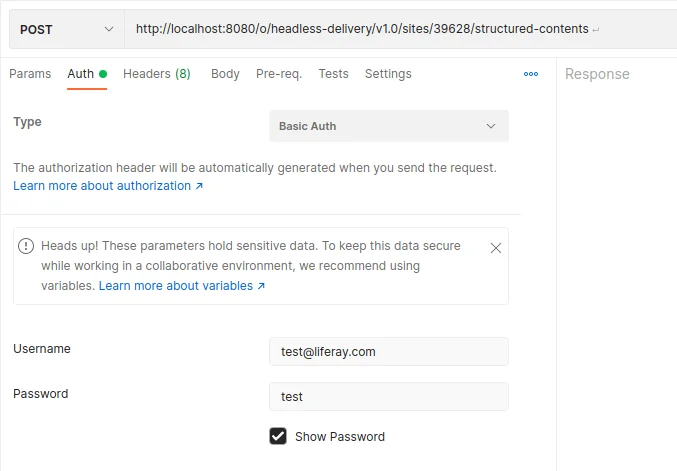
4. Select Body from the Navigation on the postman.
5. Select “raw” from the first drop down and select “JSON” from the second drop down menu.
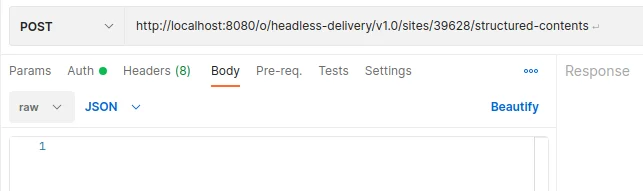
6. Enter the following Json Object.
1{
2 "actions": {
3 },
4 "availableLanguages": [
5   "en-US",
6   "ar-SA"
7 ],
8 "contentFields": [
9   {
10           "contentFieldValue": {
11               "document": {
12               "id": ${documentId}
13               }
14           },
15           "contentFieldValue_i18n": {
16               "ar-SA": {
17                   "document": {
18                       "id": ${documentId}
19                   }
20               },
21               "en-US": {
22                   "document": {
23                       "id": ${documentId}
24                   }
25               }
26           },
27           "dataType": "document",
28           "label": "File Upload",
29           "label_i18n": {
30               "en-US": "File Upload"
31           },
32           "name": "file_upload"
33       }
34 ],
35 "contentStructureId": ${StrucuteContentId},
36 "datePublished": "2021-08-30T02:14:00Z",
37 "siteId": ${siteId},
38 "title": "Webcontent created for the testing",
39 "title_i18n": {
40   "ar-SA": "تم إنشاء نص ملف جديد آخر",
41   "en-US": "Webcontent created for the testing"
42 }
43}
44- Brief description of the JSON keys are following.
1. availableLanguages: -
- Enter the languages that the web contents will support the localization.
2. ContentFields :-
- Content Fields will be responsible for giving the data to the structured input that we have used for web content creation.
- In our case, we have a repeatable field in the structure of Web content
3. ContentFieldValue : -
- Content Field Value will fill in the data in the structure of Web content.
- In our case, we have the repeatable file upload field. That's why we are providing the document details under the content field value.
- In the “contentFieldValue” key only, it will contain the data of the default-language set on the liferay.
- If we want to localize it. This means if we want to add a document to the language ID, Then we have to use “contentFieldValue_i18n”.
4. contentFieldValue_i18n : -
- This Content Field Value will be responsible for the localization of the Webcontent.
- Webcontent Data Will Be Different According to Their Locale (Example :- “en-Us” and “ar-SA”).
- As per the localization, we have to provide the document ID for the different language support.
1. ar-SA :-
- We have to localize the document details under this language to attach the document to the Arabic version of web content.
2. en-US :-
- We have to provide the document details in this language to attach the document to the English version of the web content.
5. document : -
- Document will be responsible for attaching the document file to the webcontent.
6. Id : -
- In this ID key, we have to provide the document ID of the document that we have to attach.
7. dataType : -
- This will be the data type of the structured content field.
8. label : -
- Enter the languages that the web contents will support the localization.
9. label_i18n : -
- label_i18n will be responsible for the localization as per the “contentFieldValue_i18n”.
10. name : -
- Enter the languages that the web contents will support the localization.
11. contentStructureId :-
- This will be the structure ID of the web content that will be created.
12. datePublished :-
- This will set the “Display Date” over the Web content fields.
13. siteId :-
- Site ID: Which site do we have to create the Webcontent.
14. title :-
- Title of the Webcontent We have to enter the title of the default language IDtitles of the Liferay .
15. title_i18n :-
- This title_i18n will be responsible for the localization.
- We have to enter the titles of different languages that we have allowed in the “availableLanguages”.
- Like the following.
1. ar-SA :-
- We want titles in Arabic, so we will put the Arabic conversion or the Arabic version title of webcontent.
7. After adding the json object to the post Body.
8. Post the request and if you get 200 response codes, then webcontent has been added to the Liferay site.
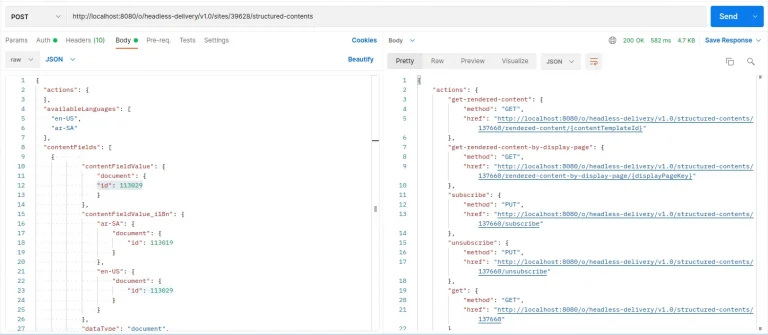
9. Make sure you get the success code 200 and you will get the response.
10. If you get a success code 200, but if you do not get the response, then there is some issue with the authentication.
Note:- Make sure you enter the URL and do not have a blank space after the URL completion.
2. From the Liferay Rest API Editor :-
1. Login as an admin on the Liferay Portal.
2. Access the following URL to access the Liferay Swagger editor.
1http://localhost:8080/o/api3. Access the accordion called “StructuredContent”.

4. Enter the site ID that you want to create the webcontent.
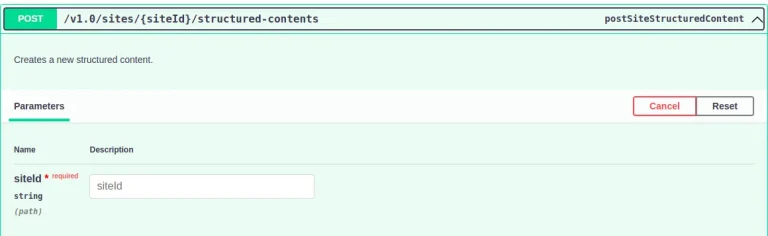
5. Enter the JSON object in the request body.
1{
2 "actions": {
3 },
4 "availableLanguages": [
5   "en-US",
6   "ar-SA"
7 ],
8 "contentFields": [
9   {
10           "contentFieldValue": {
11               "document": {
12               "id": 113029
13               }
14           },
15           "contentFieldValue_i18n": {
16               "ar-SA": {
17                   "document": {
18                       "id": 113019
19                   }
20               },
21               "en-US": {
22                   "document": {
23                       "id": 113029
24                   }
25               }
26           },
27           "dataType": "document",
28           "label": "File Upload",
29           "label_i18n": {
30               "en-US": "File Upload"
31           },
32           "name": "file_upload"
33       }
34 ],
35 "contentStructureId": 50803,
36 "datePublished": "2021-08-30T02:14:00Z",
37 "siteId": 39628,
38 "title": "Webcontent created for the testing",
39 "title_i18n": {
40   "ar-SA": "تم إنشاء نص ملف جديد آخر",
41   "en-US": "Webcontent created for the testing"
42 }
43}
44
6. The postman method is used to explain JSON objects with their keys. Please go through with that.
7. Execute the Rest API.
8. Make sure you get the success code 200 and you will get the response.
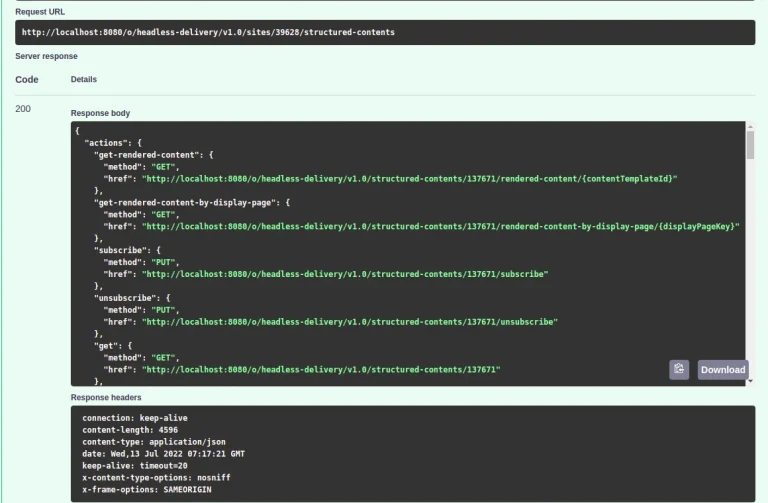
9. Your web content has been created successfully.


