Polling vs WebSockets in React

Introduction
Building real-time applications is one of the most interesting but intimidating parts of modern web development.Whether it is a chat application, a dashboard for showing live stock updates, online gaming, or as basic as a real-time notification system.Users want data to change in real-time without page reloading. Two of the most distinguishing methods in React for meeting such real-time requirements take the center stage: Polling and WebSockets.
On a high level, both methods achieve the same thing synchronizing the client interface with the server. However, they achieve it, and the compromises they entail, are quite distinct.Polling is the traditional method, where the client repeatedly “asks” the server if there’s new data, usually at fixed intervals. WebSockets, on the other hand, offer a more modern and efficient solution by maintaining a persistent connection between client and server, enabling instant bi-directional communication.
So, when would you want to use each in your React app? It depends on whether real-time is absolutely indispensable, how complex your backend is going to be, and the greatest number of users that your app needs to handle at a time. Let's dissect both strategies in the current blog, implement them step-by-step in React, and then compare.
What is Polling?
Polling is a technique where your app repeatedly asks the server for new information at fixed time intervals (like every 5 seconds). If there’s new data, the server sends it back; if not, the server still responds saying there’s nothing new.
It is simple to use and backend-agnostic, but it is not very efficient since a majority of the requests do not include new information.You'll also find that your server is being bombarded with repeated requests, even when no alteration whatsoever is detected. That is among the significant negatives of polling.
Backend Setup (Polling with JSON Server)
We need to set up a backend that can provide data. We'll use json-server. It provide a mock REST API that behaves like a real server.
First of all install json-server on your system:
1npm install -g json-server- Creating a Mock Database
Create a db.json file in the root directory of your project. It will act as our database. This file will act as our database. Add the following content:
1{
2  “messages”: [
3    { “id”: 1 , “text”: “Hello from server” },
4    { “id”: 2 , “text”: “New update available” },
5    { “id”: 3 , “text”: “Polling work fine” }
6  ]
7}
8- Running the Mock Server
Now,use below command to start your mock API server:
1json-server --watch db.json --port 4000This command tell json-server to “watch” the db.json file. It serve content as REST API on port 4000. Once server is started,you can visit this endpoint in your browser:
http://localhost:4000/messages
Sample response:
1[
2   { “id”: 1 , “text”:“Hello from server”},
3   { “id”: 2 , “text”:“New update available”},
4   { “id”: 3 , “text”:“Polling work fine”}
5]
6
Now that our backends are ready, let’s build the React components.
Implementing Polling in React
Create a new file called PollingExample.tsx inside your src folder and put the below code into that file. After putting the code you can import <PollingExample /> into your main App.tsx to test how polling fetches data at regular intervals.
1import React, { useState, useEffect } from “react”;
2function PollingExample() {
3  const [data, setData] = useState([]);
4  const [loading, setLoading] = useState(true);
5
6  // Function to fetch data from server
7  const fetchData = async () => {
8    try {
9      const response = await fetch(“http://localhost:4000/messages”);
10      const result = await response.json();
11      setData(result);
12      setLoading(false);
13    } catch (error) {
14      console.error(“Error while polling:” , error);
15    }
16  };
17
18  useEffect(() => {
19      fetchData();
20      const interval = setInterval(fetchData, 5000);
21      return () => clearInterval(interval);
22  }, []);
23
24  return (
25    <div className=”p-4”>
26      <h2 className=”text-xl font-bold mb-2”>Polling Example Output</h2>
27      {loading ? (
28        <p>Loading...</p>
29      ) : (
30        <ul className=”list-disc pl-6”>
31          {data.map((item, index) => (
32            <li key={index}>{item.text}</li>
33          ))}
34        </ul>
35      )}
36    </div>
37  );
38}
39export default PollingExample;
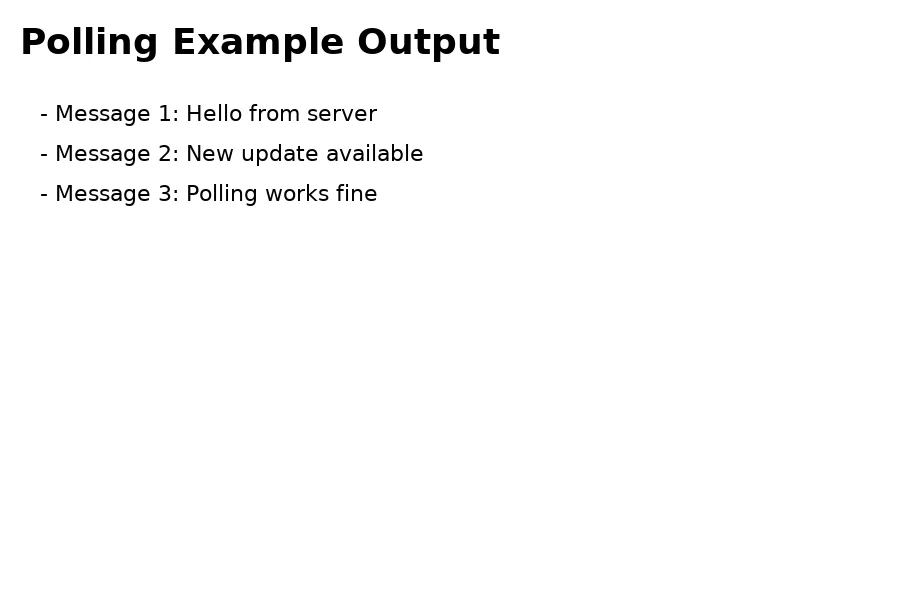
After writing the above code, you see the output below on your screen.
What are WebSockets?
WebSockets is a communication protocol that provides continuous and bidirectional connection between the server and the client ( React app). Once connection is established , the server and the client are able to pass messages whenever they want without reconnecting. That is why the connection is suitable for real-time communication like chat, streaming dashboards, game playing, or live notification.
You can include the browser's very own WebSocket API or Socket.IO for streamlined implementation and additional features with React. In prod deployments, you will need to utilize the secure version of the connection over the WebSocket, wss:// instead of ws:// so all the communications are encrypted and secured on the way.
Backend Setup (WebSockets with ws)
For our WebSocket example, we’ll create a lightweight backend using the ws library in Node.js. Unlike polling, WebSockets allow the server to push updates to the client in real time.
Start by installing the ws package, which provides WebSocket support for Node.js:
1npm install wsCreating the WebSocket Server
Now, create a new file named server.js in your project root and add the following code:
1const WebSocket = require(“ws”);
2
3// Create a new WebSocket server on port 4000
4const wss = new WebSocket.Server({ port: 4000 });
5
6wss.on(“connection” , (ws) => {
7  console.log(“Client connected”);
8
9  // Send an initial real-time message
10  ws.send(JSON.stringify({ message: “this is real time”}));
11
12  // After a short delay, send another update
13  setTimeout(() => {
14    ws.send(JSON.stringify({ message: “another instance updated”}));
15  }, 3000);
16
17  // Handle messages coming from the client
18  ws.on(“message”, (msg) => {
19    console.log(“Received from client:” , msg);
20    ws.send(JSON.stringify({ message: `Echo: ${msg}`}));
21  });
22
23  // Handle client disconnect
24  ws.on(“close”, () => {
25    console.log(“Client disconnected”);
26  });
27});
28
29console.log(“WebSocket server is running on ws://localhost:4000”);
30
31
Start the WebSocket server by running below command:
1node server.jsYour WebSocket server is now running on:
ws://localhost:4000
Now that our backends are ready, let’s build the React components.
Implementing WebSockets in React
Create a new file named WebSocketExample.tsx inside your src folder (e.g., src/WebSocketExample.jsx). Add the following code inside it. Then, you can import and use <WebSocketExample /> in your main App.tsx file to see it in action.
1import React, { useState, useEffect } from “react”;
2
3const WebSocketExample = () => {
4  const [messages, setMessages] = useState([ ]);
5
6  useEffect(() => {
7    const socket = new WebSocket(“ws://localhost:4000”);
8
9    socket.onopen = () => {
10      console.log(“Connected to WebSocket server”);
11    };
12
13    socket.onmessage = (event) => {
14      const data = JSON.parse(event.data);
15      setMessages((prev) => [...prev, data.message]);
16    };
17
18    socket.onerror = (error) => {
19      console.error(“WebSocket error:” , error);
20    };
21
22    socket.onclose = () => {
23      console.log(“WebSocket connection closed”);
24    };
25
26    return () => socket.close();
27  }, []);
28
29  return (
30    <div className=”p-4”>
31      <h2 className=”text-xl font-bold”>WebSocket Example Output</h2>
32      <ul>
33        {messages.map((msg, i) => (
34          <li key={i}>{msg}</li>
35        ))}
36      </ul>
37    </div>
38  );
39};
40
41export default WebSocketExample;
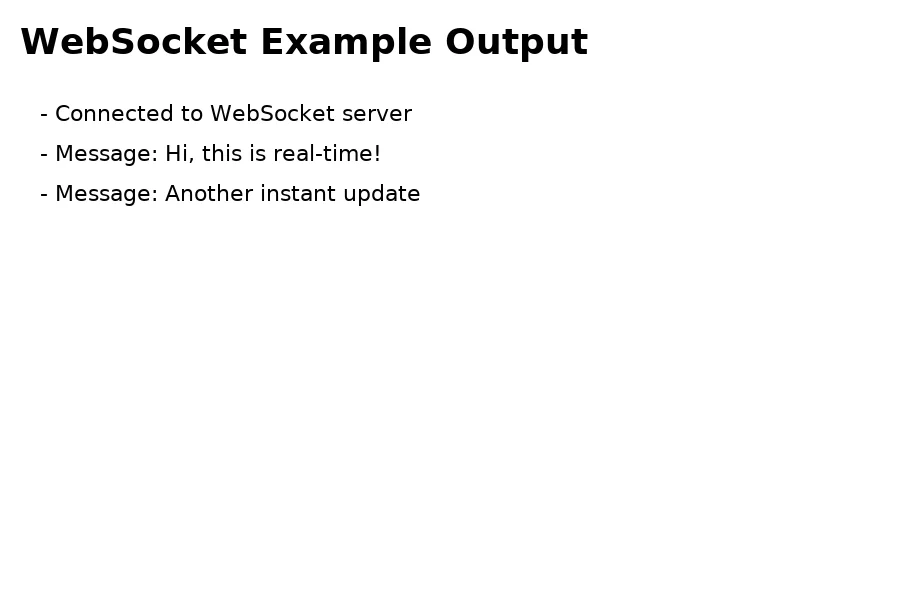
After writing the above code, you see the output below on your screen.
Polling vs WebSockets
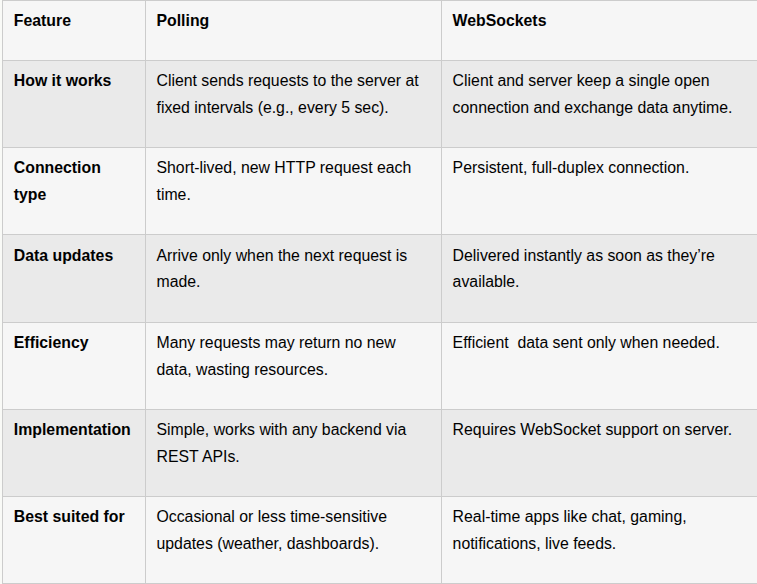
Polling and WebSockets are two different ways to keep your React app updated with new data. Let’s see the key differences between Polling and WebSockets.
Conclusion
Both Polling and WebSockets are powerful ways of keeping your React applications up to date with new information, but they serve different needs. Polling is the old school and most basic solution, reliant on regular HTTP requests with fixed time gaps. It is simple to implement, requires no special server configuration, and is dependable for cases where updates happen not often or are time-insensitive. It is, though, inefficient as the majority of the calls come back with no new data.
WebSockets, in contrast, bring real-time to your app for real. Since they maintain a persistent, two-way connection open between client and server, data is pushed directly as it happens. That's why they're the default choice for chat apps, online multiplayer games, financial dashboards, or anywhere time and efficiency count most.
When you’ve got to pick between the two, ask your use case. If your application is updating intermittently and you care more about simplicity than you care about real-time responsiveness, then polling is typically “good enough”. If you care more about real-time responsiveness, then WebSockets will produce a much better user experience.


