Setting up B2B Account Hierarchy in Liferay Commerce

Introduction
If you have been working with Liferay DXP, you already know how Sites, Users, and Roles work. Liferay Commerce builds on top of that and adds features specifically designed for B2B commerce scenarios. Things like company accounts, pricing per organization, and order management for businesses.
One of the first things you will need in a real B2B setup is a way to organize your customers the way they actually exist, a parent company with multiple divisions or regional offices, each with their own users and purchasing behavior. This is what account hierarchy helps with.
In this blog, we will walk through two ways to set up a B2B account hierarchy in Liferay 7.4, using Organizations and using Account Groups. This blog will explain what each approach does, when to use which, and show you the exact steps for both.
What is a B2B Account in Liferay Commerce?
In a B2B setup, your customers are not individual people, they are companies. A company has multiple employees who place orders on its behalf. Liferay handles this through Accounts.
An Account represents a company or customer. There are three account types in Liferay 7.4 :
- Business Account - For companies. Supports multiple users. Use this for B2B.
- Personal Account - For individual customers. Used in B2C.
- Guest Account - For unregistered users checking out as guests.
Important: For B2B, always select Business as the account type. You cannot change it after the account is created.
Two Ways to Build Account Hierarchy
Unlike some platforms, Liferay 7.4 accounts do not have a 'Parent Account' field when you create them. Instead, hierarchy is handled through two different mechanisms :
Approach 1 - Organizations
Organizations are Liferay's way to create hierarchical structures. You create a parent organization, add child organizations under it, and then link these organizations to your Commerce accounts. This gives you a real structural hierarchy that reflects how a company is organized in real life.
Approach 2 - Account Groups
Account Groups let you group several accounts together based on shared criteria, like geography or customer tier. There is not parent-child relationship, it is a flat grouping. Once accounts are, in the group you can target them all with the same price list, promotion, or discount.
Prerequisites
- Liferay DXP 7.4 installed and running
- Administrator access to the Control Panel
What We Are Building
We will use a company called TechCorp Inc as our example. The structure we want to represent is :
TechCorp Inc (root company)
├── TechCorp - North Division
└── TechCorp - South Division
In Approach 1, we build this using Organizations linked to accounts. In Approach 2, we create accounts and group them under a shared Account Group.
Approach 1 : Using Organizations (True Parent-Child Hierarchy)
Overview
Here is what we will do in this approach :
- Create a parent organization: TechCorp Inc
- Create two child organizations under it : North Division and South Division
- Create three Business accounts (one per level)
- Link each organization to its matching account
- Add users to the accounts
Step 1 : Create the Parent Organization
First we need to make the organization for the parent company.
- To do this navigate to Global Menu → Control Panel → Users → Users and Organizations. Open the Organizations tab. Click the Add button to make a new organization, for the parent company.
- Enter “TechCorp Inc” in the Name field, leave the Parent Organization field empty since this will serve as the top-level organization, and then click Save to create the organization successfully.

Step 2 : Create Child Organizations
Now add the two divisions as child organizations under TechCorp Inc.
- North Division
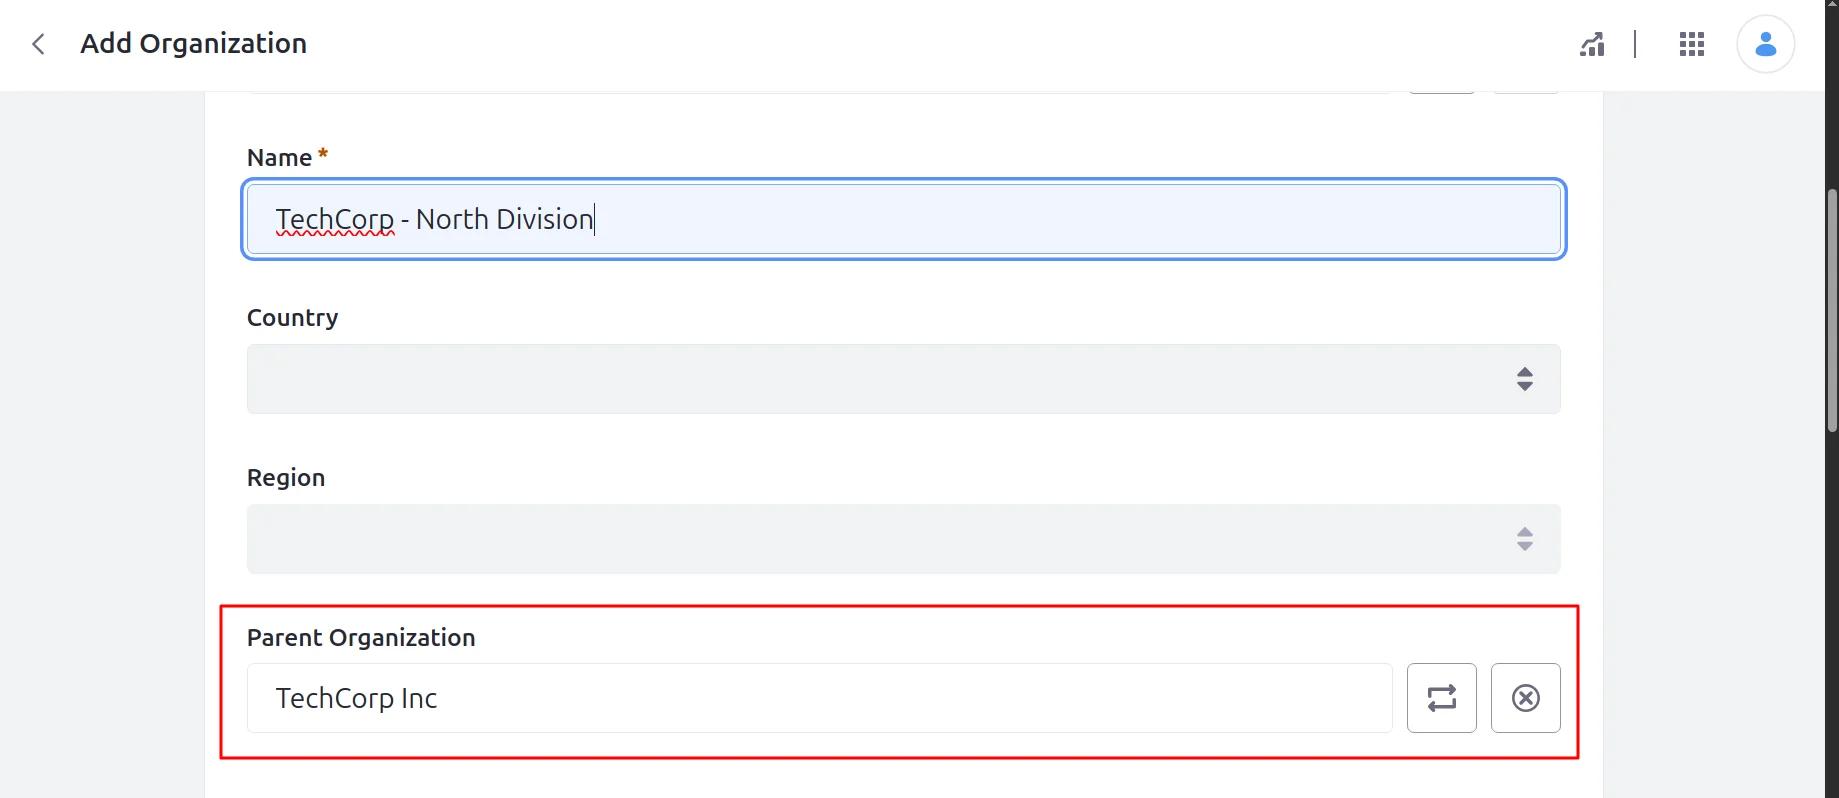
- Click Add (+) in the Organizations tab. Enter “TechCorp - North Division” in the Name field to define the new division.
- Click the Parent Organization Select button, Search for TechCorp Inc and select it.
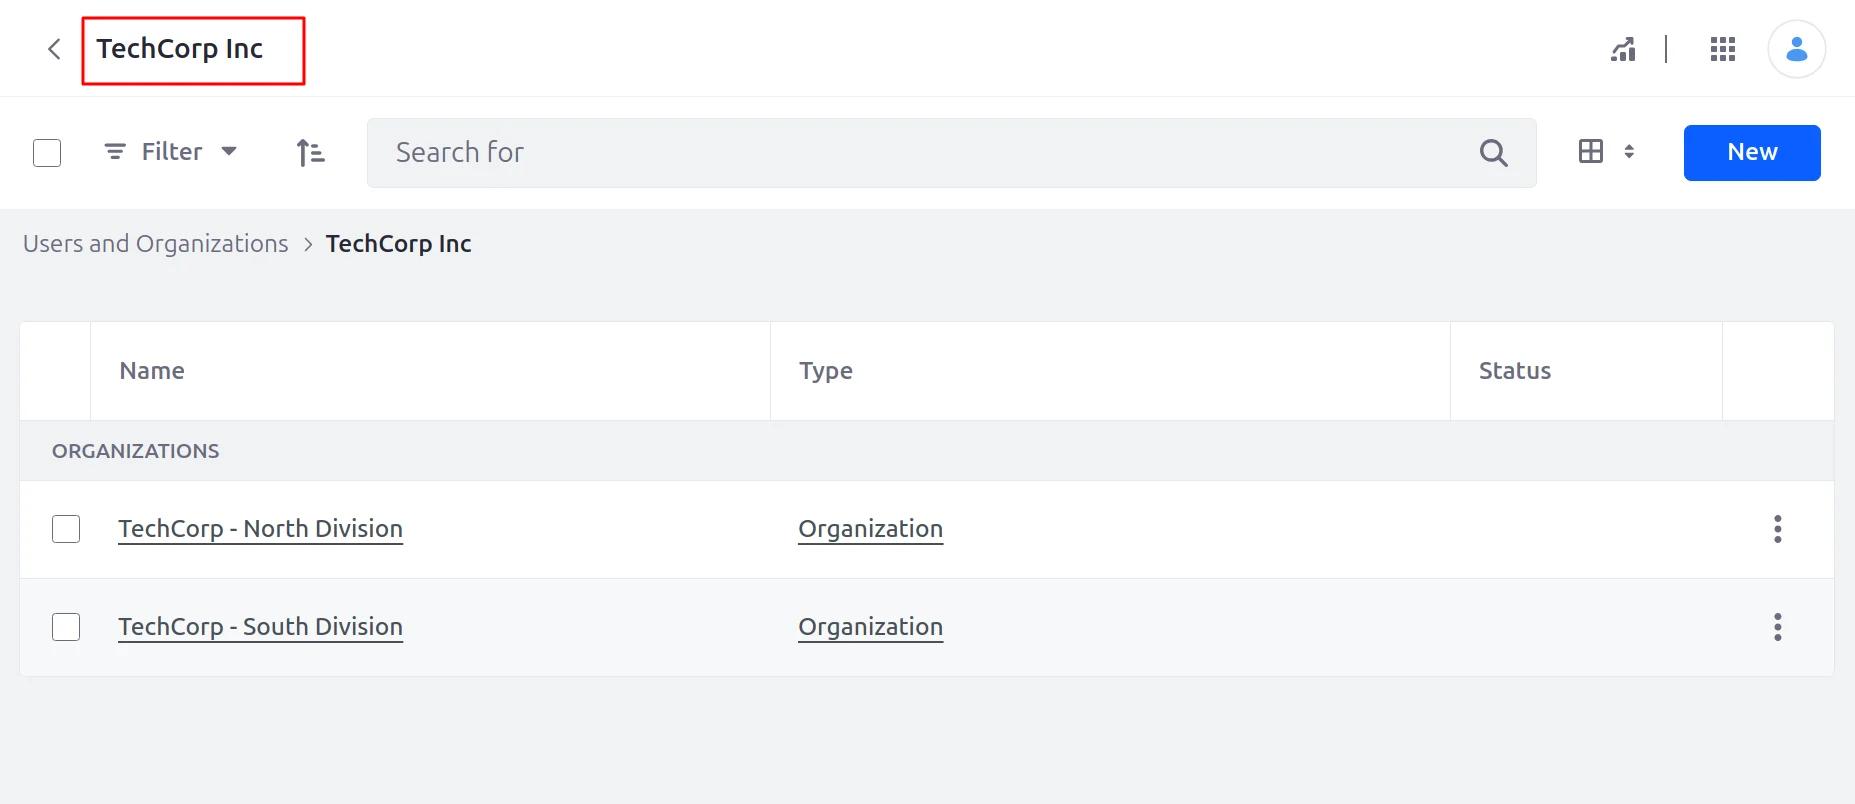
- After verifying all details, click Save to successfully create the “TechCorp - North Division” organization beneath “TechCorp Inc.”
- South Division
- Click Add (+) again
- In the Name field, enter “TechCorp - South Division” as the name of the new division. For the Parent Organization, select “TechCorp Inc” so that this division is also grouped under the same top-level parent organization as the North Division.
- Click Save to successfully create the “TechCorp - South Division” organization under “TechCorp Inc.”
Step 3 : Create Business Accounts
Organizations and Accounts are separate in Liferay — we need to create accounts and then link the organizations to them.
- Go to Global Menu → Control Panel → Accounts
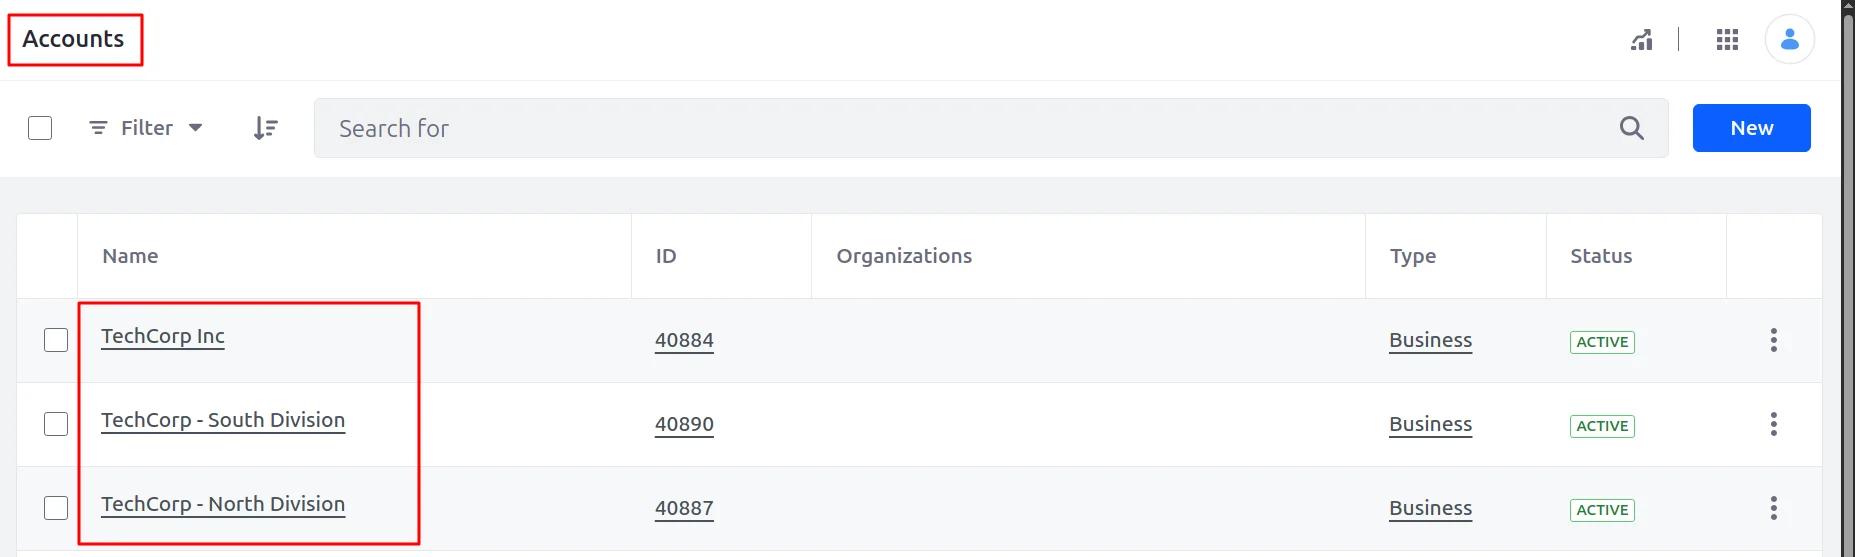
- Click New → Name : TechCorp Inc → Type: Business → Save
- Click New → Name : TechCorp - North Division → Type: Business → Save
- Click New → Name : TechCorp - South Division → Type: Business → Save
Step 4 : Link Organizations to Accounts
This is the important step. We connect each account to its matching organization so Liferay understands the structural relationship.
- Link the parent
- Open the “TechCorp Inc” account by clicking its name, navigate to the Organizations tab at the top of the page, and click the Add (+) button.
- Search for TechCorp Inc organization and select it.
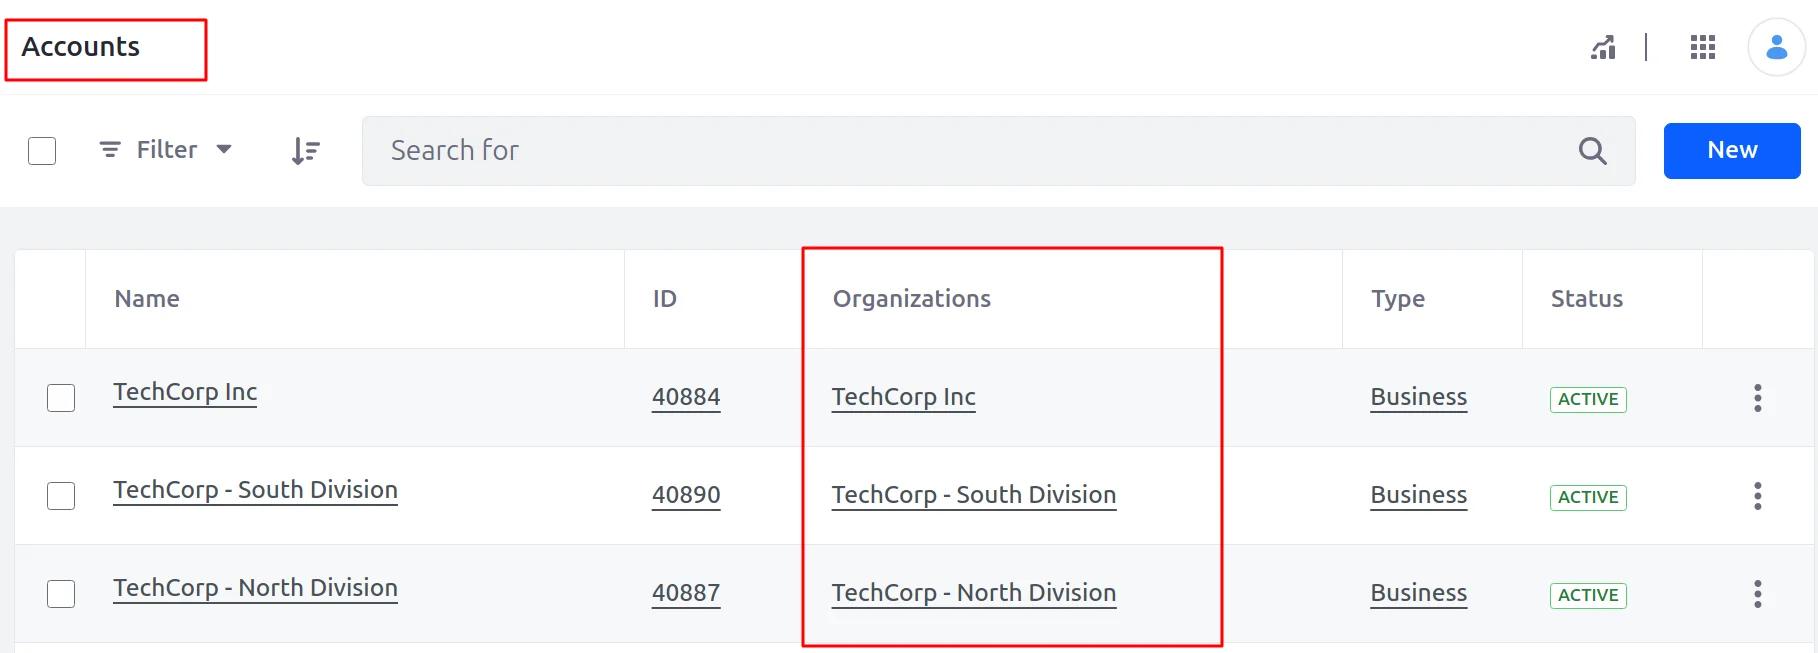
- After the correct organization has been chosen, click Assign to successfully associate the organization with the account.
- Link the divisions
- Open TechCorp - North Division account → Organizations tab → Add → select TechCorp - North Division org → Assign
- Open TechCorp - South Division account → Organizations tab → Add → select TechCorp - South Division org → Assign
Step 5 : Add Users to Accounts
- Open the “TechCorp - North Division” account and navigate to the Users tab, then click New → Assign Users to add a user to the account.
- Select a test user and click Choose. You can assign a role: Account Administrator (to manage the account) or Buyer (to place orders). Click Save to complete the assignment.
- Repeat the same for TechCorp - South Division with a different user.
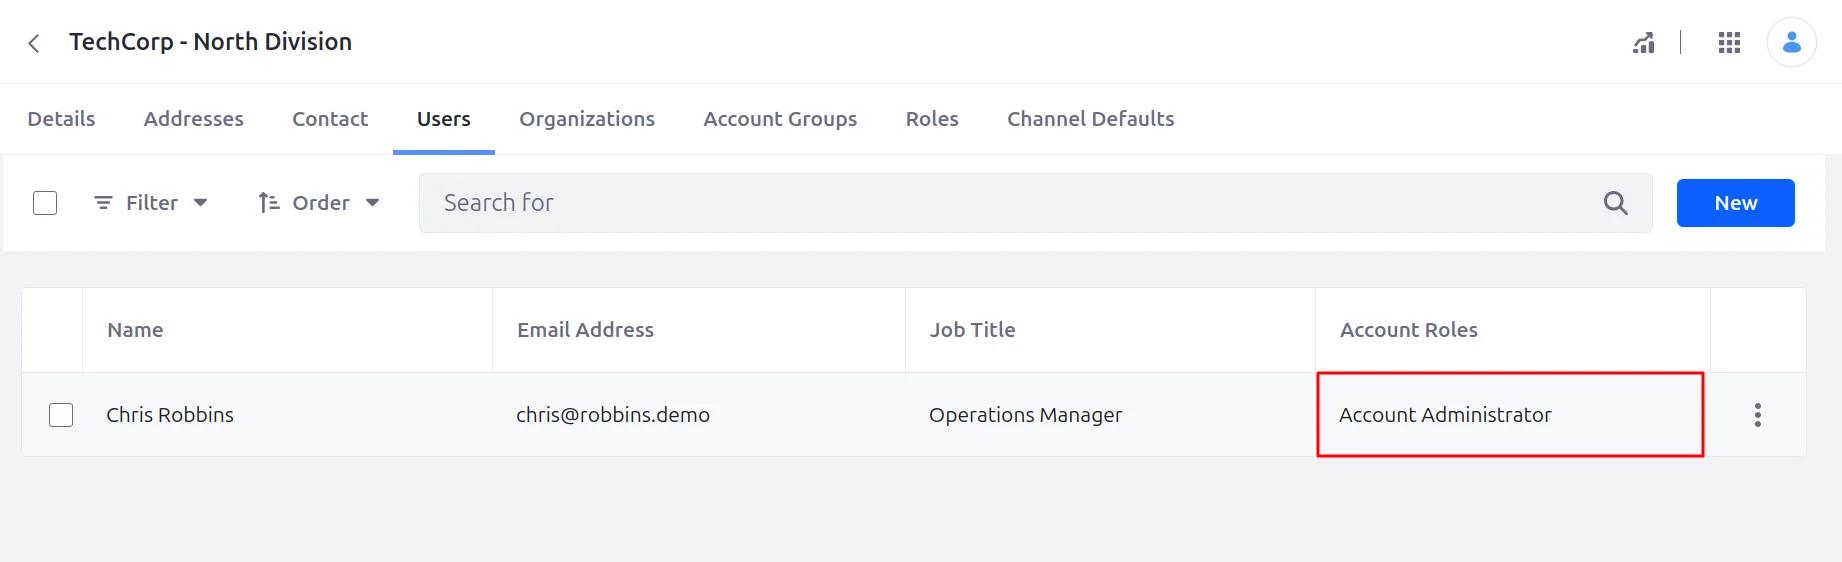
Account Roles: Account Administrator can manage users and account settings. Account Member is auto-assigned to all users. Buyer can browse the catalog and place orders.
What you have built in Approach 1
A real organizational hierarchy: TechCorp Inc as the parent, with North and South Division as children. Each account is linked to its organization. Users in child organizations belong to that division and interact only with their linked account.
Approach 2: Using Account Groups (Flat Grouping)
Overview
In this approach we skip Organizations entirely. Instead we :
- Create three Business accounts (one per company entity)
- Create an Account Group called TechCorp Group
- Add all three accounts into that group
There is no parent-child relationship here. But the group lets you apply one price list or promotion to all accounts at once.
Step 1 : Create Business Accounts
If you already did Approach 1, you have these. If you are starting fresh :
- Go to Global Menu → Control Panel → Accounts
- Click New → Name : TechCorp Inc → Type: Business → Save
- Click New → Name : TechCorp - North Division → Type: Business → Save
- Click New → Name : TechCorp - South Division → Type: Business → Save
Step 2 : Create an Account Group
- Navigate to Global Menu → Control Panel → Account Groups, click the Add (+) button to create a new account group
- Enter “TechCorp Group” in the Name field and “All TechCorp divisions” in the optional Description field, then click Save to complete the setup.
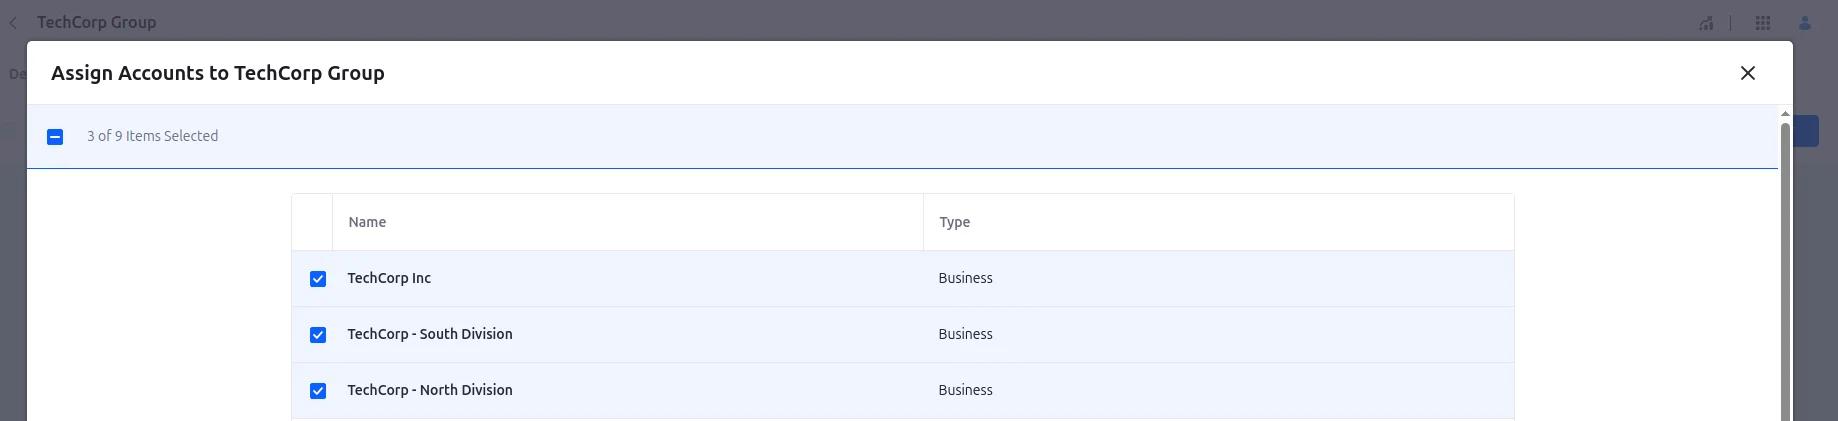
Step 3 : Add Accounts to the Group
Once you’ve saved the group, you’ll see an Accounts tab appear at the top.
- Navigate to the Accounts tab and click the Add (+) icon to begin assigning accounts to the group.
- Check the boxes next to TechCorp Inc, TechCorp - North Division, and TechCorp - South Division, click Assign to successfully associate them with the account group.
Step 4 : Add Users to Each Account
Same as Approach 1 - add users directly inside each account via the Users tab.
- Open each account → Users tab → New → Assign Users → select user → Save
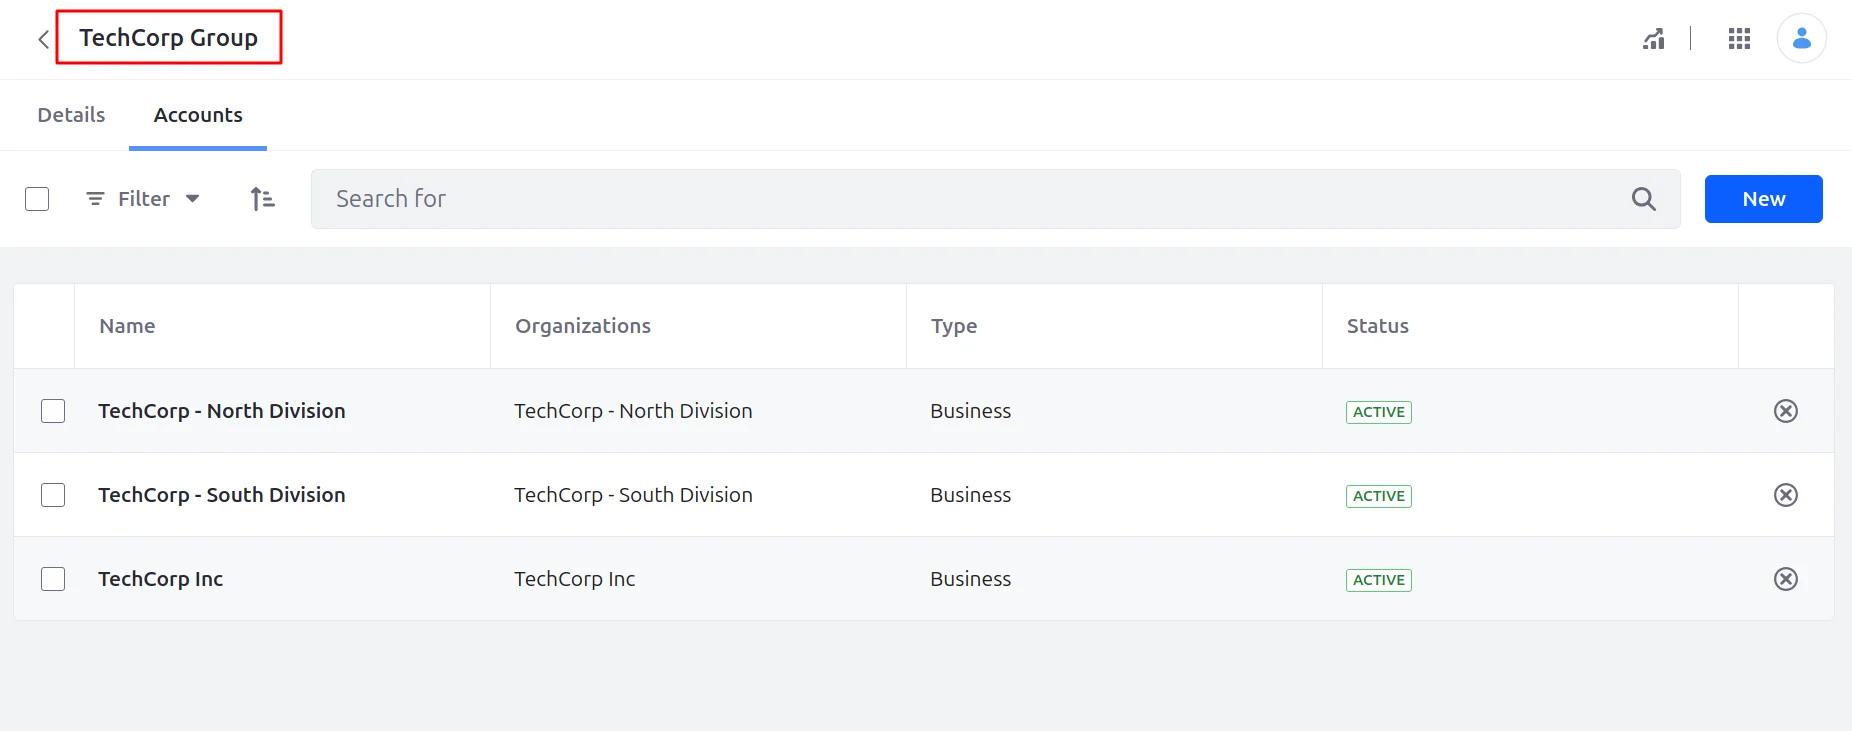
What you have built in Approach 2
Three independent Business accounts, all grouped under TechCorp Group. They don’t have a parent-child relationship, but you can still group them for pricing, promotions, and discounts in Commerce.
Approach 1 vs Approach 2
Organizations (Approach 1) - Creates a structural hierarchy. Users are managed at the organizational level. Good for companies where divisions are independently managed and need their own roles and permissions.
Account Groups (Approach 2) - Creates a flat grouping. Simpler to set up. Good when the goal is to apply shared pricing, discounts, or promotions across multiple accounts without needing a structural org hierarchy.
Pro tip : You can combine both. Use Organizations for the company structure and add all accounts to an Account Group for shared pricing.
Conclusion
Now that we have the basics in place we can begin to add Commerce features to this foundation. This includes things like price lists that are targeted at groups of people. We can also set up order approval workflows, and catalog visibility rules per account.
Happy building with Liferay Commerce!