Why Publish an NPM Package? Use Cases & Benefits
If you’ve written the same bit of code more than once — like a helper function or a small React component — you might as well just package it. Saves time, keeps things tidy, and you won’t have to copy-paste all over the place.
Publishing to NPM isn’t some huge thing either. Once you go through it once, it’s just another step in the workflow. Build, version, push. Done. Also handy if someone else needs to use the same logic.
This guide covers how to structure code, build an NPM package, and publish it — with a focus on JavaScript and React.
When to Create a Package
- Reusable Utility Functions : You’ve got a few utility functions — stuff like capitalizeWords, formatDate, whatever — and you keep using them in every project. No point copying them over and over. Package them up once, reuse them cleanly.
- Shared UI Components : Built a Button, Modal, or some form thing in React? And now you’re using the same one across multiple apps? Probably a good time to move it into a shared package.
- Organization-Wide Standards : Your organization has internal coding standards (e.g., logging wrappers, error handlers, custom hooks).
- Open Source Contribution : You’ve built something you believe others can benefit from.
When Not to Create a Package
- Code is too specific
If the code you wrote depends directly on your app’s database or local config or even how your UI state is managed, don’t make it a package. It’s too tied to one setup. - It’s too early
Just because you wrote a couple of functions doesn’t mean it needs to be packaged. If it’s not reused yet, just leave it in the project. - Trying to move a full app
Putting your whole codebase or all app logic into a shared package? Not a good idea. Packages should be for smaller, reusable stuff.
Benefits of Publishing an NPM Package
- Use code in more than one place
Components, utilities, hooks — whatever it is, if you need it in multiple projects, a package makes it easier. - Track changes
Semantic versioning helps keep updates clear. You know what changed and when. - Work better with your team
Everyone uses the same shared code. Keeps things consistent and avoids rewriting. - Share with others
Publishing helps others who have the same problem. You might get feedback or improvements too. - Keeps things clean
Moving logic into its own package helps avoid clutter in your main project.
Pitfalls to Watch Out For
- Bad or missing docs
If your README doesn’t explain how to use the package, don’t expect others (or even your future self) to know what to do with it. - Publishing just for the sake of it
Not everything needs to be on NPM. If it only works in your project, maybe leave it there. - Leaking sensitive stuff
Be extra careful not to push anything like secrets, keys, or internal logic that shouldn’t be public. - Extra work after release
Once it’s out there, you’re on the hook. People might open issues, ask for fixes, or expect updates. That’s part of the deal. - Package size problems
If you don’t trim things down, you might ship a big bundle. That slows down apps that depend on it. Keep it lean.
How to Create an NPM Package
Step 1 : Initialize Your Project
- Create a new folder for your package :
					mkdir format-utils
cd format-utils
- Initialize a package.json file :
npm init
During setup, provide :
- Package name: Ensure it’s unique (e.g., format-utils or @yourname/format-utils)
- Version: Start with 1.0.0
- Entry point: index.js
- License: MIT or your choice
- Description and keywords : Important for discoverability

Step 2 : Write Utility Functions
Create an index.js file with practical formatting utilities :
// Capitalizes the first letter of each word in a given string
function capitalizeWords(str) {

    // Ensure the input is a string
    if (typeof str !== 'string') {
        throw new TypeError(`capitalizeWords(): Expected a string, got ${typeof str}`);
    }

    // Use regex to find word boundaries and capitalize the first character of each word
    return str.replace(/\b\w/g, char => char.toUpperCase());
}

// Converts a camelCase string to a Title Case string (e.g., 'myExampleString'  =>  'My Example String')
function camelToTitle(str) {

    // Ensure the input is a string
    if (typeof str !== 'string') {
        throw new TypeError(`camelToTitle(): Expected a string, got ${typeof str}`);
    }

    // Insert a space before each uppercase letter
    const spaced = str.replace(/([A-Z])/g, ' $1');

    // Trim leading/trailing spaces and capitalize the first letter of each word
    return capitalizeWords(spaced.trim());
}

// Formats a given Date object or date string into the format 'dd/mm/yyyy'
function formatDate(date) {

    // Create a Date object from the input
    const d = new Date(date);
    // Ensure input is a valid Date or string that can be converted to a Date
    if (!(date instanceof Date) && typeof date !== 'string') {
        throw new TypeError(`formatDate(): Expected a Date object or date string, got ${typeof date}`);
    }

    // Check if the created Date is valid
    if (isNaN(d.getTime())) {
        throw new Error(`formatDate(): Invalid date provided`);
    }

    // Extract and pad day, month, and year
    const day = String(d.getDate()).padStart(2, '0');
    const month = String(d.getMonth() + 1).padStart(2, '0');
    const year = d.getFullYear();

    // Return formatted date
    return `${day}/${month}/${year}`;
}

// Export the utility functions
module.exports = {
    capitalizeWords,
    camelToTitle,
    formatDate,
};
Step 3: Add a README File
Create a README.md explaining :
- What the package does
- Installation instructions
- Code examples
Example :
					# format-data-utils

A lightweight JavaScript utility library for formatting strings and dates with runtime validation.

## Installation

```bash
npm install format-data-utils
How to Publish Your NPM Package
Step 1 : Run the following and enter your credentials
npm login
If you don’t have an account, create one at npmjs.com.
Step 2 : Publish Your Package to the NPM Registry
Make sure your package.json is correctly filled.
If using a scoped name (@yourname/format-utils), publish with public access :
					npm publish --access public

Or just run

npm publish
You can now view it on: https://www.npmjs.com/package/format-data-utils
How to Install and Use the Package
Step 1 : Install the Package in Any Project
From NPM :
npm install format-data-utils
Or from GitHub :
npm install git+https://github.com/yourusername/yourpackagename.git

Step 2 : Import and Use the Functions
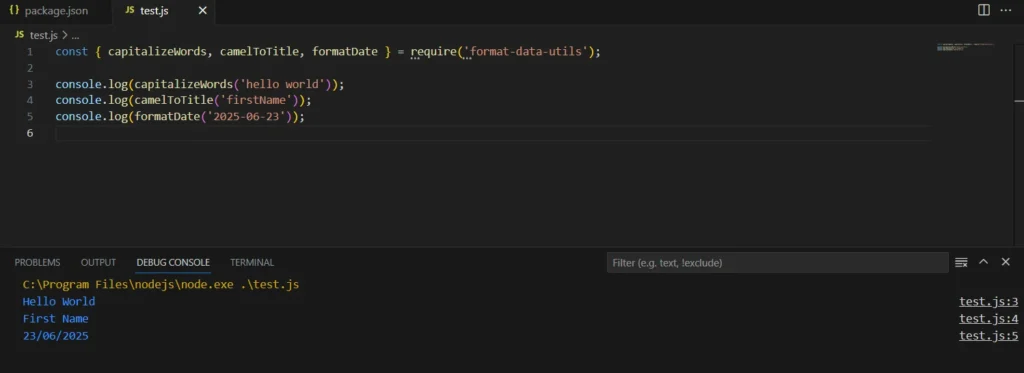
					const { capitalizeWords, camelToTitle, formatDate } = require('format-utils');

console.log(capitalizeWords('hello world')); // Hello World
console.log(camelToTitle('firstName'));      // First Name
console.log(formatDate('2025-06-23'));       // 23/06/2025

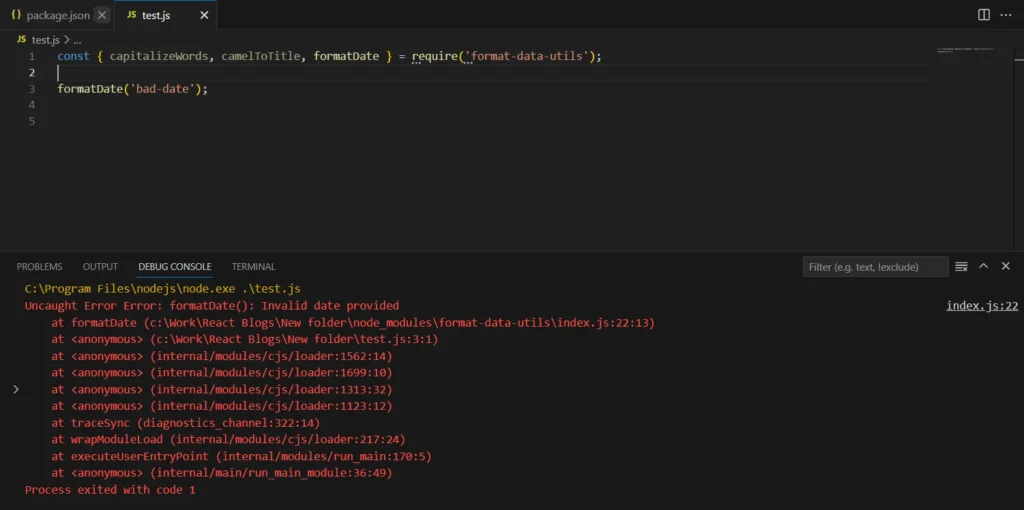
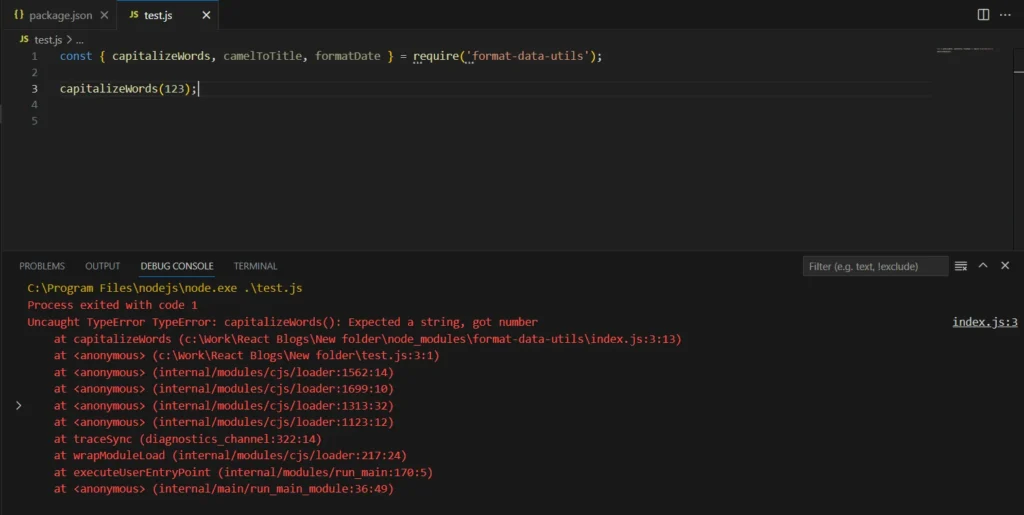
Invalid usage throws helpful errors :
					capitalizeWords(123);     // TypeError
formatDate('bad-date');   // Error: Invalid date


Bonus Tips & Best Practices
Use semantic versioning
Follow the usual version pattern: bug fixes = patch (1.0.1), new features = minor (1.1.0), breaking stuff = major (2.0.0). Don’t skip this — it helps anyone using your package.Pick a name that’s not taken
Before you publish, search npmjs.com. If your name’s already in use, tweak it. Add something specific like -js, or use scoped names — for example, @yourname/tool-name.Add some tests
Doesn’t have to be full test coverage. A few basic checks are better than nothing. Helps catch mistakes before someone else finds them.Build your code if needed
If you’re using JSX or new JS features, make sure to transpile first. Babel, Rollup, Vite — any of those work. Just don’t ship raw modern code unless you’re sure it’ll run everywhere.
Conclusion
You don’t need anything fancy to publish a useful NPM package. If you’ve got code you use often — maybe a function, maybe a small React component — turning it into a package can save time. You write it once and reuse it wherever.
Just make sure it’s easy to set up and works on its own. Add some docs. Keep the versioning clean. That’s it. It doesn’t have to be perfect — just something that does one job well.


