Simplifying Global State in React with useContext and useReducer

Introduction
The Context API in React allows sharing state across the entire app without prop drilling. useReducer handles complex state logic with a reducer function. Together, they offer a powerful way to manage global state predictably, reduce boilerplate code, and improve code organization. Additionally, they enhance performance by preventing unnecessary re-renders and make it easier to debug state changes.
Prerequisites
- Node.js and npm
- React
- Typescript
- MUI
Diving into Context API
The Context API offers a straightforward and effective method for sharing state throughout a React component tree. It addresses the issues of prop drilling, which can be messy and frustrating when passing props down to components.
With the Context API, you can pass props to any child component of a parent, enabling state sharing without the need to pass props through each level.
- Provider and Consumer
- The Context API has two main components:
Provider
Consumer
- The Provider is a React component that wraps other components, while the Consumer consumes the data or state passed through the Provider. It’s important to note that the Context API is ideal for passing global data. If your use case involves global state, it’s likely a suitable choice.
Diving into useReducer :
The useReducer hook enables the management of complex state logic in React components. If you’ve used Redux before, the concept of useReducer is pretty similar to Redux. A reducer is basically a switch statement defining all the possible actions a context can perform, and only updating the part of the global state related to that action.
- Syntax
- const [state, dispatch] = useReducer(reducer, initialState)
- The line const [state, dispatch] = useReducer(reducer, initialState); initializes state management using useReducer in React. Here, state holds the current state of the application, while dispatch is a function that triggers state updates by invoking the reducer function with an action, and initialState represents the initial state value for the application’s state management. It defines the starting point of the state before any actions are dispatched to update it.
- Advantages of useReducer
- When dealing with complex state logic that involves multiple sub-values or where the next state depends on the previous one, useReducer is typically a better choice than useState.
- Using useReducer can also help optimize component performance by allowing you to pass the dispatch function down instead of individual callbacks, which can reduce unnecessary re-renders.
A Comprehensive Guide to Application
This React + TypeScript application is a shopping app demonstrating the use of the Context API with useReducer for state management. By using the Context API along with useReducer, the state is efficiently shared and managed across components without the need for prop drilling. This setup showcases a clean and scalable approach to handling the global state in a React application.
By following the below steps, you can easily learn how to use context api with useReducer and also make an application where you leverage the advantages of context api.
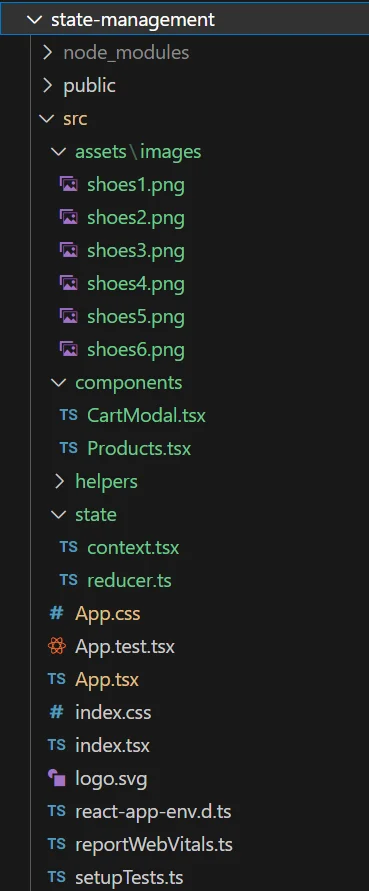
Let’s understand the folder structure
- There is a folder for components, where all the necessary components for the application will be created.
- There is a folder named assets, where all the styling files, images will be stored.
- Then, a separate state folder is created for the context and reducer .
Therefore, it is good practice to follow a proper folder structure and separate our concerns.
Navigating the Frontend Setup In React
Let’s start the UI implementation for using React with a TypeScript template.
Initializing React Application : To create a React application, you need to start by creating a project folder in your root directory. Inside the project folder, install the necessary dependencies by running the following commands.
1// Create react app using the following cmd
2
3npx create-react-app state-management --template typescript
Please follow the below step to make the shopping app using context api and useReducer hook for state management. In the project state-management folder, locate the App.tsx file which serves as the entry point for the project.
1) Create a separate folder for the components where you will create the necessary components.
2) In that components folder, make a file named Products.tsx and CartModal.tsx.
3) Make a separate folder named state. In that folder make a file with the nameContext.tsx and reducer.ts.
4) Make a separate folder named assets. In that folder make another folder named images to store the images.
5) Make a separate folder named helper. In that folder make a file with the name ProductData.ts to store the dummy data for the products.
6) In this app, material ui is used for styling. Design the user interface according to your preference using raw CSS or any library of your choice.
1//App.tsx
2//Necessary imports
3
4function App() {
5  return (
6    <ShopProvider>
7      <Box>
8        <Products />
9      </Box>
10    </ShopProvider>
11  );
12}
13
14export default App;- In the App component, the Products component is wrapped inside the ShopProvider, so all the child components will be able to use the context value.
1//context.tsx
2//Necessary imports
3
4interface ShopContextProps {
5  total: number;
6  products: IProduct[];
7  addToCart: (product: IProduct) => void;
8  removeFromCart: (product: IProduct) => void;
9}
10
11export const ShopContext = createContext<ShopContextProps | undefined>(undefined);
12
13export const ShopProvider = ({ children }: { children: ReactNode }) => {
14  const [state, dispatch] = useReducer(shopReducer, initialState);
15
16  const addToCart = (product: IProduct) => {
17    const updatedCart = [...state.products, product];
18    updatePrice(updatedCart);
19    dispatch({
20      type: "ADD_TO_CART",
21      payload: {
22        products: updatedCart,
23      },
24    });
25  };
26
27  const removeFromCart = (product: IProduct) => {
28    const updatedCart = state.products.filter(
29      (currentProduct) => currentProduct.id !== product.id
30    );
31    updatePrice(updatedCart);
32
33    dispatch({
34      type: "REMOVE_FROM_CART",
35      payload: {
36          products: updatedCart,
37      },
38    });
39  };
40
41  const updatePrice = (products: IProduct[]) => {
42    let total = 0;
43    products.forEach((product) => (total += parseFloat(product.price.slice(1))));
44
45    dispatch({
46      type: "UPDATE_PRICE",
47      payload: {
48        total,
49      },
50    });
51  };
52
53  const value = {
54    total: state.total,
55    products: state.products,
56    addToCart,
57    removeFromCart,
58  };
59
60  return <ShopContext.Provider value={value}>{children}</ShopContext.Provider>;
61};- The ShopProvider sets up the context for managing the shopping cart state using the useReducer hook and the shopReducer function. It provides functions addToCart and removeFromCart to modify the cart and an updatePrice function to calculate the total price.
- The ShopContext is created and used to pass down these values and functions to the rest of the application. The provider wraps around the application’s children components to give them access to the cart state and functions.
1//reducer.ts
2
3export interface IProduct {
4  id: number;
5  name: string;
6  description: string;
7  price: string;
8  image: string;
9}
10
11interface InitialState {
12  total: number;
13  products: IProduct[];
14}
15
16export const initialState: InitialState = {
17  total: 0,
18  products: [],
19};
20
21interface AddToCartAction {
22  type: "ADD_TO_CART";
23  payload: {
24    products: IProduct[];
25  };
26}
27
28interface RemoveFromCartAction {
29  type: "REMOVE_FROM_CART";
30  payload: {
31    products: IProduct[];
32  };
33}
34
35interface UpdatePriceAction {
36  type: "UPDATE_PRICE";
37  payload: {
38    total: number;
39  };
40}
41
42export type Action = AddToCartAction | RemoveFromCartAction | UpdatePriceAction;
43
44const shopReducer = (state: InitialState, action: Action): InitialState => {
45  switch (action.type) {
46    case "ADD_TO_CART":
47      return {
48        ...state,
49        products: action.payload.products,
50      };
51    case "REMOVE_FROM_CART":
52      return {
53        ...state,
54        products: action.payload.products,
55      };
56    case "UPDATE_PRICE":
57      return {
58        ...state,
59        total: action.payload.total,
60      };
61    default:
62      return state;
63  }
64};
65
66export default shopReducer;- The shopReducer function manages the state of the shopping cart in a Redux-like manner. It handles three types of actions: ADD_TO_CART, REMOVE_FROM_CART, and UPDATE_PRICE.
- When a product is added or removed from the cart, the corresponding action updates the products array in the state. The UPDATE_PRICE action updates the total price of the items in the cart. The initialState defines the initial structure of the state with a total of 0 and an empty products array.
1//Products.tsx
2
3//Necessary imports
4
5export interface IProductData {
6 id: number;
7 name: string;
8 description: string;
9 price: string;
10 image: string;
11}
12
13const Products = () => {
14 const context = useContext(ShopContext);
15
16 if (!context) {
17 throw new Error("Error");
18 }
19
20 const { products, addToCart, removeFromCart, total } = context;
21 const [cartIsOpen, setCartIsOpen] = useState<boolean>(false);
22
23 const isInCart = (product: IProductData) => {
24 return products.some((cartProduct) => cartProduct.id === product.id);
25 };
26
27 const handleClick = (product: IProductData) => {
28 if (isInCart(product)) {
29 removeFromCart(product);
30 } else {
31 addToCart(product);
32 }
33 };
34
35 const toggleCart = () => {
36 setCartIsOpen((cartIsOpen) => !cartIsOpen);
37 };
38
39 return (
40 <>
41 <>
42 <Box>
43 <AppBar position="static">
44 <Toolbar>
45 <Typography>
46 Shopeasy
47 </Typography>
48 <Button
49 onClick={toggleCart}
50 startIcon={<ShoppingCartRoundedIcon />}
51 >
52 View Cart
53 </Button>
54 </Toolbar>
55 </AppBar>
56 </Box>
57 <Box>
58 <Typography>
59 Products
60 </Typography>
61 <Box>
62 {ProductData.map((product) => (
63 { Render Product }
64 <CardActions>
65 <Button onClick={() => handleClick(product)}>
66 {isInCart(product) ? "Remove from Cart" : "Add to Cart"}
67 </Button>
68 </CardActions>
69 </Card>
70 ))}
71 </Box>
72 </Box>
73 </>
74 <CartModal open={cartIsOpen} onClose={toggleCart} />
75 </>
76 );
77};
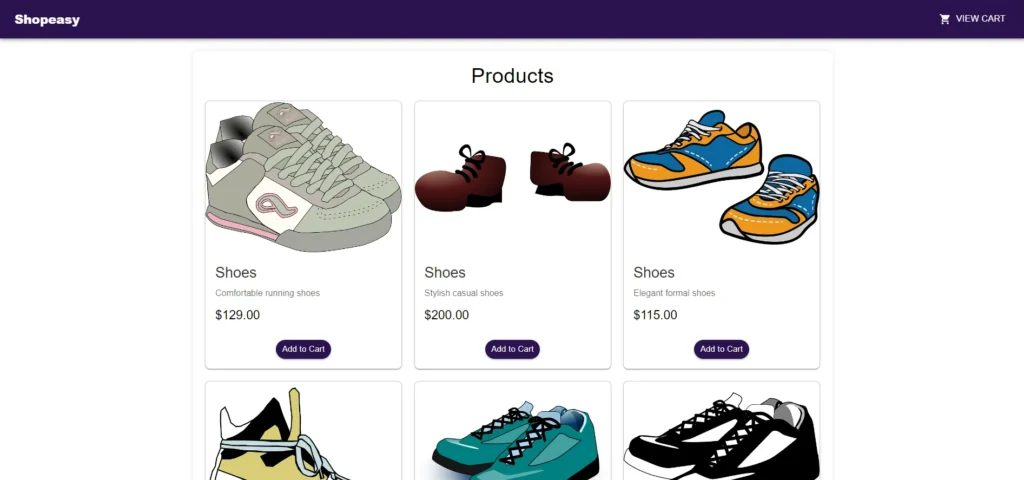
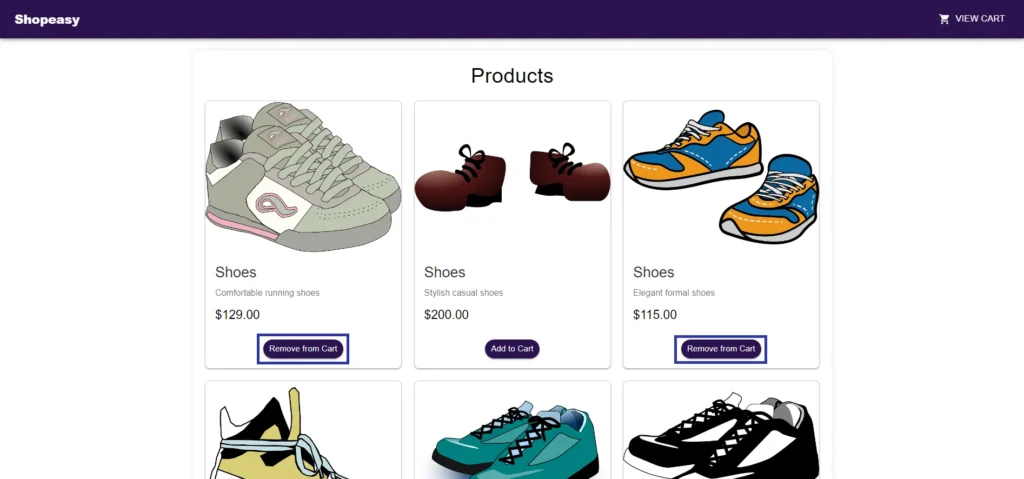
78export default Products;- The Products.tsx component displays a list of products and allows users to add or remove products from their shopping cart. It utilizes ShopContext to manage the state of the cart, including the functions addToCart and removeFromCart.
- The component also includes a VIEW CART button to toggle the visibility of the cart modal.
- Each product is displayed with its image, name, description, and price, and has a button to add or remove it from the cart.
1//CartModal.tsx
2
3//Necessary imports
4
5interface ICartModalProps {
6 open: boolean;
7 onClose: () => void;
8}
9
10const CartModal: React.FC<ICartModalProps> = ({ open, onClose }) => {
11 const context = useContext(ShopContext);
12
13 if (!context) {
14 throw new Error("Error");
15 }
16
17 const { products, total } = context;
18
19 const handleClose = () => {
20 onClose();
21 };
22
23 return (
24 <Dialog onClose={handleClose} open={open}>
25 <DialogTitle>
26 <Typography>
27 Cart
28 </Typography>
29 </DialogTitle>
30 <DialogContent>
31 {products.length ? (
32 <Box>
33 <Grid>
34 {products.map((product) => (
35 { Render Product }
36 ))}
37 </Grid>
38 <Divider />
39 <Box>
40 <Typography>Total Amount</Typography>
41 <Typography>{`$${total}`}</Typography>
42 </Box>
43 </Box>
44 ) : (
45 <Typography>
46 Your cart is empty!
47 </Typography>
48 )}
49
50 <DialogActions>
51 <Button
52 onClick={handleClose}
53 >
54 Close
55 </Button>
56 </DialogActions>
57 </DialogContent>
58 </Dialog>
59 );
60};
61
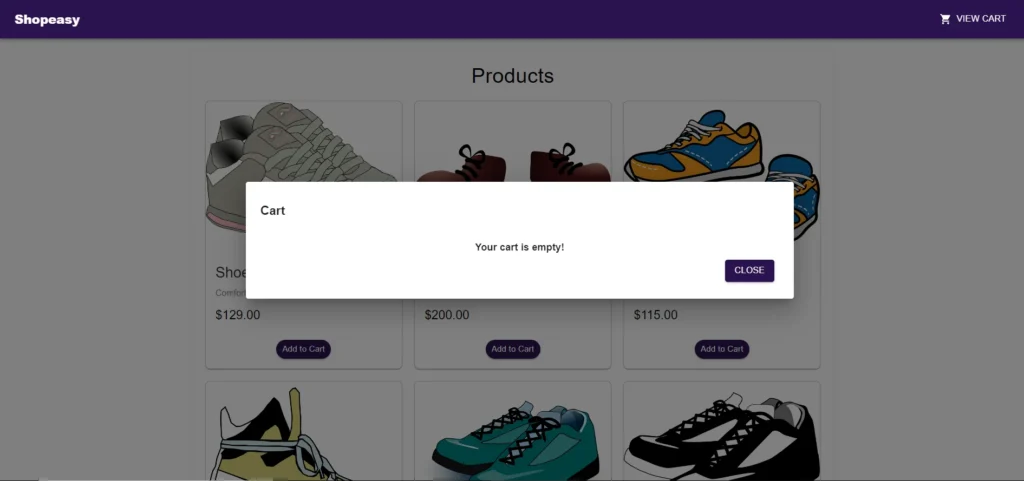
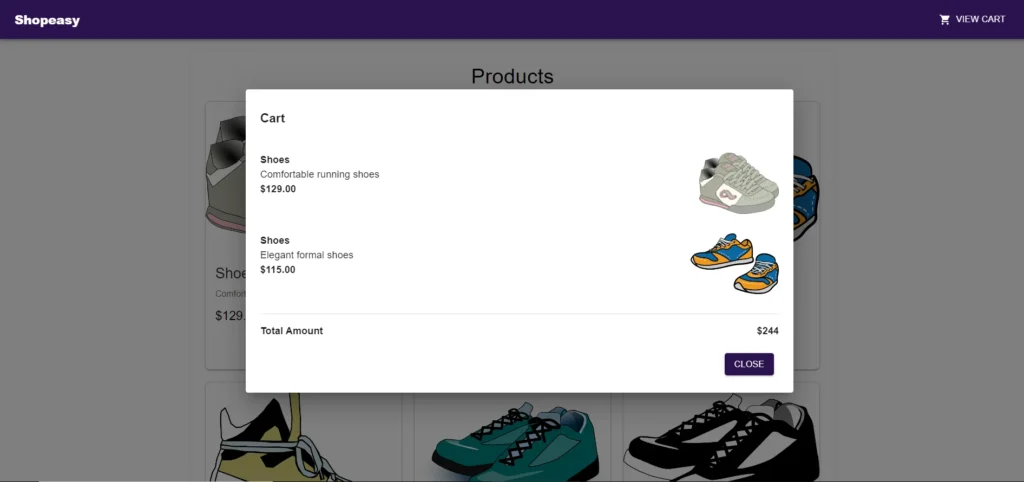
62export default CartModal;- Here, in the CartModal component, we are using products and total from the ShopContext and then rendering the products added to the cart in the modal.
1//ProductData.ts
2
3import { IProductData } from "../components/Products";
4
5export const ProductData: IProductData[] = [
6    {
7        id: 1,
8        name: "Shoes",
9        description: "Comfortable running shoes",
10        price: "$129.00",
11        image: shoes1,
12      },
13     // Add more dummy data
14]- The Product.ts stores the dummy data for the products which is used in the Products.tsx component to render the products.
Conclusion
In conclusion, creating a React TypeScript application using the Context API and the useReducer hook effectively manages the state. This approach centralizes state management, allowing for a clear and scalable structure. The Context API provides a way to pass down the state and actions without prop drilling. The useReducer hook simplifies complex state logic, making the code more maintainable and predictable.
Output