Test React Typescript Component with Jest and RTL

Introduction
Unit testing React components with TypeScript is a common practice to ensure the correctness of your components, especially when TypeScript is used in a React project. The process is quite similar to unit testing in JavaScript, but with some adjustments to accommodate TypeScript's type system.
There are two popular testing libraries for React: Enzyme and React Testing Library.
In this guide we will be testing React components using React Testing Library and Jest. As RTL provides a simple and straightforward way to test components that promotes good test practices and Jest will take care of running tests and handling assertions.
We'll walk through setting up your project, creating a simple registration form, and writing test cases for it.
Project Setup
Create a TypeScript and React module with Liferay:
Follow our blog post on TypeScript and React with Liferay to set up your module.
When you create a react app, you have some testing dependencies by default installed in your package.json. Make sure you have the following dependencies installed in your project:
@types/jest @testing-library/react @testing-library/jest-dom npm i @testing-library/user-event
Install additional dependencies:
[ npm install jest ts-jest jest-config jest-environment-jsdom ]
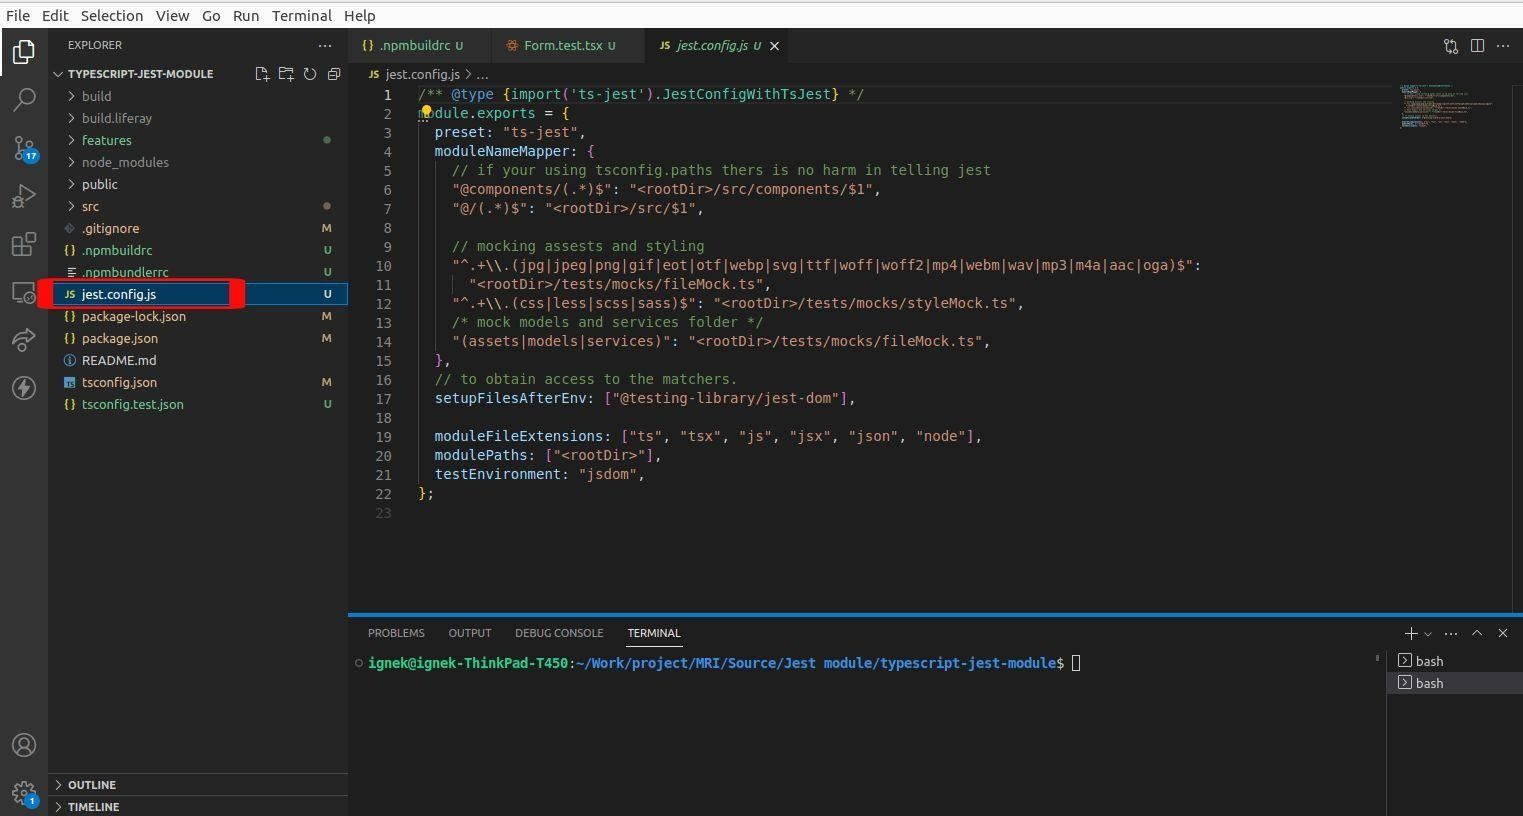
Configure Jest:
Run the following command to create a jest.config.json file:
[ npx jest –init ]
This will generate a jest.config.json file with default configurations. It includes mappings for module names and mocks. Additionally, it specifies the file extensions to be considered and sets the test environment to jsdom. Make sure your project structure and paths align with the configured mappings for the best results.
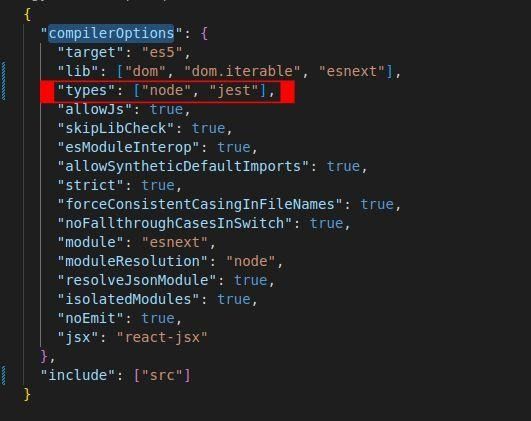
Update tsconfig.json:
Add the Jest type to the compilerOptions:
[ "types": "node", "jest" ]
Create tsconfig.test.json:
Create a tsconfig.test.json file with the following configuration:
1{
2  "extends": "./tsconfig.json",
3  "compilerOptions": {
4    "jsx": "react-jsx",
5    "esModuleInterop": true
6  }
7}
8
9
Creating a Registration Form Component
Now that your project is set up, let's create a simple registration form and write test cases for it and export default RegisterForm.
1import React from "react";
2import {
3  Grid,
4  makeStyles,
5  Card,
6  CardContent,
7  CardActions,
8  Button,
9  CardHeader,
10} from "@material-ui/core";
11
12import { Formik, Form, Field } from "formik";
13import * as Yup from "yup";
14import { TextField } from "formik-material-ui";
15
16interface Values {
17  firstName: string;
18  lastName: string;
19  city: string;
20  email: string;
21  password: string;
22}
23
24const useStyles = makeStyles((theme: any) => ({
25  padding: { padding: theme.spacing(3) },
26  button: { margin: theme.spacing(1) },
27}));
28
29const lowercaseRegEx = /(?=.*[a-z])/;
30const uppercaseRegEx = /(?=.*[A-Z])/;
31const numericRegEx = /(?=.*[0-9])/;
32const lengthRegEx = /(?=.{6,})/;
33
34const validationSchema = Yup.object().shape({
35  firstName: Yup.string().required("Required"),
36  lastName: Yup.string().required("Required"),
37  email: Yup.string().email("Invalid email").required("Required"),
38  password: Yup.string()
39    .matches(
40      lowercaseRegEx,
41      "Must contain one lowercase alphabetical character!"
42    )
43    .matches(
44      uppercaseRegEx,
45      "Must contain one uppercase alphabetical character!"
46    )
47    .matches(numericRegEx, "Must contain one numeric character!")
48    .matches(lengthRegEx, "Must contain 6 characters!")
49    .required("Required!"),
50});
51
52const RegisterForm: React.FC = () => {
53  const classes = useStyles();
54
55  const onSubmit = (values: Values) => {
56    console.log(values);
57  };
58
59  return (
60    <Grid container justifyContent="center" spacing={1}>
61      <Grid item md={6}>
62        <Card className={classes.padding}>
63          <CardHeader title="REGISTER FORM"></CardHeader>
64          <Formik
65            initialValues={{
66              firstName: "",
67              lastName: "",
68              city: "",
69              email: "",
70              password: "",
71            }}
72            validationSchema={validationSchema}
73            onSubmit={onSubmit}
74          >
75            {({ dirty, isValid, values, handleChange, handleBlur }) => {
76              return (
77                <Form>
78                  <CardContent>
79                    <Grid item container spacing={1} justifyContent="center">
80                      <Grid item xs={12}>
81                        <Field
82                          label="First Name"
83                          variant="outlined"
84                          fullWidth
85                          name="firstName"
86                          value={values.firstName}
87                          component={TextField}
88                        />
89                      </Grid>
90                      <Grid item xs={12}>
91                        <Field
92                          label="Last Name"
93                          variant="outlined"
94                          fullWidth
95                          name="lastName"
96                          value={values.lastName}
97                          component={TextField}
98                        />
99                      </Grid>
100
101                      <Grid item xs={12}>
102                        <Field
103                          label="City"
104                          variant="outlined"
105                          fullWidth
106                          name="city"
107                          value={values.city}
108                          component={TextField}
109                        />
110                      </Grid>
111
112                      <Grid item xs={12}>
113                        <Field
114                          label="Email"
115                          variant="outlined"
116                          fullWidth
117                          name="email"
118                          value={values.email}
119                          component={TextField}
120                        />
121                      </Grid>
122                      <Grid item xs={12} >
123                        <Field
124                          label="Password"
125                          variant="outlined"
126                          fullWidth
127                          name="password"
128                          value={values.password}
129                          type="password"
130                          component={TextField}
131                        />
132                      </Grid>
133                    </Grid>
134                  </CardContent>
135                  <CardActions>
136                    <Button
137                      disabled={!dirty || !isValid}
138                      variant="contained"
139                      color="primary"
140                      type="submit"
141                      className={classes.button}
142                    >
143                      REGISTER
144                    </Button>
145                  </CardActions>
146                </Form>
147              );
148            }}
149          </Formik>
150        </Card>
151      </Grid>
152    </Grid>
153  );
154};
Writing Test Cases
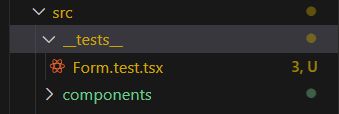
Folder Structure
Create a __tests__ folder inside your component folder for test files.
The use of a special folder name like “__tests__” signifies that the content of this folder is related to testing. This can be beneficial when someone new joins a project or when revisiting the code after some time. However, it's important to note that the use of “__tests__” is a convention and not a strict rule. In Jest, the “__tests__” convention is recognized by default, but Jest is flexible enough to work with other configurations or file structures if needed. Always refer to the documentation of the testing framework you are using to understand its conventions and customization options.
Writing Unit Tests
Create Formtable.test.tsx file inside the __ tests__ folder for writing test cases for react code.Here, we will create a unit test for that Form.tsx component. First of all, make sure we have created Form.test.tsx on /components/__test__/Form.test.tsx.
1import { render, screen, fireEvent, act } from "@testing-library/react";
2import userEvent from "@testing-library/user-event";
3import RegisterForm from "../components/Form";
4
5describe("RegisterForm component", () => {
6  test("can fill out the form and submit", async () => {
7    render(<RegisterForm />);
8
9    await act(async () => {
10      const firstNameInput = screen.getByLabelText("First Name");
11       const lastNameInput = screen.getByLabelText("Last Name");
12      const cityInput = screen.getByLabelText("City");
13      const emailInput = screen.getByLabelText("Email");
14      const passwordInput = screen.getByLabelText("Password");
15      const registerButton = screen.getByText("REGISTER");
16
17      userEvent.type(firstNameInput, "John");
18      userEvent.type(lastNameInput, "Doe");
19      userEvent.type(cityInput, "Sample City");
20      userEvent.type(emailInput, "john.doe@example.com");
21      userEvent.type(passwordInput, "Password123");
22
23      fireEvent.click(registerButton);
24    });
25  });
26
27  test("displays validation error for invalid email", async () => {
28    render(<RegisterForm />);
29
30 await act(async () => {
31      const emailInput = screen.getByLabelText("Email");
32      const registerButton = screen.getByText("REGISTER");
33
34      userEvent.type(emailInput, "invalidemail");
35      fireEvent.click(registerButton);
36    });
37
38    // Add assertion to check for the expected error message
39expect(screen.getByText("Invalid email")).toBeInTheDocument();
40  });
41});
42
Explanation:
- The render(<RegisterForm />) function is used to render the RegisterForm component.
- The act function from @testing-library/react is used to handle asynchronous actions. In this case, it wraps the code that interacts with the form elements.
- screen.getByLabelText and screen.getByText are used to obtain references to form elements by their associated labels or text.
- userEvent.type is used to simulate typing input into form fields.
- fireEvent.click simulates clicking the "REGISTER" button.
- The test checks if the form can be filled out and submitted successfully.
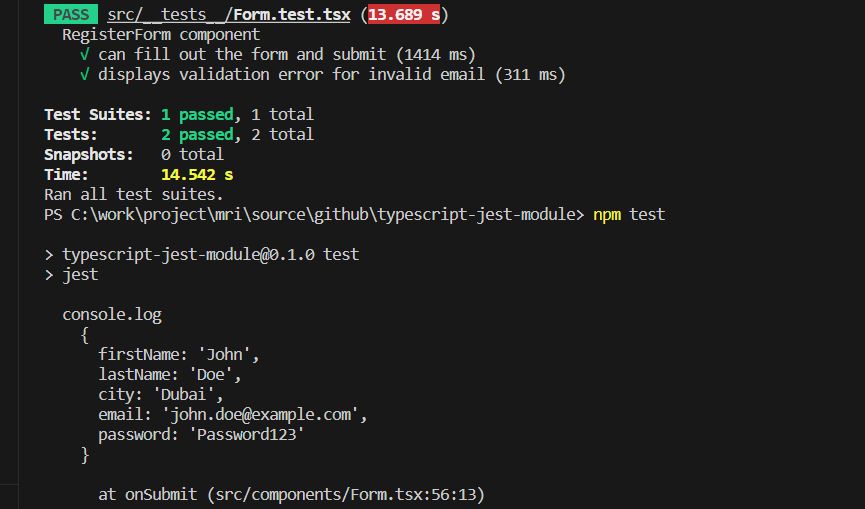
Running Tests
Execute the following command to run your tests:
[ npm test ]
Addressing Issues
If you encounter warnings or errors, ensure you use await with act and fix any selector mismatches.