Test GraphQL Queries and Mutation using RTL and Jest

Introduction:
Testing GraphQL queries and mutations is a crucial part of ensuring the reliability and functionality of your React applications. There are multiple phases involved in creating test cases for GraphQL queries and changes with Jest. Jest is a well-liked JavaScript testing framework that works well for testing mutations and queries in GraphQL. Here's a step-by-step guide on how to efficiently write test cases for GraphQL queries and mutations using Jest.
Prerequisites:
Before diving into testing, ensure you have the following technologies:
- React.js
- Jest
- GraphQL
Create a setup for Jest configration below blog can help to setup for jest.
https://www.ignek.com/blog/test-react-typescript-component-with-jest-and-rtl/
Once the setup is complete, we'll create a simple login form that includes GraphQL queries and mutations.
1import React from "react";
2import { useForm } from "react-hook-form";
3import { useQuery, useMutation, ApolloError } from "@apollo/react-hooks";
4
5import {
6  TextField,
7  Button,
8  Container,
9  Typography,
10  makeStyles,
11  ListItem,
12  List,
13  ListItemText,
14  Paper,
15} from "@material-ui/core";
16import { ADD_USER } from "../ApolloClient/GraphlQL/Mutation";
17import { GET_USERS } from "../ApolloClient/GraphlQL/Query";
18
19const useStyles = makeStyles((theme) => ({
20  formContainer: {
21    marginTop: theme.spacing(4),
22    display: "flex",
23    flexDirection: "column",
24    alignItems: "center",
25  },
26  formPaper: {
27    padding: theme.spacing(4),
28    boxShadow: "0px 4px 10px rgba(0, 0, 0, 0.1)",
29    borderRadius: theme.spacing(1),
30  },
31  form: {
32    width: "100%",
33    maxWidth: "400px",
34    marginTop: theme.spacing(2),
35  },
36  submitButton: {
37    marginTop: theme.spacing(2),
38    backgroundColor: theme.palette.primary.main,
39    color: theme.palette.primary.contrastText,
40    "&:hover": {
41      backgroundColor: theme.palette.primary.dark,
42    },
43  },
44  userList: {
45    listStyle: "none",
46    padding: 0,
47    marginTop: theme.spacing(2),
48    width: "100%",
49    maxWidth: "400px",
50  },
51  userListItem: {
52    marginBottom: theme.spacing(1),
53    backgroundColor: "#d3d2d2",
54    borderRadius: theme.spacing(1),
55    "&:hover": {
56      boxShadow: "0px 4px 10px rgba(0, 0, 0, 0.1)",
57      borderRadius: theme.spacing(1),
58      Color: "#ccc",
59    },
60  },
61  listItemText: {
62    color: theme.palette.text.primary,
63  },
64}));
65
66interface UserData {
67  id: string;
68  name: string;
69  email: string;
70}
71
72interface GetUsersData {
73  users: UserData[];
74}
75
76interface FormData {
77  name: string;
78  email: string;
79}
80
81function MaterialUIForm() {
82  const { register, handleSubmit, reset } = useForm<FormData>();
83  const { loading, error, data } = useQuery<GetUsersData>(GET_USERS);
84  const [addUser] = useMutation(ADD_USER);
85  const classes = useStyles();
86
87  const onSubmit = async (formData: any) => {
88    try {
89      const { data: mutationData } = await addUser({
90        variables: {
91          input: {
92            name: formData.name,
93            email: formData.email,
94          },
95        },
96      });
97
98      reset();
99
100      if (mutationData && mutationData.addUser && mutationData.addUser.id) {
101        console.log(mutationData, "mutationData");
102      }
103    } catch (error) {
104      const mutationError = error as ApolloError;
105      console.error("Error adding user:", mutationError.message);
106    }
107  };
108
109  if (loading) return <p>Loading...</p>;
110  if (error) return <p>Error: {error.message}</p>;
111
112  return (
113    <Container className={classes.formContainer}>
114      <Paper className={classes.formPaper}>
115        <Typography variant="h4" align="center" gutterBottom>
116          Add User
117        </Typography>
118        <form className={classes.form} onSubmit={handleSubmit(onSubmit)}>
119          <TextField
120            label="Name"
121            name="name"
122            margin="normal"
123            fullWidth
124            variant="outlined"
125            color="primary"
126            inputProps={{ ...register("name"), "data-testid": "Name" }}
127          />
128          <TextField
129            label="Email"
130            name="Email"
131            type="email"
132            margin="normal"
133            inputProps={{ ...register("email"), "data-testid": "Email" }}
134            fullWidth
135            variant="outlined"
136            color="primary"
137          />
138          <Button
139            className={classes.submitButton}
140            type="submit"
141            data-testid="save-form-data"
142            variant="contained"
143          >
144            Submit
145          </Button>
146        </form>
147
148        {/* Display existing users */}
149        <Typography variant="h5" align="center" style={{ marginTop: "20px" }}>
150          Existing Users
151        </Typography>
152        <List className={classes.userList}>
153          {data?.users.map(
154            (user: {
155              id: React.Key | null | undefined;
156              name: any;
157              email: any;
158            }) => (
159              <ListItem
160                key={user.id}
161                className={classes.userListItem}
162                alignItems="flex-start"
163              >
164                <ListItemText
165                  primary={`${user.name}`}
166                  secondary={`${user.email}`}
167                  className={classes.listItemText}
168                />
169              </ListItem>
170            )
171          )}
172        </List>
173      </Paper>
174    </Container>
175  );
176}
177
178export default MaterialUIForm;
179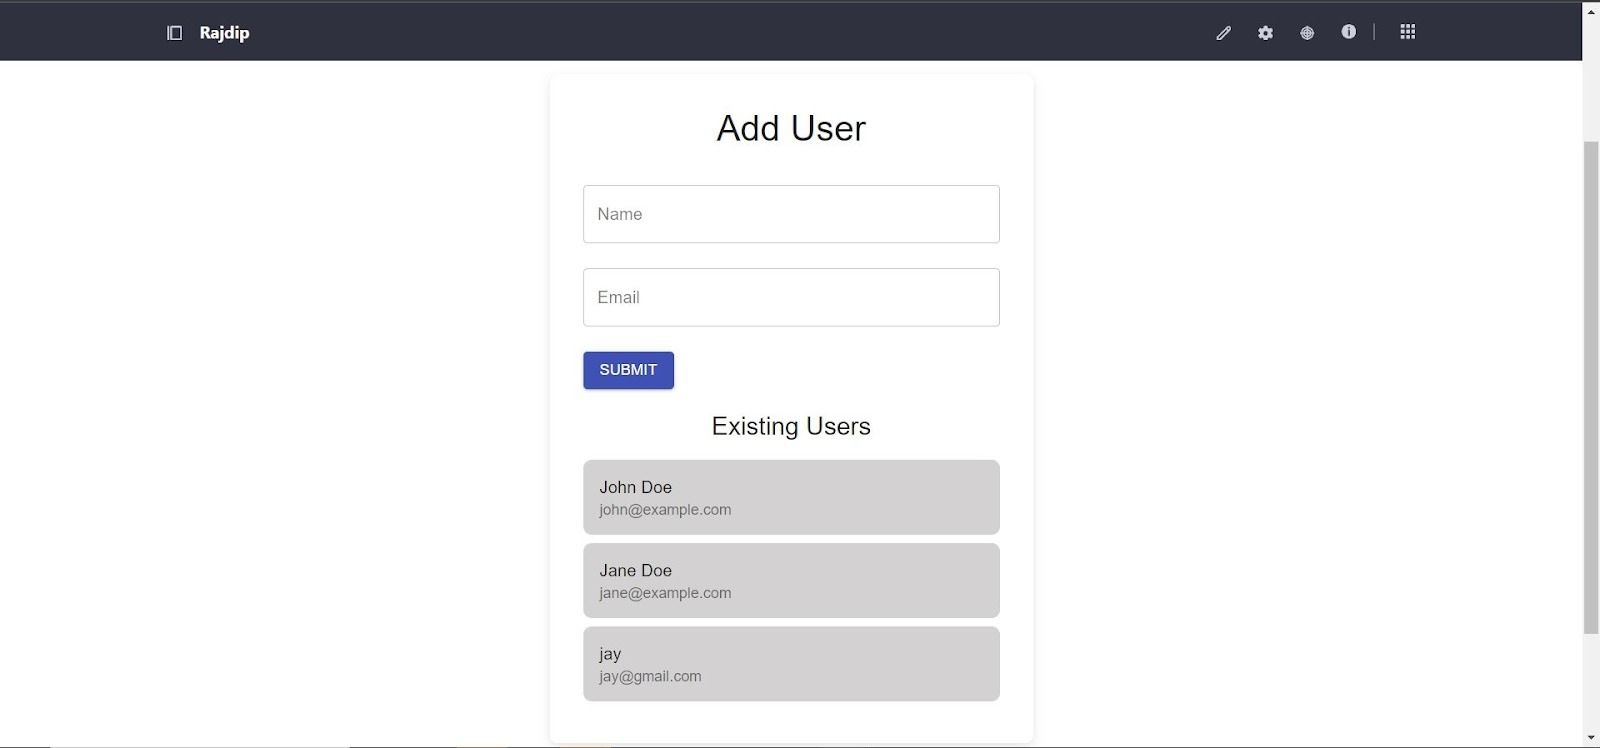
In this form, I have used one query to retrieve existing user information and added a mutation
for adding a new user.
Query:
1  export const GET_USERS = gql`
2                  query getUsers {
3                           users  {
4                                 id
5                                 name
6                                 Email
7  	 	   }
8 		 }
9           `;
10Mutation:
1  export const ADD_USER = gql`
2  mutation addUser($input: UserInput!) {
3    addUser(input: $input) {
4             id
5             name
6             email
7          }
8       }
9    `;
10
Write unit test cases for the query and mutation
Let’s start writing test cases for the above query and mutation.
- Install the necessary packages for testing GraphQL. These packages will help you mock and test GraphQL queries and mutations.
[ npm install --save-dev @apollo/client graphql ]
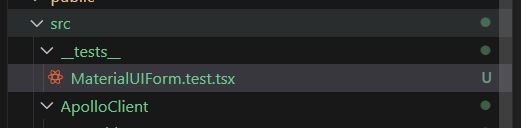
2. Create a test file for your component, e.g., MaterialUIForm.test.tsx in the __tests__ directory.
3. Import MockedProvider from @apollo/client/testing to handle GraphQL queries and mutations.
1import { MockedProvider } from "@apollo/client/testing";
2
3<MockedProvider mocks={mocks} addTypename={false}>
4 <MaterialUIForm /> // Your desire component
5</MockedProvider>
6- mocks is an array of mock responses to simulate GraphQL queries and mutations.
- addTypename={false} is used to exclude the typename field from the generated queries. It can be helpful when working with Apollo Client.
4. Mock the GraphQL queries and mutations that your component will use.
1const mocks = [
2  {
3    request: {
4      query: GET_USERS,
5    },
6    result: {
7      data: {
8        users: [
9          {
10            id: "1",
11            name: "John Doe",
12            email: "john@example.com",
13          },
14        ],
15      },
16    },
17  },
18  {
19    request: {
20      query: ADD_USER,
21      variables: {
22        input: {
23          name: "Test User",
24          email: "test@example.com",
25        },
26      },
27    },
28    result: {
29      data: {
30        addUser: {
31          id: "3",
32          name: "Test User",
33          email: "test@example.com",
34        },
35      },
36    },
37  },
38];
39
5. Write a below test case for the GET_USERS query.
1it("renders form and existing users", async () => {
2    render(
3      <MockedProvider mocks={mocks} addTypename={false}>
4        <MaterialUIForm />
5      </MockedProvider>
6    );
7
8    const inputName = await screen.findByTestId("Name");
9    await userEvent.type(inputName, "John Doe");
10    expect(inputName).toHaveValue("John Doe");
11
12    const inputEmail = await screen.findByTestId("Email");
13    await userEvent.type(inputEmail, "john@example.com");
14    expect(inputEmail).toHaveValue("john@example.com");
15
16    console.log(mocks[0]?.result?.data?.users, "GetUserData");
17
18  });
19
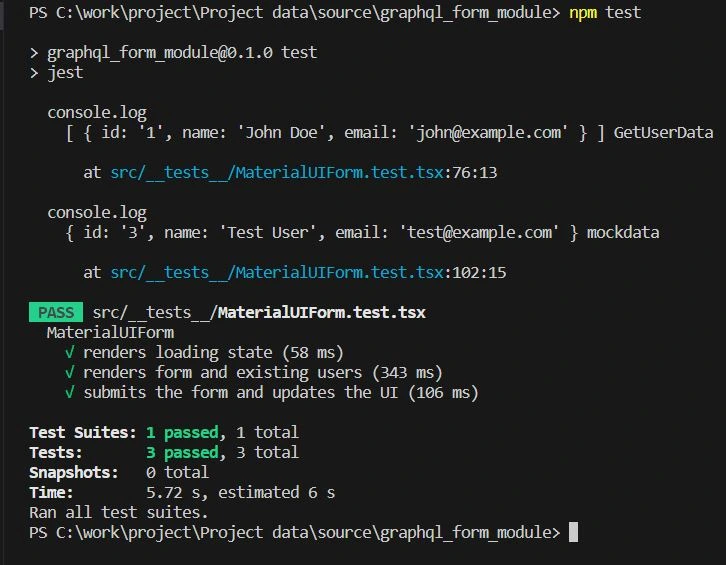
6. Run your tests using the following command:
1npm test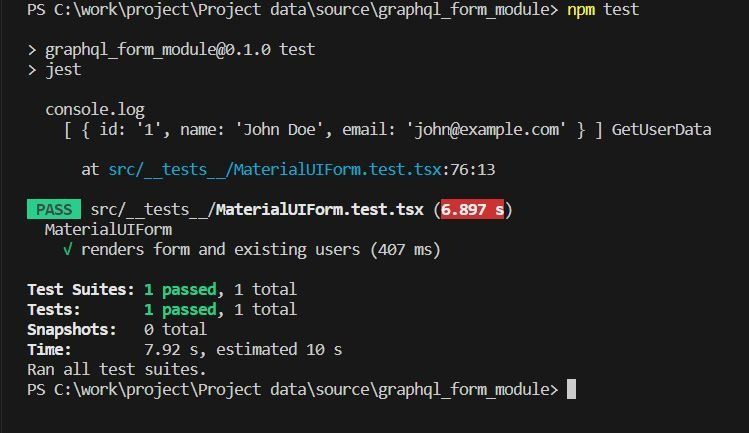
7. As we finish writing test case for the query. Let’s now write a test cases for the ADD_USERS mutation.
1 it("submits the form and updates the UI", async () => {
2    render(
3      <MockedProvider mocks={mocks} addTypename={false}>
4        <MaterialUIForm />
5      </MockedProvider>
6    );
7
8    await waitFor(() => {
9      fireEvent.input(screen.getByTestId("Name"), {
10        target: { value: "john@example.com" },
11      });
12    });
13
14    await waitFor(() => {
15      fireEvent.input(screen.getByTestId("Email"), {
16        target: { value: "Test User" },
17      });
18    });
19
20    await waitFor(() => {
21      fireEvent.click(screen.getByTestId("save-form-data"));
22    });
23    await waitFor(() => {
24      expect(mocks[1]?.result?.data?.addUser?.id).toBe("3");
25    });
26  });
27});
28
8. Run your tests using the following command:
1npm test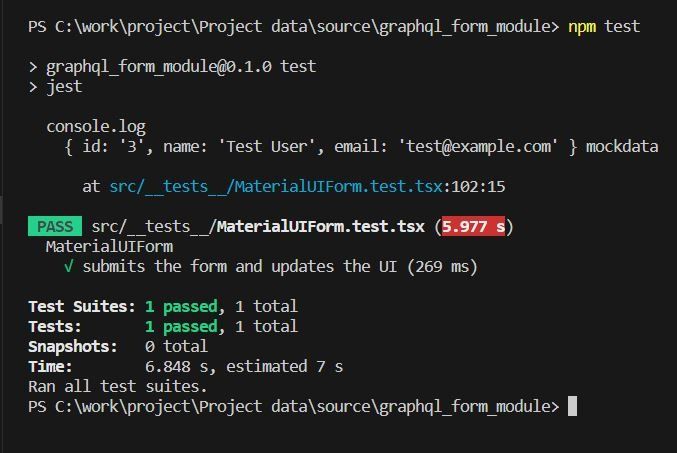
Services Our ReactJS Development Team offers:
- Unlock the potential of ReactJS with our Custom Application Development service. Tailored solutions for your unique needs. Expertise in building responsive, high-performance web apps. Let’s bring your vision to life with ReactJS.
- Integrate seamlessly with the ReactJS API Integration service. Connect your app to external data sources effortlessly. Enhance functionality and the user experience. Let’s bridge the gap between your app and the world!
- Elevate the user experience with ReactJS Single Page Development services. Craft dynamic, responsive apps for seamless navigation and engagement. Drive conversions and stand out in the digital realm. Let’s build your next-gen SPAs!


