Google, Facebook, and OTP Login Integration using Firebase in React : Part 1

Introduction
User authentication is an important feature in all modern web applications. Whether they are e-commerce sites, social platforms, or business applications, web applications need to give users secure and convenient ways to log-in. In this three-part article, we are going to show you how to implement some of the popular logging-in methods by utilizing Firebase, React, TypeScript, and Material-UI. In Part One (this article), we are going to set up Google Authentication, which is the quickest way of allowing users to sign-in with their google account they already have, and by the end of this article we are going to have a working Google Sign-In in your React app.
Why Choose Firebase Authentication?
Firebase Authentication offers several advantages:
- Easy Integration: Minimal setup required
- Multiple Providers: Google, Facebook, Twitter, GitHub, and more
- Security: Built-in security features and best practices
- Scalability: Handles millions of users without additional configuration
- Free Tier: Generous free usage limits
- Real-time Updates: Instant authentication state changes
What will we create?
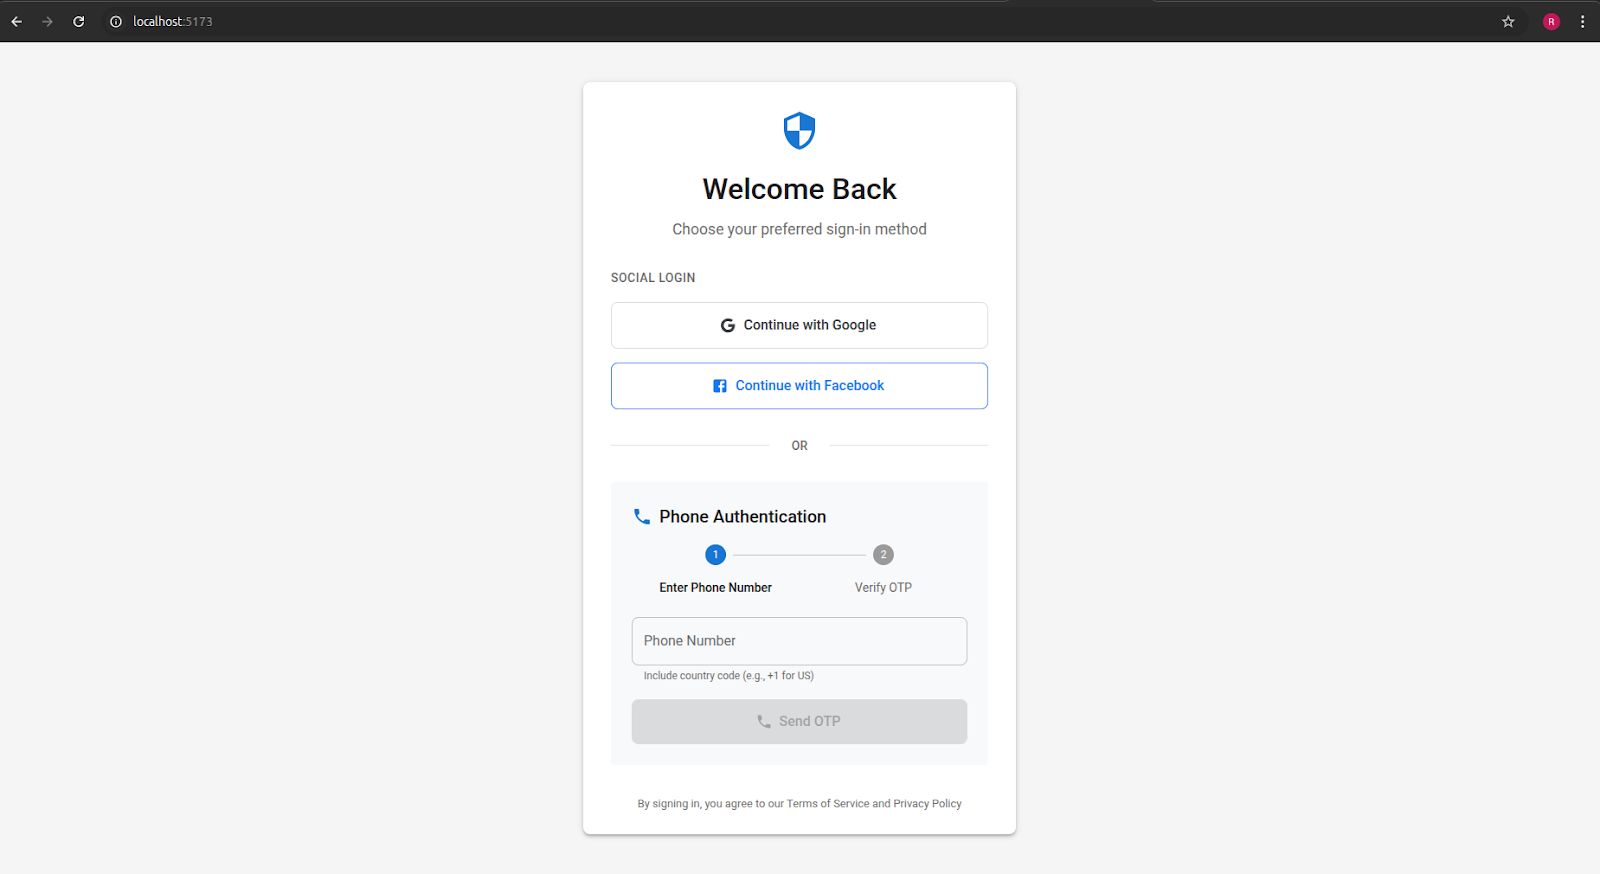
We will create a stunning UI as shown in this video, building it in three parts, so follow along till the end.
Prerequisites
- Node.js (version 16 or higher) - Download here
- npm or yarn package manager
- A Google account for Firebase Console access
- Basic understanding of React and JavaScript/TypeScript
- A code editor like VS Code
Don't worry if you're new to TypeScript or Firebase - we'll explain everything step by step!
Setting Up Firebase
Step 1: Create Your Firebase Project
- Visit the Firebase Console
- Click the "Create a project" button
- Enter a project name (e.g., "my-auth-app")
- Choose whether to enable Google Analytics (recommended for production apps)
- Click "Create project" and wait for setup to complete
Step 2: Enable Authentication Methods
- In your Firebase project dashboard, click "Authentication" in the left sidebar
- Go to the "Sign-in method" tab
- Enable the following providers:
For Google:
- Click on "Google"
- Toggle "Enable"
- Select your project support email
- Click "Save"
Step 3: Get Your Firebase Configuration
- Click the gear icon ⚙️ next to "Project Overview"
- Select "Project settings"
- Scroll to "Your apps" section
- Click the web icon </>
- Register your app with a nickname
- Copy the configuration object (we'll use this later)
Creating the React TypeScript Project
Let's create our project with all necessary dependencies:
1//Create a new react app using the following command
2npm create vite@latest firebase-auth-demo -- --template react-ts
3
4# Navigate to the project directory
5cd firebase-auth-app
6
7# Install required dependencies
8npm install firebase @mui/material @emotion/react @emotion/styled @mui/icons-material @mui/lab
9
10# Start the development server
11npm run dev
Your browser should open automatically showing the default React app. If not, visit - http://localhost:5173.
Folder Structure:
1src/
2├── components/
3│   ├── auth/
4│   │   ├── GoogleAuth.tsx
5│   │   └── AuthenticationContainer.tsx
6│   └── Dashboard.tsx
7├── contexts/
8│   └── AuthContext.tsx
9├── services/
10│   └── authService.ts
11├── config/
12│   └── firebase.ts
13└── App.tsx
Firebase Configuration
Create src/config/firebase.ts:
1import { initializeApp } from 'firebase/app';
2import { getAuth, GoogleAuthProvider} from 'firebase/auth';
3import { getFirestore } from 'firebase/firestore';
4const firebaseConfig = {
5  apiKey: "your-api-key",
6  authDomain: "your-project.firebaseapp.com",
7  projectId: "your-project-id",
8  storageBucket: "your-project.appspot.com",
9  messagingSenderId: "your-sender-id",
10  appId: "your-app-id"
11};
12
13// Initialize Firebase
14const app = initializeApp(firebaseConfig);
15
16// Initialize Firebase Authentication and get a reference to the service
17export const auth = getAuth(app);
18
19// Initialize Firestore
20export const db = getFirestore(app);
21
22// Configure providers
23export const googleProvider = new GoogleAuthProvider();
24
25export default app;
26
Authentication Service
Create src/services/authService.ts:
1import { signInWithPopup, type User, signOut as firebaseSignOut, onAuthStateChanged } from "firebase/auth";
2import { auth, googleProvider } from '../config/firebase';
3
4export interface AuthUser {
5  uid: string;
6  email: string | null;
7  displayName: string | null;
8  photoURL: string | null;
9  phoneNumber: string | null;
10}
11class AuthService {
12  // Google Sign In
13  async signInWithGoogle(): Promise<AuthUser | null> {
14    try {
15      const result = await signInWithPopup(auth, googleProvider);
16      return this.formatUser(result.user);
17    } catch (error) {
18      console.error('Google sign in error:', error);
19      throw error;
20    }
21  }
22
23 // Sign Out
24  async signOut(): Promise<void> {
25    try {
26      await firebaseSignOut(auth);
27      this.cleanup();
28    } catch (error) {
29      console.error('Sign out error:', error);
30      throw error;
31    }
32  }
33
34  // Listen to auth state changes
35  onAuthStateChange(callback: (user: AuthUser | null) => void): () => void {
36    return onAuthStateChanged(auth, (user) => {
37      callback(user ? this.formatUser(user) : null);
38    });
39  }
40
41  // Format user object
42  private formatUser(user: User): AuthUser {
43    return {
44      uid: user.uid,
45      email: user.email,
46      displayName: user.displayName,
47      photoURL: user.photoURL,
48    };
49  }
50export default new AuthService();
Understanding Key Functions
- signInWithPopup()
- This Firebase function opens a popup window for Google OAuth. It handles the entire OAuth flow and returns user credentials upon successful authentication.
- onAuthStateChanged()
- A Firebase listener that monitors authentication state changes. It automatically updates your app when users sign in or out, ensuring consistent state management.
- GoogleAuthProvider()
- Firebase's built-in provider for Google OAuth. You can add specific scopes (like 'email', 'profile') to request additional permissions.
- Context Pattern
- React Context provides global authentication state management, avoiding prop drilling and ensuring any component can access user data.
- Error Handling
- The implementation includes comprehensive error handling for common scenarios:
- Popup blocked by browser
- User cancels sign-in
- Network connectivity issues
- Invalid configurations
- The implementation includes comprehensive error handling for common scenarios:
Authentication Context
Create src/contexts/AuthContext.tsx:
1import React, { createContext, useContext, useEffect, useState, type ReactNode } from 'react';
2import authService, { type  AuthUser } from '../services/authService';
3
4interface AuthContextType {
5  user: AuthUser | null;
6  loading: boolean;
7  signInWithGoogle: () => Promise<void>;
8  signOut: () => Promise<void>;
9}
10
11const AuthContext = createContext<AuthContextType | undefined>(undefined);
12
13export const useAuth = (): AuthContextType => {
14  const context = useContext(AuthContext);
15  if (!context) {
16    throw new Error('useAuth must be used within an AuthProvider');
17  }
18  return context;
19};
20
21interface AuthProviderProps {
22 children: ReactNode;
23}
24
25export const AuthProvider: React.FC<AuthProviderProps> = ({ children }) => {
26  const [user, setUser] = useState<AuthUser | null>(null);
27  const [loading, setLoading] = useState<boolean>(true);
28
29  useEffect(() => {
30    const unsubscribe = authService.onAuthStateChange((user) => {
31      setUser(user);
32      setLoading(false);
33    });
34
35    return unsubscribe;
36  }, []);
37
38  const signInWithGoogle = async (): Promise<void> => {
39    try {
40      await authService.signInWithGoogle();
41    } catch (error) {
42      console.error('Google sign in failed:', error);
43      throw error;
44    }
45  };
46 const signOut = async (): Promise<void> => {
47    try {
48      await authService.signOut();
49    } catch (error) {
50      console.error('Sign out failed:', error);
51      throw error;
52    }
53  };
54
55  const value = { user, loading, signInWithGoogle, signOut };
56  return <AuthContext.Provider value={value}>{children}</AuthContext.Provider>;
57};
Individual Authentication Components
GoogleAuth Component
Step 1: Configure Google OAuth (Additional Setup)
- Visit Google Cloud Console
- Select your Firebase project
- Go to "APIs & Services" → "Credentials"
- Find your OAuth 2.0 Client ID (created automatically by Firebase)
- Add your development URL (http://localhost:3000) to "Authorized origins"
- For production, add your actual domain
Step 2: Create Google Authentication Component
Create src/components/auth/GoogleAuth.tsx:
1// GoogleAuth.tsx
2import { useAuth } from '../../contexts/AuthContext';
3const GoogleAuth: React.FC = () => {
4  const { signInWithGoogle } = useAuth();
5 // here you can manage loading and errors etc.
6
7  const handleGoogleSignIn = async () => {
8    try {
9      await signInWithGoogle();
10    } catch (err: any) {
11      setError(err.message || 'Google sign in failed');
12    }
13  };
14
15  return (
16    <Box>
17      <Button variant=”contained” onClick={handleGoogleSignIn}>
18        Sign in with Google
19      </Button>
20    </Box>
21  );
22};
23
24export default GoogleAuth;
Authentication Container Component
Create src/components/auth/AuthenticationContainer.tsx:
1// AuthenticationContainer.tsx
2import React from "react";
3import GoogleAuth from "./GoogleAuth";
4// import UI elements from material-UI as you need….
5
6const AuthenticationContainer: React.FC = () => {
7  return (
8    <Box display="flex" justifyContent="center" alignItems="center" minHeight="100vh">
9    <Card>
10      <CardContent>
11        <Typography variant="h5" gutterBottom>
12          Sign In
13        </Typography>
14        <GoogleAuth />
15      </CardContent>
16    </Card>
17  </Box>
18  );
19};
20
21export default AuthenticationContainer;
Create Dashboard Component
src/components/Dashboard.tsx:
1import React from "react";
2import { Button, Typography, Box } from "@mui/material";
3import { useAuth } from "../contexts/AuthContext";
4
5const Dashboard: React.FC = () => {
6  const { user, signOut } = useAuth();
7
8  return (
9    <Box display="flex" flexDirection="column" alignItems="center" gap={2} mt={5}>
10      <Typography variant="h5">Welcome, {user?.displayName || "User"}!</Typography>
11      <Button variant="outlined" onClick={signOut}>
12        Sign Out
13      </Button>
14    </Box>
15  );
16};
17
18export default Dashboard;
Updated Main App Component
Update src/App.tsx:
1// App.tsx
2import React from "react";
3import { CssBaseline, CircularProgress, Box, Typography } from "@mui/material";
4import { ThemeProvider, createTheme } from "@mui/material/styles";
5import { AuthProvider, useAuth } from "./contexts/AuthContext";
6import AuthenticationContainer from "./components/auth/AuthenticationContainer";
7import Dashboard from "./components/Dashboard";
8
9const theme = createTheme({ // Customize theme as you need…..});
10const LoadingScreen: React.FC = () => (// You can create this for better user experience….);
11
12const AppContent: React.FC = () => {
13  const { user, loading } = useAuth();
14  if (loading) return <LoadingScreen />;
15  return user ? <Dashboard /> : <AuthenticationContainer />;
16};
17
18const App: React.FC = () => (
19  <ThemeProvider theme={theme}>
20    <CssBaseline />
21    <AuthProvider>
22      <AppContent />
23    </AuthProvider>
24  </ThemeProvider>
25);
26
27export default App;
28
Running the Application
1npm run devYour application will be available at http://localhost:5173 with a complete authentication system supporting Google sign-in method.
Security Best Practices
- Environment Variables: Never commit API keys to version control
- Firebase Security Rules: Implement proper Firestore security rules
- App Check: Enable Firebase App Check for production apps
- Input Validation: Always validate phone numbers and other inputs
- Error Handling: Implement comprehensive error handling and user feedback
Next Steps
This foundation provides a robust Google authentication system. You can extend it by:
- Adding user profile management
- Implementing protected routes
- Adding additional OAuth providers
- Integrating with Firestore for user data
The authentication service and context pattern make it easy to add Facebook and phone authentication, which we'll cover in the next parts of this series.
Also, You can check out the complete code for this part in my GitHub repository here:
https://github.com/Ridham-K/Blog-Code-Examples/tree/main/firebase-auth-demo
Conclusion
This implementation creates a secure production-ready and fully configurable authentication module with various sign-in options. The modular structure allows for easy maintenance and extensibility, and TypeScript gives you the type safety throughout your application. Material UI gives you a professional and accessible user interface that works across all form factors.The authentication workflow accounts for edge cases and user feedback that can be useful in real-world applications.