Introduction:
Gogo Shell is a powerful command-line interface that facilitates the management of OSGi bundles and interaction with the runtime environment. In this blog post, we’ll delve into creating a custom command for the Gogo Shell in Liferay. This allows us to extend its functionality to meet specific requirements.
Prerequisites:
- Liferay 7.4
- Java 11.0.18
- Eclipse (Version 2022-03(4.23.0))
- Liferay IDE 3.0.0 Plugin
Step 1: Project Setup
- Create a new Liferay workspace in Eclipse IDE.
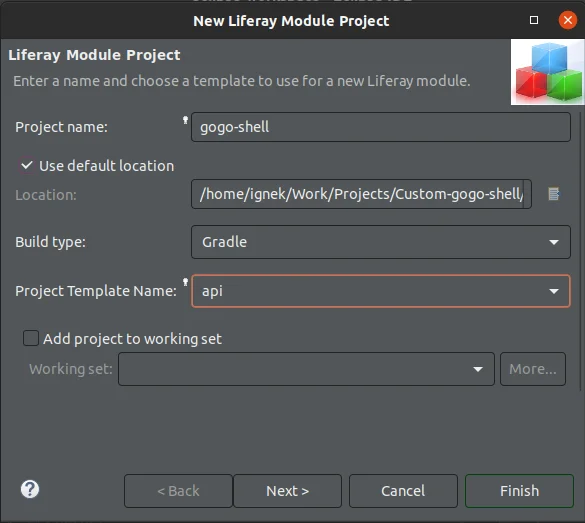
- Create a Liferay module project of type API.
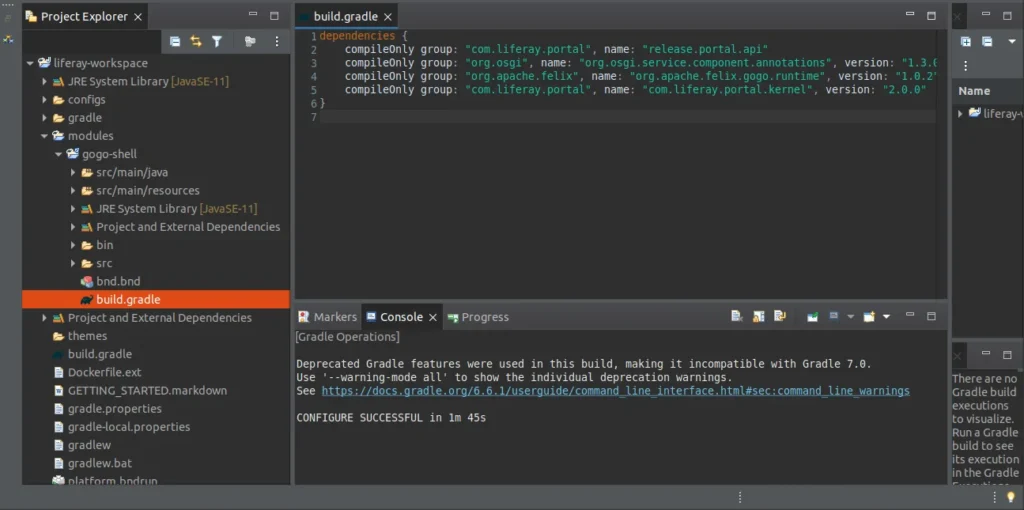
Now add the dependency below in the build.gradle file of this module and build it.
compileOnly group: “org.osgi”, name: “org.osgi.service.component.annotations”, version: “1.3.0” compileOnly group: “org.apache.felix”, name: “org.apache.felix.gogo.runtime”, version: “1.0.2” compileOnly group: “com.liferay.portal”, name: “com.liferay.portal.kernel”, version: “2.0.0” |
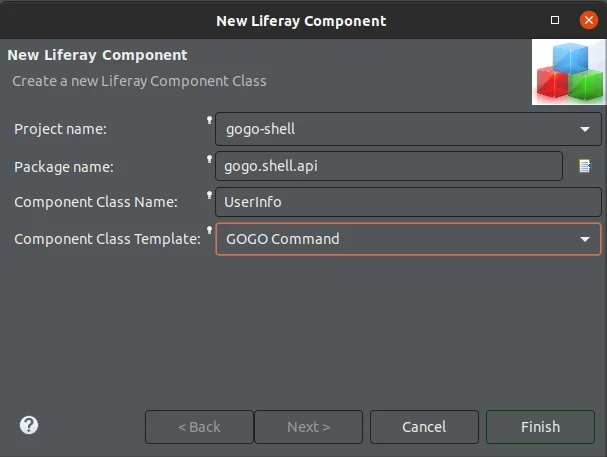
- In this module, create a Liferay component class. Choose the Gogo command as the component class template.
- Package Declaration:
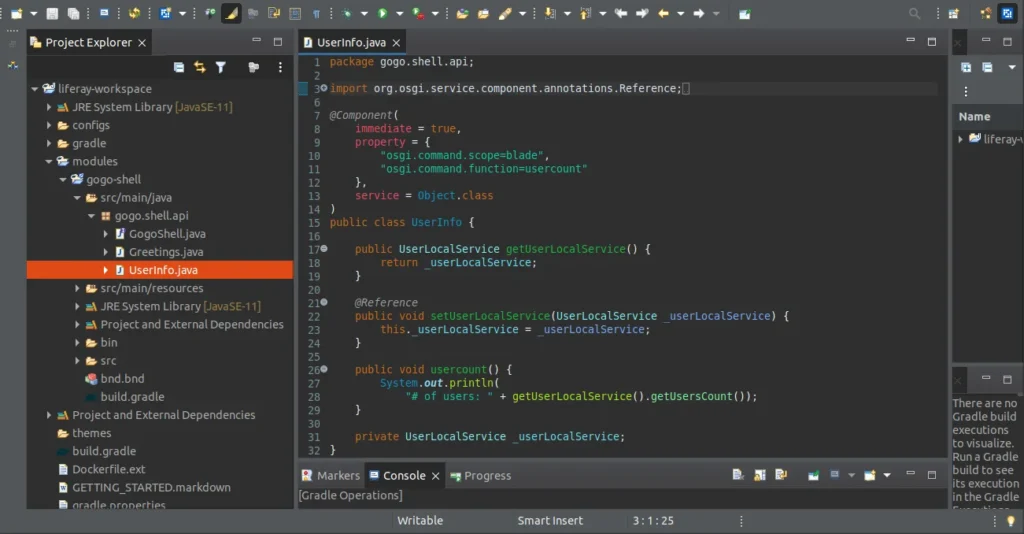
- ‘package gogo.shell.api;’ : Specifies the package to which the class belongs.
- Import Statements:
- Package Declaration:
					import org.osgi.service.component.annotations.Reference;

import com.liferay.portal.kernel.service.UserLocalService;

import org.osgi.service.component.annotations.Component;
- Reference : For dependency injection.
- UserLocalService : For user-related operations.
- Component : For declaring the class as an OSGi component.
- Class Declaration:
- ‘@Component’ : Annotates the class as an OSGi component with specified properties.
- immediate = true: Specifies immediate component activation.
- property: Declares Gogo Shell properties, such as the command scope (blade) and the function (usercount) which we create in our class.
- service = Object.class: Specifies the class as an OSGi service.
- ‘@Component’ : Annotates the class as an OSGi component with specified properties.
- Class Members:
- getUserLocalService(): Getter method for accessing the injected UserLocalService.
- setUserLocalService(UserLocalService _userLocalService): Method annotated with @Reference for injecting UserLocalService.
- usercount(): Custom Gogo Shell command function that prints the number of users using getUserLocalService().getUsersCount().
- Class Declaration:
Now, you have a custom command template. If you wish to use it as is, build your module and deploy it to your Liferay instance.
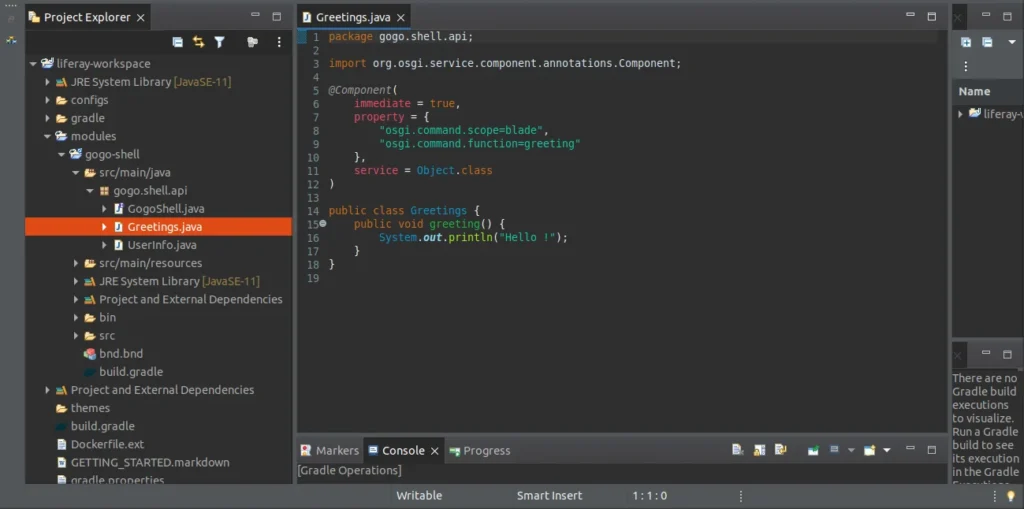
- If you want to customize it, create a public Java class and write below code in it.
					package gogo.shell.api;
import org.osgi.service.component.annotations.Component;
@Component(immediate = true, property = {“
    osgi.command.scope = blade”,
    “osgi.command.function = greeting”
}, service = Object.class) public class Greetings {
    public void greeting() {
        System.out.println(“Hello!”);
    }
}
Build your module and deploy it to your Liferay instance.
Step 2: Configure Gogo Shell- Add the following lines to Liferay’s ‘portal-ext.properties’ file and restart your server.
					module.framework.properties.osgi.console=0.0.0.0:11311
module.framework.properties.osgi.console.use.ip=false
- Open your terminal and execute the following commands:
| telnet localhost 11311 |

- Now, run custom commands in the Gogo Shell:
					blade:UserCount

blade:Greeting

Conclusion:
In this blog post, we have demonstrated how to create a custom command for the Gogo Shell in Liferay 7.4. By following the detailed steps, you can set up your project, create a Liferay module, and define a custom Gogo Shell command to meet your specific requirements. The ability to extend the functionality of Gogo Shell commands allows for better management of OSGi bundles and interaction with the runtime environment. With your custom command now in place, you can efficiently execute tasks and streamline your Liferay development process. Happy coding!
