Introduction
Liferay DXP supports several virtual instances under one installation so that different portals share the same application server and OSGi container. Each virtual instance contains its own domain, data, and configuration so is functionally independent of others. Configuration in Liferay occurs at various scopes: the system scope has implications for all virtual instances, whereas instance scope has implications for a particular one. When there is only a single virtual instance, no practical difference exists between the two scopes. Virtual instances work well when you have a need for multiple, isolated portals without creating new servers or installations.
Prerequisites
Liferay DXP/Community
Environment Requirements :
Java
Liferay
Need of virtual instance
In a practical sense, imagine that you have a Liferay server that is already running one site, and you now want to create another site. You don’t need to install Liferay again to get another site separate from your original from the first installation. You can simply create a new virtual instance. Each virtual instance has its own domain name & users, pages, and content, but they all live on the same server and database back end. As such, you can get multiple websites running while investing minimal time developing and managing the two versions of your site. All management of virtual instances can be done via the Control Panel under Configuration.
Adding virtual Instance :
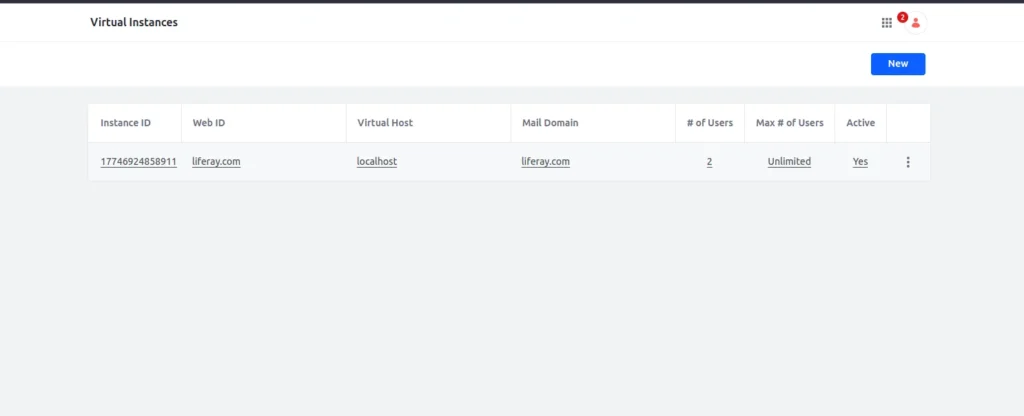
- To add virtual instance in Liferay to need to go to Control Panel -> System -> Virtual Instance.

- Click on the New button.

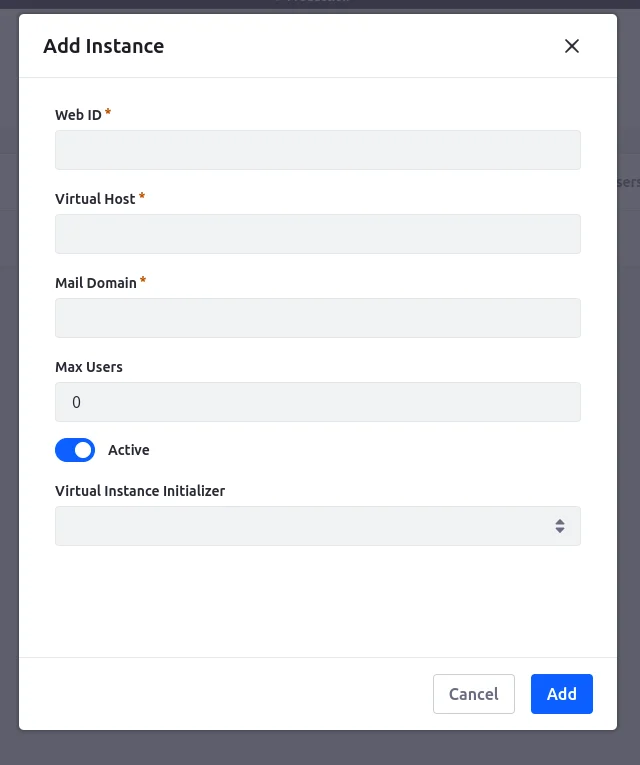
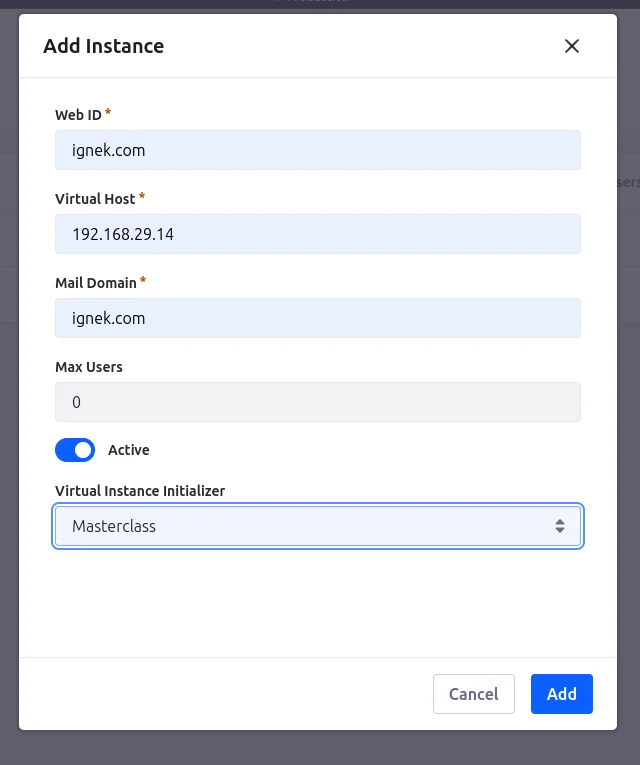
- A Pop up Screen will open. Fill the information as follows to create a new instance :
- Web ID : This is simply Instance ID in human readable form, We can add domain names in this field.
- Virtual Host : Here we set DNS(Domain name Service) So to reach this instance, the user hits this Domain.
- Mail Domain : Enter the Domain name of the mail host server. Liferay will use this to send mail.
- Max users : Enter the max count of the user account to allow for users. Set 0 for unlimited user
- Active : set this to make instances Active and Inactive. Inactive virtual instances are not accessible to anyone, even administrators.
- Virtual Instance Initializer : Choose the initial site name to use instance after creating instance.
- For demonstration purposes I am taking my local network IP for virtual host.

- After clicking the add button it will take some time to initialize the instance.
- To access the instance simply type your local IP address or DNS in the browser URL bar.
- For Example: http://192.168.29.14:8080/

- As you can see in the above screenshot for my instance.
- For first login use test@mailDomainName.com and Password test, as Liferay use for default for User.
Conclusion
Virtual Instances in Liferay offer an efficient way to host multiple isolated sites on a single server without needing multiple installations. Each instance maintains its own users, domain, and data, making it ideal for organizations managing multiple clients, brands, or portals. Using the Control Panel, you can easily configure and manage each instance independently. This approach ensures scalability, flexibility, and resource optimization within a unified Liferay environment.


