Introduction:
Redis is an open-source, in-memory data structure store that can be used as a database, cache, and message broker. It’s known for its speed, versatility, and ability to handle large volumes of data.
Redis for session management in Liferay can significantly enhance the performance of your application, especially for large-scale deployment. In this blog, we will configure Redis as a session store for Liferay. By default, Liferay stores session data in the application server’s memory. While this approach works well for small deployments, it can become a bottleneck as the application scales. Redis offers several advantages for session management:
- Improved performance: Redis stores session data in memory, resulting in faster read and write operations compared to disk-based storage.
- Scalability: Redis can be easily scaled horizontally to handle increased load by adding more Redis nodes to the cluster.
- High Availability: Redis supports replication and clustering, ensuring high availability and fault tolerance.
Prerequisites:
- Liferay 7.4
- Ubuntu 20.04+
- Eclipse 03-2022+
Redis Setup
Step 1: Update System
- Make sure your system is updated if not then execute the below command in your terminal. This will update your apt package list.
| sudo apt update |
Step 2: Install Redis server
- Just paste the following command in your terminal to install the Redis server.
| sudo apt install redis-server |
Step 3: Configure redis.config
- Open the configuration file using the following command:
| sudo nano /etc/redis/redis.conf |
- Now configure a supervised directive.
- By default, It is set to no, but here in Ubuntu, we configure it under the supervision of systemd.
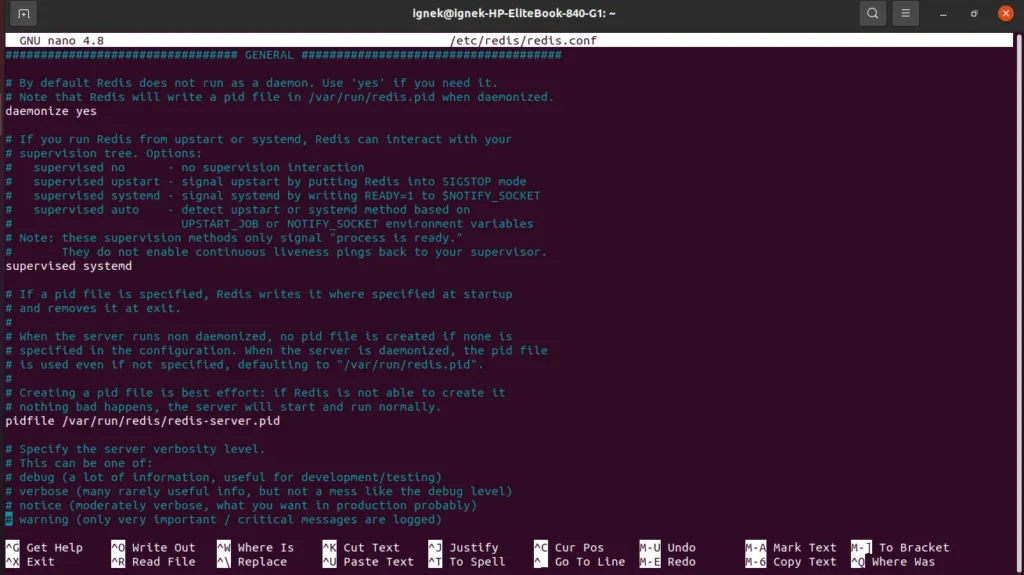
- Supervised systemd is a system management daemon that monitors and controls processes, ensuring they run continuously and reliably, commonly used for managing services in Linux environments.
- Save the configuration and exit.
- Restart the Redis service after the above configuration using the following command.
| sudo systemctl restart redis.service |
- After restarting the service we will check if the Redis server is active or not using the following command.
| sudo systemctl status redis |

- Access Redis logs by navigating to the redis-server.logs using the following command. By accessing Redis logs you can gain insights into resource usage, identify potential bottlenecks, and ensure the smooth operation of Redis-based applications.
| sudo cat /var/log/redis/redis-server.log |
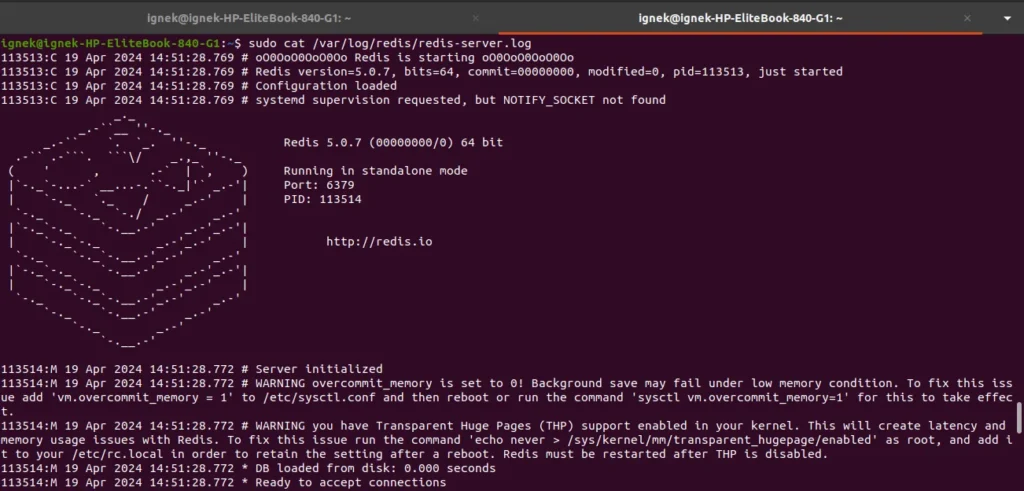
- Redis-cli enables operations like setting/getting keys, executing commands, monitoring performance, and debugging Redis instances, offering a convenient way to manage Redis databases without the need for a graphical interface. Additionally, redis-cli supports scripting, pipelining, and clustering features, enhancing its versatility for various Redis use cases.
- Access redis-cli to interact with the Redis instance directly from the command line.
| redis-cli |
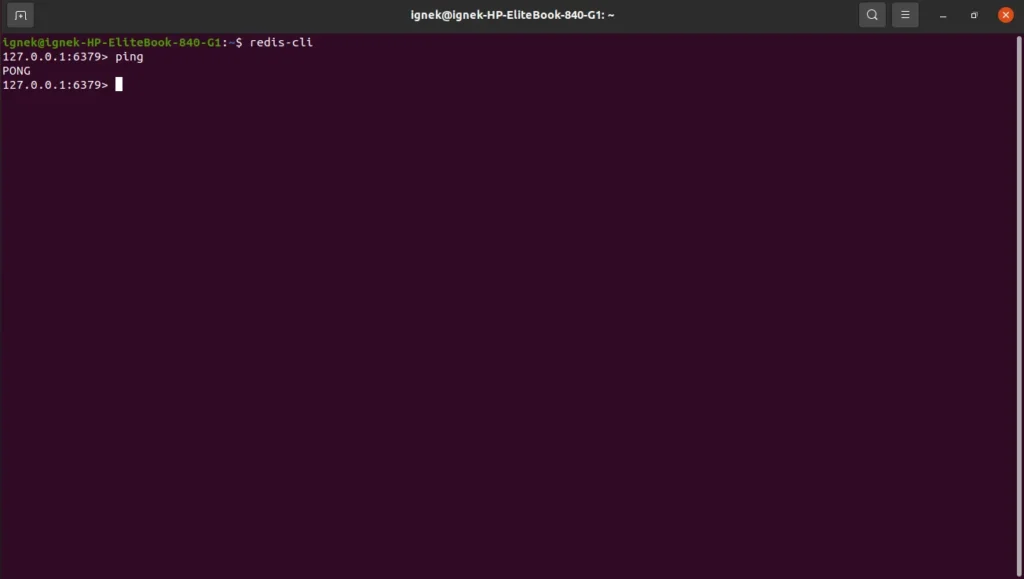
Redis server setup is done now. We will extend Radisson session manager in Liferay to achieve session management in Liferay using Redis.
Extending Redisson Session Manager
The Redisson Session Manager is a component of Redisson, a Java client library for Redis. It allows developers to manage user sessions in Java web applications by storing session data in Redis. This approach offers advantages such as scalability, fault tolerance, and improved performance compared to traditional session management methods. Configure the Liferay server and perform the following steps.
Step 1: Configure the root file.
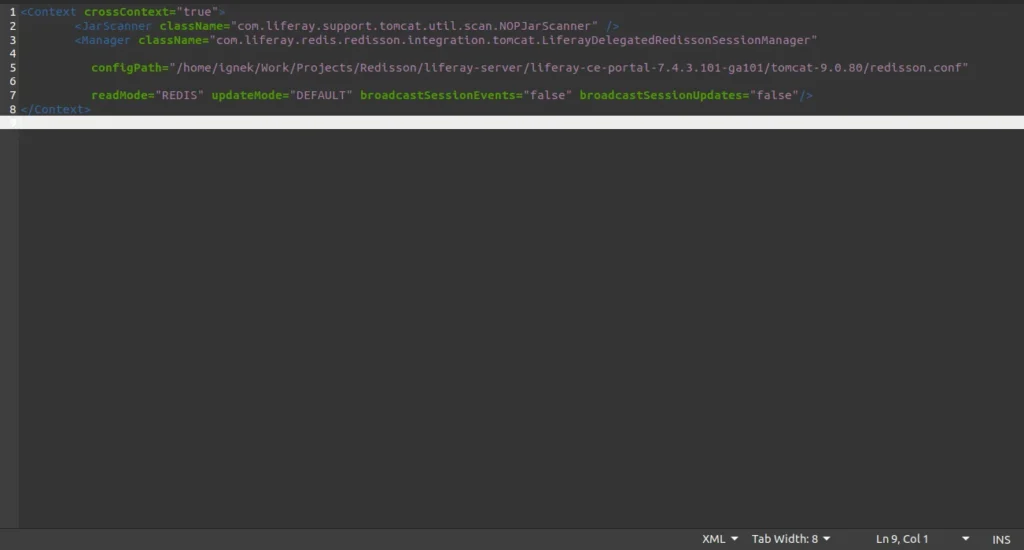
- The ROOT.xml file is the main entry point for all requests. This file is used to define settings and configurations specific to the root context of the Liferay portal.
- Navigate to your Liferay server’s $TOMCAT_HOME now navigate to the /conf/Catalina/localhost/ROOT.xml and add the following configuration.
					<Manager className="com.liferay.redis.redisson.integration.tomcat.LiferayDelegatedRedissonSessionManager"

configPath="${catalina.base}/redisson.conf"

readMode="REDIS" updateMode="DEFAULT" broadcastSessionEvents="false" broadcastSessionUpdates="false"/>
Step 2: Create a redisson configuration file.
- Now create a redisson.conf file in $CATALINA_BASE and add the following content for configuring redission with Redis address.
					{

    "singleServerConfig":{

        "address": "redis://127.0.0.1:6379"

    },

    "threads":0,

    "nettyThreads":0,

    "transportMode":"NIO"

}
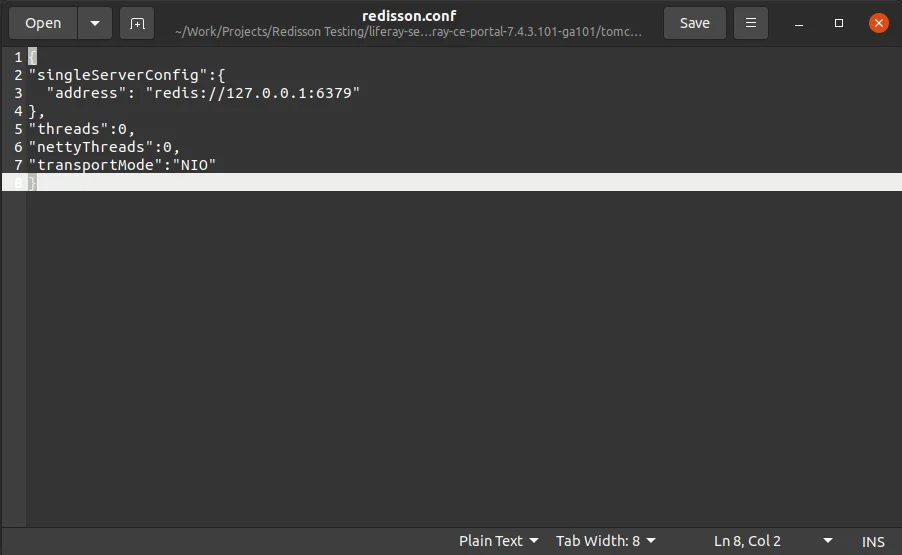
- singleServerConfig: This section defines configuration settings for connecting to a single Redis server,
- address: This specifies the address of the Redis server, here we specify 127.0.0.1 IP and 6379 port.
- threads: A value of 0 typically means that Redisson will automatically determine the optimal number of threads based on available system resources.
- nettyThreads: Specifies the number of threads used by the Netty library, which Redisson relies on for network communication. Here value of 0 suggests automatic adjustment by Redisson.
- transport mode: Sets the transport mode for communication with the Redis server. “NIO” indicates the use of non-blocking I/O operations for improved efficiency and scalability in handling multiple connections concurrently.
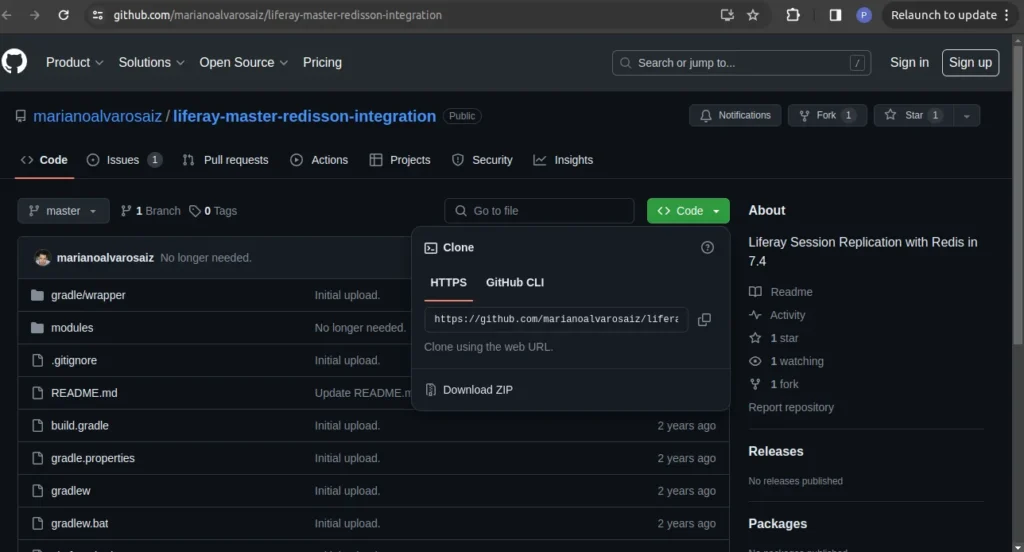
- Now navigate to this link https://github.com/marianoalvarosaiz/liferay-master-redisson-integration.git
- Click on the code and download the zip file as shown below.
- Set up a new Liferay server.
- Create a Liferay workspace project in Eclipse and configure the following modules.
- redis-redisson-integration-tomcat
- This module provides the necessary integration between Redisson and Tomcat, the servlet container commonly used in Java web applications.
- It includes components and configurations specific to Tomcat, allowing Redisson Session Manager to seamlessly manage sessions within the Tomcat environment.
- This module typically consists of classes and configurations tailored for Tomcat’s session management mechanism, ensuring compatibility and efficient operation within the Tomcat container.
- redis-redisson-integration
- This module contains the core functionality for integrating Redisson with Java web applications for session management.
- It includes general-purpose components and configurations for connecting to Redis, storing and retrieving session data, and managing the session lifecycle.
- While the “redis-redisson-integration-tomcat” module focuses on Tomcat-specific integration, the “redis-redisson-integration” module provides the foundational components necessary for session management regardless of the servlet container used.
- redis-redisson-integration-tomcat
- Now deploy these modules it will generate redis-redisson-integration.jar and redis-redisson-integration-tomcat.jar files, Copy those files and put them in your project’s liferay-server as per the below guidelines.
- Now place redis-redisson-integration.jar in following directory $TOMCAT_HOME/webapps/ROOT/WEB-INF/shielded-container-lib
- Create a Liferay workspace project in Eclipse and configure the following modules.
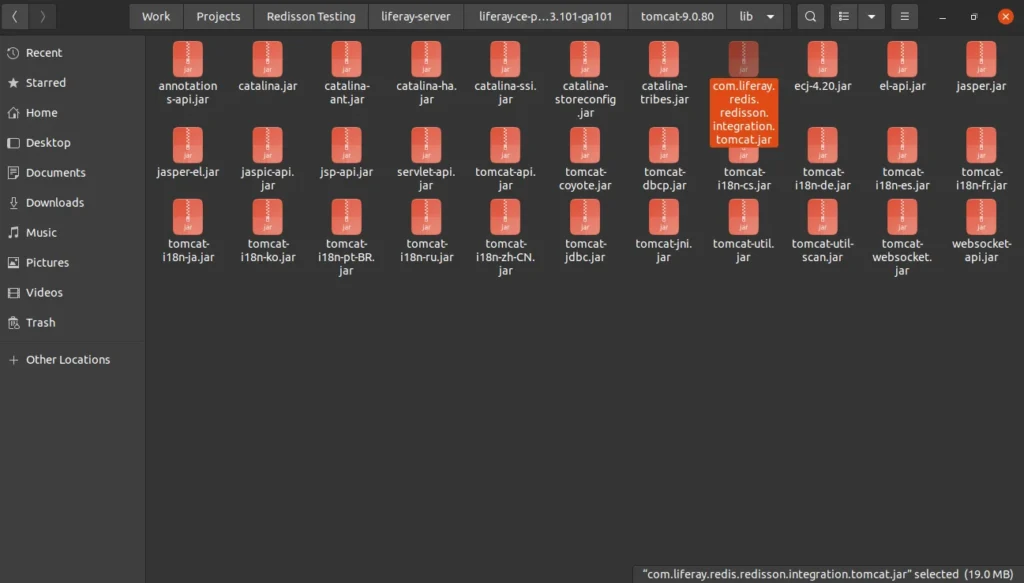
- And redis-redisson-integration-tomcat.jar in following directory $TOMCAT_HOME/lib
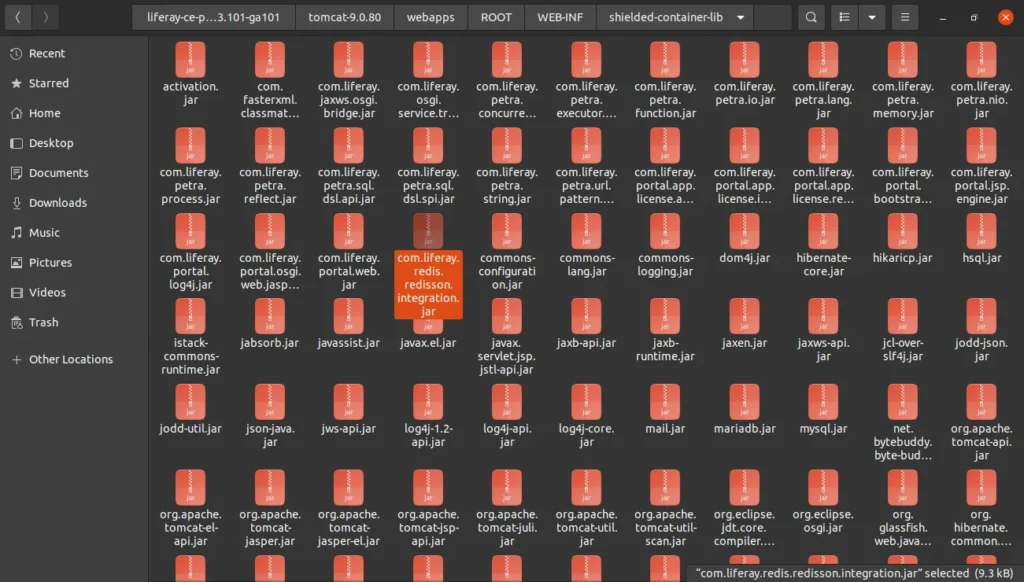
Note: Before starting the Liferay server make sure the redis-server is active. If the redis-server is active and there is no error in it then start the liferay server.
Conclusion:
Configuring Redis as a session store in Liferay 7.4 can significantly enhance the performance and scalability of your application. By leveraging Redis’s in-memory data storage and Redisson Session Manager, you can achieve faster session read/write operations, improved fault tolerance, and better resource management. This guide provides a comprehensive walkthrough for setting up Redis on Ubuntu 20.04, integrating it with Liferay, and deploying the necessary modules for seamless session management. Following these steps ensures your Liferay application is optimized for high performance and can handle increased loads efficiently.