Configure SAML in Liferay DXP

Introduction:
SAML (Security Assertion Markup Language) is a widely used standard that allows secure Single Sign-On (SSO) and Single Log-Off (SLO) across business applications. By using SAML, organizations can simplify authentication, lessen password fatigue, and improve security with centralized identity management. The protocol works by exchanging authentication and authorization data between an Identity Provider (IdP) and a Service Provider (SP). In this system, the IdP verifies user identities, while the SP provides access to protected resources. Liferay can be deployed flexibly as either an IdP or an SP, making it an effective solution for implementing enterprise-level authentication.
Prerequisites:
- Liferay DXP
Environment Requirements:
- Java
- Liferay
Purpose:
The purpose of configuring SAML in Liferay DXP is to provide centralized authentication and improve security across enterprise applications. By enabling Liferay to act as an IdP or SP, organizations can:
- Simplify user login experiences with SSO.
- Reduce password fatigue and security risks.
- Ensure secure communication between systems using signed and encrypted assertions.
- Enhance productivity by reducing repetitive authentication.
Use Cases:
- Enterprise Single Sign-On (SSO):
Employees log in once through the Identity Provider (e.g., Liferay IdP) and gain secure access to multiple applications acting as Service Providers.
2. Cross-application Authentication:
Integrating Liferay with third-party applications (e.g., HR systems, CRM platforms) using SAML for seamless authentication.
3. Secure Identity Management:
Using centralized identity verification through Liferay as IdP to ensure compliance and improve security.
4. Multi-instance Integration:
Supporting multiple Liferay DXP instances across departments or clients, where one serves as IdP and others as SPs.
5. Single Log-Off (SLO):
Logging out from one application automatically ends sessions across all connected Service Providers.
Steps to Configure SAML:
To configure SAML, we require two Liferay DXP instances: one for the Identity Provider and another for the Service Provider.
To create a Liferay virtual instance, please click here.
To configure SAML in Liferay DXP, we need to go to Control Panel -> Security -> SAML Admin

There are three tabs in the SAML admin
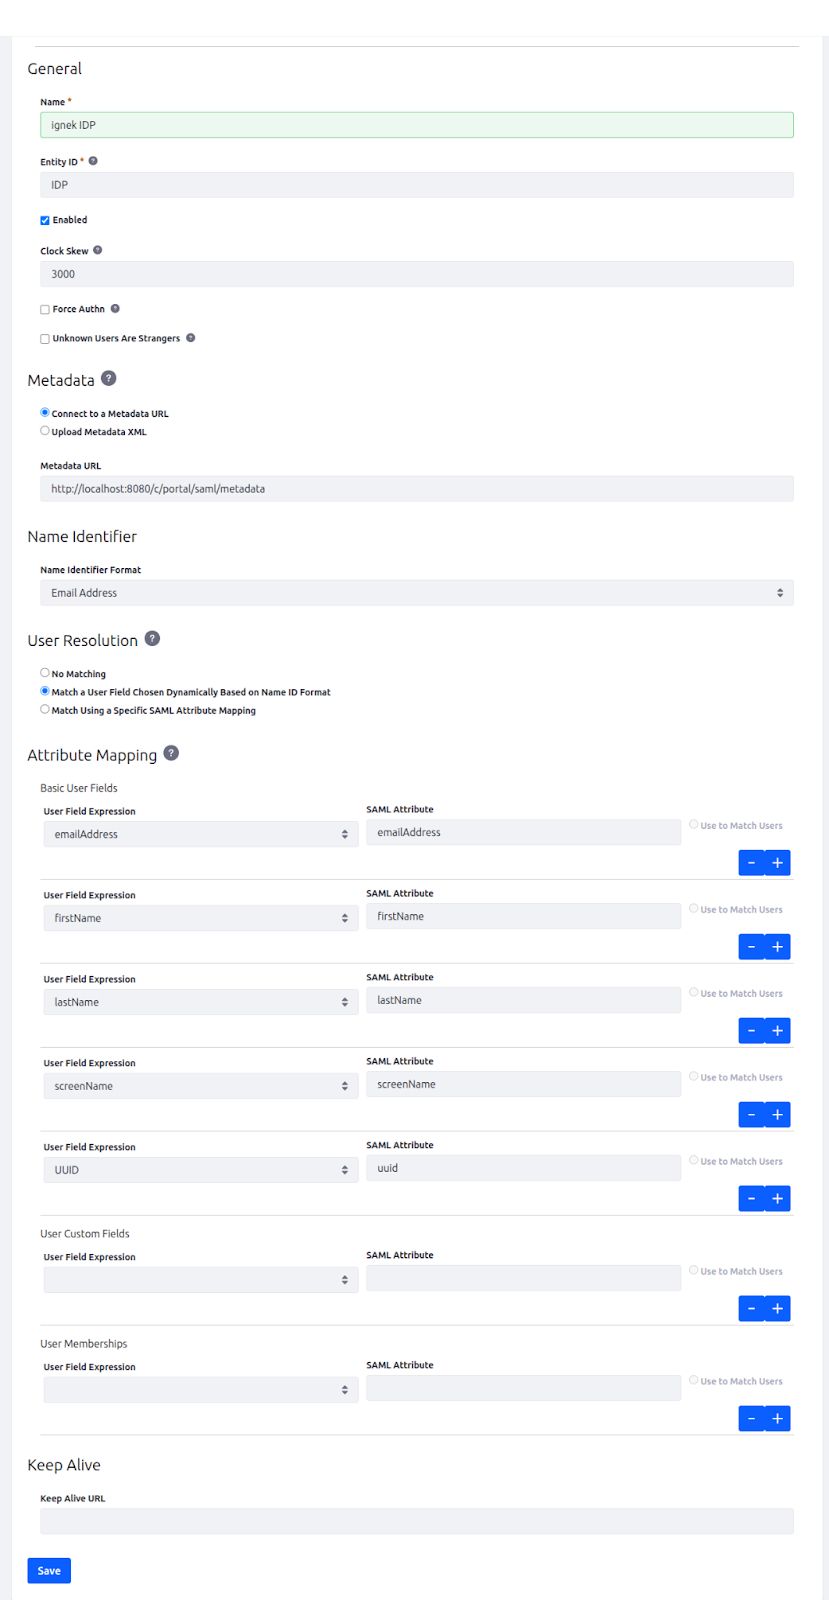
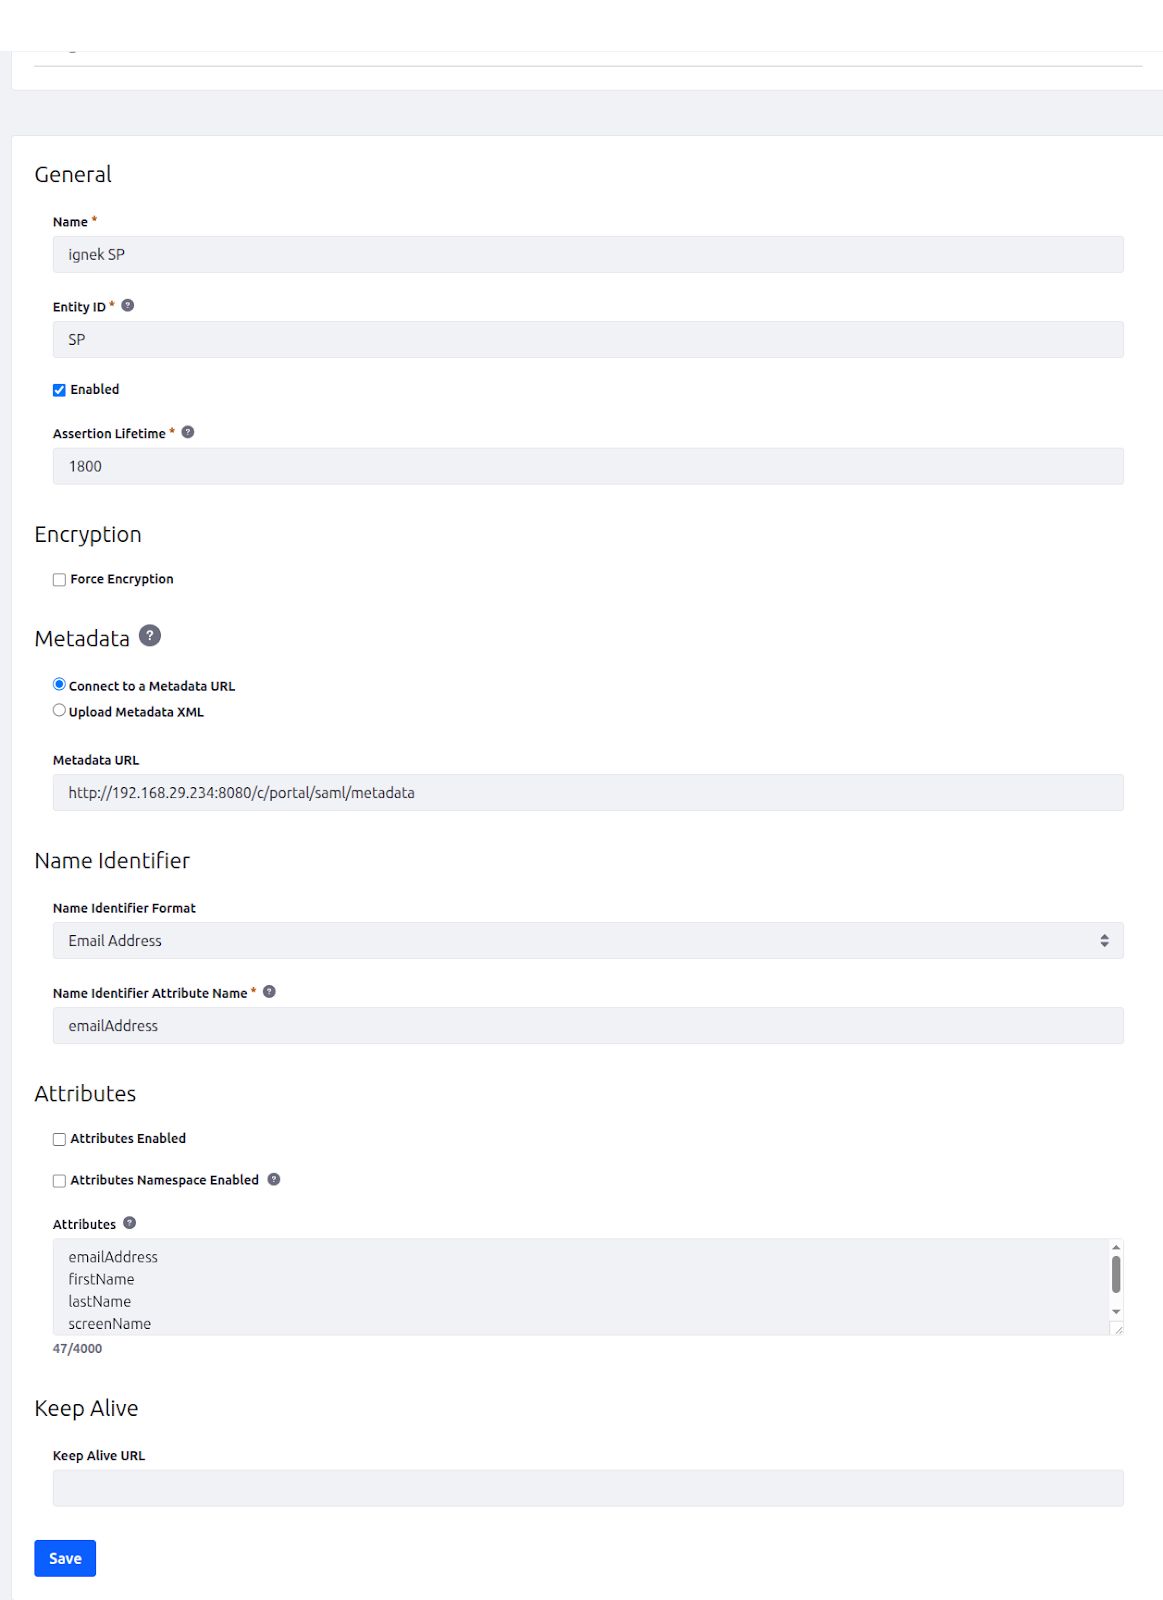
General: Enables or disables the SAML SP or IdP and manages the required keystore.
Service/Identity Provider: Manages basic and advanced settings for the SP or IdP based on the chosen SAML role.
Identity/Service Provider Connection: Manages connections to the SP if the SAML role is Identity Provider or to the IdP if the SAML role is Service Provider. There can be multiple SP/IdP connections.
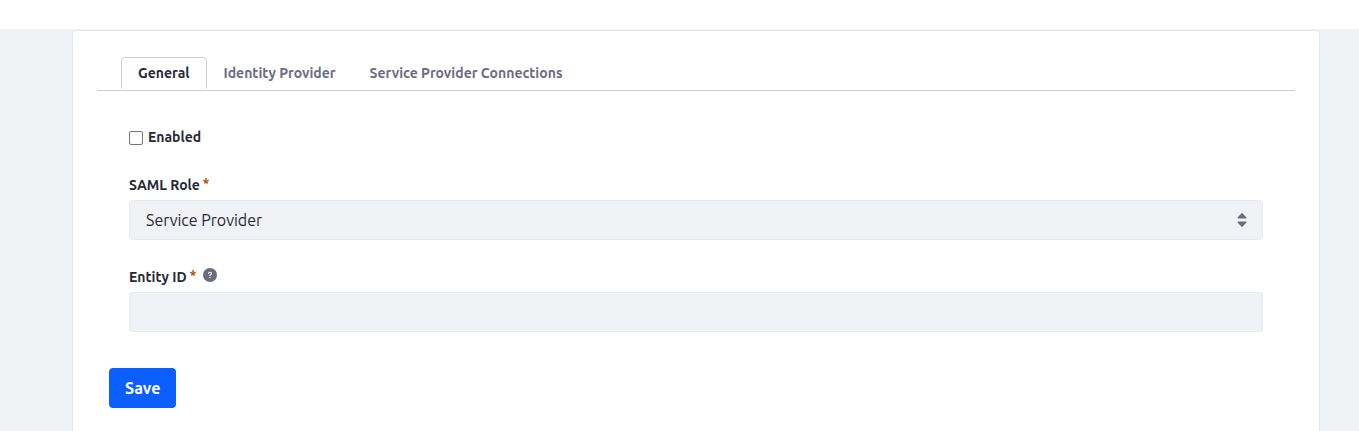
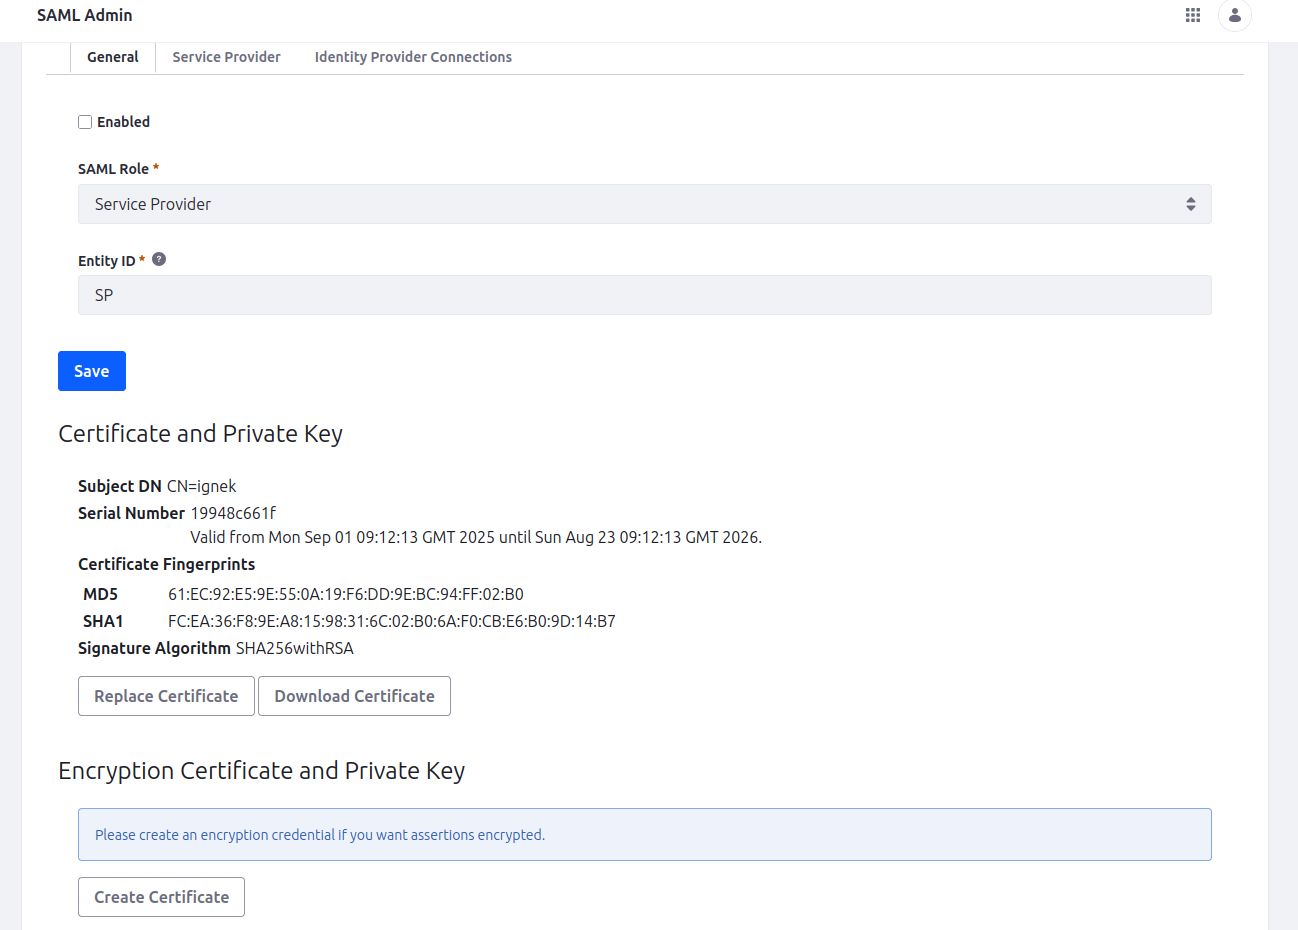
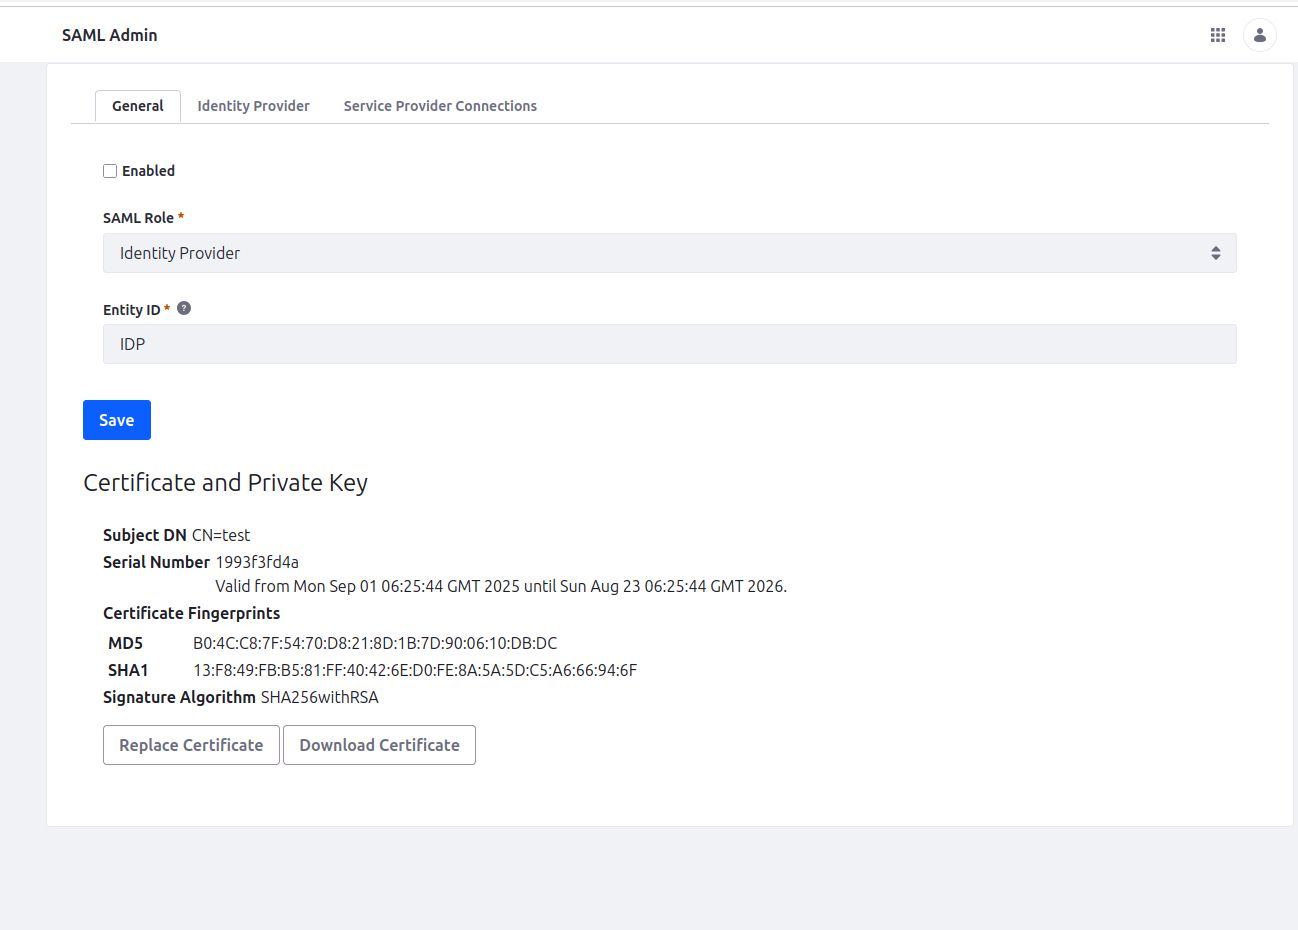
General Tab:-
Enabled: Check this box to turn on SAML authentication once you have everything set up.
SAML Role: Select the SAML role, either Identity Provider or Service Provider.
Entity ID: This is the unique identifier for this SAML entity (IdP or SP). It can be up to 1024 characters long.
The Certificate and Private Key section shows up after the first save. It displays the key created when you set up your key store in system settings. Here, you can replace the certificate by creating a new one or importing one you made elsewhere. You can also download the certificate to use in another location.
Service Provider:-
- Choose the Service Provider role from the SAML Role field and provide the entity name.
- Click on the Save button. After saving, it will show the Create Certificate button.
- Click on the Create certificate button, it will open a form, fill in the required fields, and the Password field.
Keep in mind that the keystore offers two storage choices: Documents and Media storage and file system storage, which is the default. The certificate is fingerprinted and self-signed using MD5 and SHA256, and it is encrypted by default using the SHA256 algorithm.
4. Click on the save button.
An encryption certificate can also be created. For encrypting assertions, this is a different key. You must create a key if you wish to encrypt assertions. The process is identical to the one used to generate your certificate in step 2 above.
5. Enable the service provider and save again.
Identity Provider:-
Follow the same steps as we have created a service provider.
Enable the identity provider and save
Configuring the Service Provider:-
Require Assertion Signature: Check this box to require SAML assertions to be signed individually by the IdP, in addition to signing the entire SAML message.
Clock Skew: Set the tolerance for the time difference between the SP and the IdP in milliseconds.
LDAP Import Enabled: Check this box to import user attributes from the LDAP servers listed in this SP’s instance settings.
Sign Authn Requests: If set up as an SP, digitally sign Authn requests.
Sign Metadata: Sign the metadata sent to peer SAML entities.
SSL Required: Check this box to require SSL for all SAML message transfers. All URLs in metadata sent to peers will use the HTTPS protocol.
Allow showing the login portlet: Allow the login portlet to appear when there is no SAML IdP matched to the login request. In this case, users log in locally to Liferay DXP.
Configuring the Identity Provider:-
When you select your instance as an identity provider, then this tab shows.
Sign Metadata: Sign the metadata sent to peer SAML entities.
SSL Required: Check this box to require SSL for transferring all SAML messages. All URLs in the metadata sent to peers will use the HTTPS protocol.
Require Authn Request Signature: Check this box to require each Authn request to be signed by the sending Service Provider. In most cases, you should enable this.
Session Maximum Age: The duration in seconds that the SSO session, managed by the IdP, lasts.
Session Idle Timeout: The duration in seconds that an idle session lasts before it expires.
Add identity provider in service provider instance:-
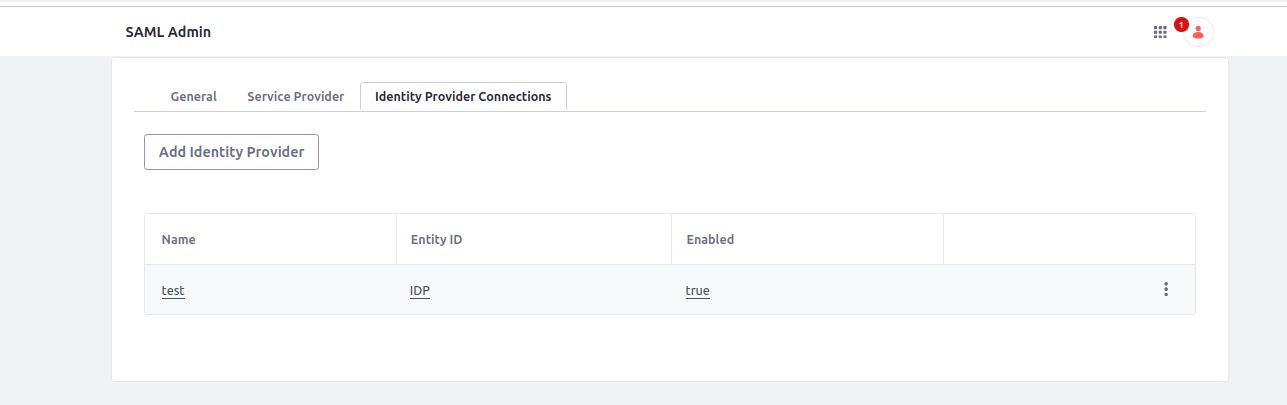
Click on the Add identity provider button.
- Name: Liferay SP
- Entity ID: ID of the service provider
- Metadata URL: http://[SP host name]/c/portal/saml/metadata (test this URL first)
Configuring the Identity Provider:-
Sign Metadata: Sign the metadata sent to peer SAML entities.
SSL Required: Check this box to require SSL for the transfer of all SAML messages. All URLs in the metadata sent to peers will use the https protocol.
Require Authn Request Signature: Check this box to require each Authn request to be signed by the sending Service Provider. In most cases, you should enable this option.
Session Maximum Age: The length of time in seconds the SSO session, managed by the IdP, lasts.
Session Idle Timeout: The length of time in seconds an idle session lasts before it expires.
Add service provider in identity provider instance:-

Click on the add service provider button.
- Name: Liferay IDP
- Entity ID: ID of the service provider
- Metadata URL: http://[SP host name]/c/portal/saml/metadata (test this URL first)
Testing the SAML connection:-
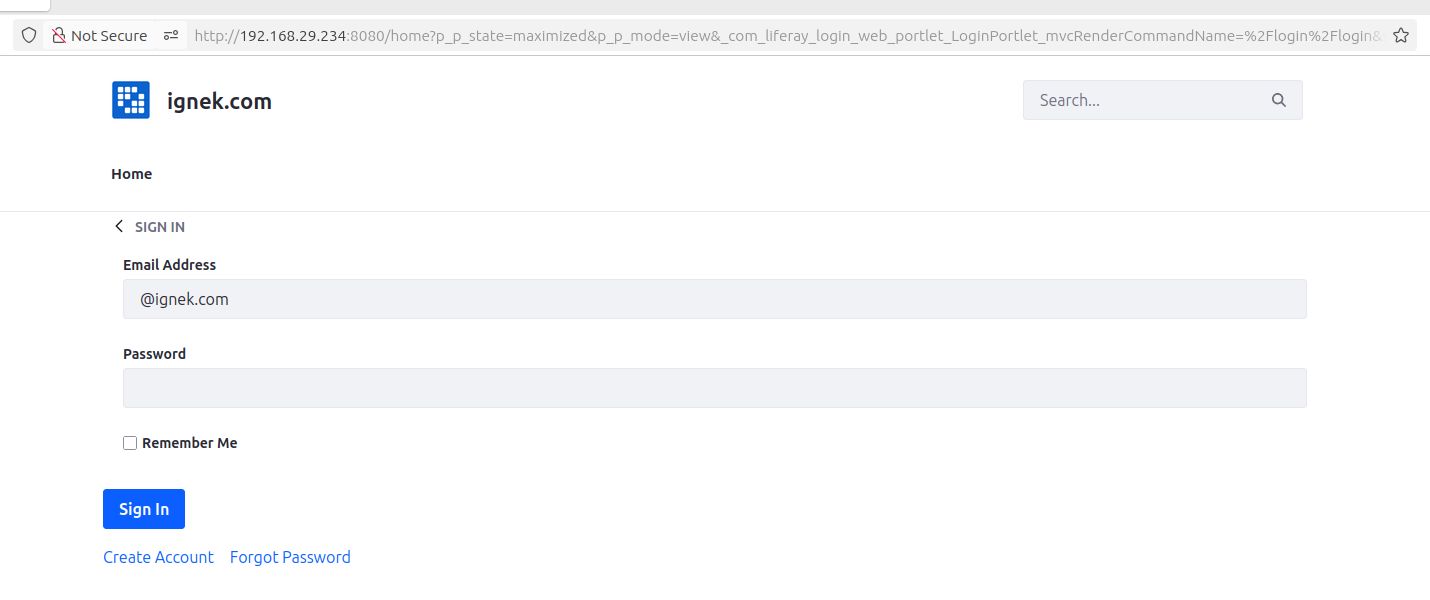
- Create a new user in your identity provider, excluding your admin user.
- You should log in at least once from the identity provider, so that your user configurations like (changing password, reminder question, etc.)
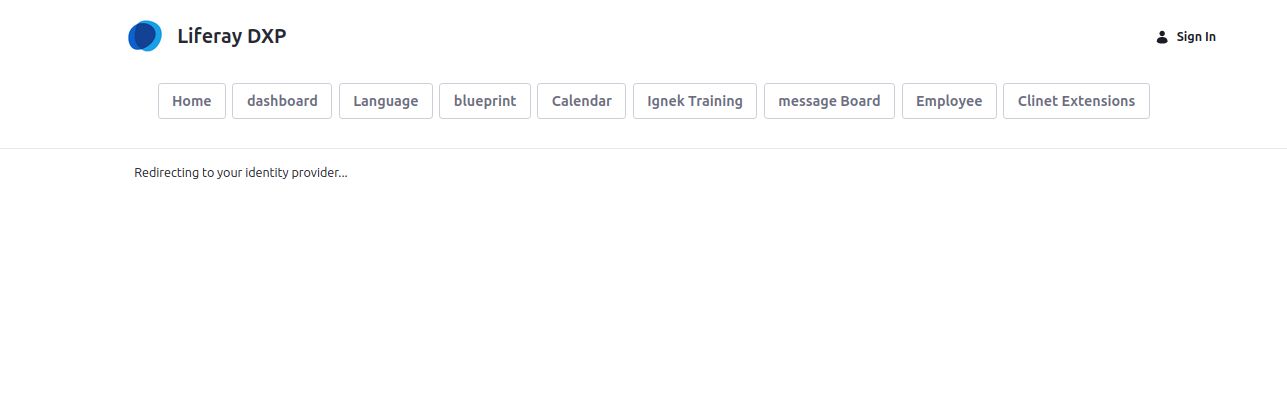
- Now we can log in from the service provider with the login credentials of your new user of identity provider. A new user is created in your service provider with the data of the same user in the identity provider, and you are logged in with the same identity provider.
- Once you are logged in to your service provider, then in the same browser you can log out and login many times with single sign on (SSO).
- If you have many service providers logged in a single browser then you can single log off (SLO)here mean if you are logged out from one service provider, then you're all the service provider logged out automatically from the browser.
SAML common setting descriptions:-
- Clock Skew: Set the tolerance in milliseconds between SP and IdP.
- Force Authn: Whether the IdP should force re-authentication regardless of context.
- Unknown Users are Strangers: Stranger behavior is defined in Control Panel → Instance Settings → Platform → User Authentication → General.
- Metadata: Provide a URL for the Service Provider metadata XML file or upload the file manually. If you give a URL, the system retrieves the XML file and checks for updates regularly. You can set the update interval in System Settings using the Runtime Metadata Refresh Interval property, which defines the number of seconds. If fetching the metadata XML file from the URL fails, you cannot enable the Service Provider connection. If the Identity Provider server cannot access the metadata through the URL, you can upload the XML file manually. In this situation, the metadata XML file will not update automatically.
- Name Identifier: Select a Name Identifier Format from the options listed in section 8.3 of the SAML specification. Set this according to the expectations of the Service Provider. For Liferay Service Providers, any choice other than email address means that the Name Identifier refers to the screen name. The formats hold no special meaning for Liferay Identity Providers. The NameID value is defined by the Name Identifier attribute.
- User Resolution: Choose from No Matching, Match a User Field Chosen Dynamically Based on Name ID Format, or Match Using a Specific SAML Attribute Mapping. This method determines how users are located or created. For instance, if you select based on Name ID Format and the Name ID Format is email address, the method matches by email address.
- Attribute Mapping: Choose a field from Liferay to match with a SAML attribute. You can select several fields from Liferay’s User object or any custom fields you have created for it. These attributes get updated from the SAML assertion when a user logs in. By default, the NameID and Service Provider are tied to a user once the emailAddress is matched at least once. Bindings are preferred and verified before user matching takes place. This ensures that users whose email addresses have changed can still log in, and it allows for corrections through SAML attribute mappings. The Liferay attributes available for mapping include emailAddress, screenName, firstName, lastName, and uuid.
- Keep Alive: If users are logged into multiple Liferay SP instances through a Liferay IdP, their sessions remain active as long as one of the browser windows stays open. Only configure this if the SP is Liferay DXP. The URL is https://[SP host name]/c/portal/saml/keep_alive.
Conclusion:
Configuring SAML in Liferay DXP enables organizations to streamline authentication, strengthen security, and deliver a smooth user experience across multiple systems. By supporting both IdP and SP roles, Liferay provides flexibility for various enterprise scenarios. Proper configuration of certificates, metadata, and attribute mappings ensures secure and reliable SSO/SLO functionality, making Liferay DXP a strong choice for enterprise-level identity and access management.