Optimizing Spring Boot Performance Using Redis Caching

Introduction
In today’s world, fast and responsive applications are important. One easy and effective way to speed up our spring boot application using Redis. Redis acts as a high-performance cache and in-memory data store. In this blog, We will display you the way Redis could make a big difference on your Spring Boot packages. We will manual you through the setup procedure and explain to you how to use Redis and improve the performance of the packages. Whether you’re handling slow database queries or want to deal with extra users efficiently, Redis can help you achieve your dreams.
Prerequisites
- JDK 11 or Later
- Maven or Gradle
- Spring Boot Development Environment (Here we use IntelliJ IDEA)
- Redis Server(You can install Redis locally or use a cloud-based solution like Redis Labs)
What is Redis?
Redis, which stands for Remote Dictionary Server, is an open-source, in-memory data store. This makes it super quick for applications to access frequently used data, significantly speeding up performance. Redis is mainly used as a cache, meaning it stores data temporarily so apps can retrieve it faster without having to check the database every time.
Redis is a versatile tool that can be used for many different purposes, including
- Caching : It stores frequently accessed data, which reduces the load on the database and helps improve application performance.
- Session Management : Redis keeps track of user session data for web applications, ensuring a smooth user experience.
- Real-Time Analytics : It handles high-speed data operations, making it ideal for real-time analytics and processing.
- Message Brokering : Redis facilitates communication between different parts of an application, allowing for efficient message passing and coordination.
Why Use Redis?
Redis is a powerful tool for enhancing application performance, and there are several reasons why it’s a popular choice for developers:
- Speed : Redis operates in memory, making data retrieval extremely fast.
- Scalability : It can handle a large number of read and write operations, making it suitable for high-traffic applications.
- Versatility : Redis supports various data structures like strings, hashes, lists, sets, and more.
- Ease of Use : It integrates seamlessly with Spring Boot and other frameworks, simplifying the development process.
- Reliability : Redis offers persistence options, ensuring data durability even in case of failures.
How to Integrate Redis with a Spring Boot Application
Step 1 : Add Redis Dependency
If you’re using Maven, add the following dependencies to your pom.xml file:
1<dependency>
2    <groupId>org.springframework.boot</groupId>
3    <artifactId>spring-boot-starter-data-redis</artifactId>
4</dependency>
Step 2 : Configure Redis
You can configure Redis properties in your application.properties or application.yml file:
1spring.redis.host=localhost
2spring.redis.port=6379
Step 3 : Create a Redis Configuration Class
You can create a configuration class to customize the Redis template and connection factory:
1@Configuration
2public class RedisConfig {
3
4  @Bean
5  public RedisConnectionFactory redisConnectionFactory() {
6    return new LettuceConnectionFactory();
7  }
8
9  @Bean
10  public RedisTemplate<String, User> redisTemplate() {
11    RedisTemplate<String, User> template = new RedisTemplate<>();
12    template.setConnectionFactory(redisConnectionFactory());
13    template.setKeySerializer(new StringRedisSerializer());
14    template.setValueSerializer(new GenericJackson2JsonRedisSerializer());
15    return template;
16  }
17}
Step 4 : Use Redis in Your Service
Now, you can inject the RedisTemplate into your service classes and use it to perform caching or other operations. Here’s an example of caching user data:
Adding a new User to Redis Cache and Database
The add method performs two key operations: saving a new user to the MySQL database and caching the user in Redis for quick access in future requests.
1private static final String USER = "user:";
2  private final UserRepository userRepository;
3
4  private final RedisTemplate<String,User> redisTemplate;
5
6  public UserServiceImpl(UserRepository userRepository,
7      RedisTemplate<String, User> redisTemplate) {
8    this.userRepository = userRepository;
9    this.redisTemplate = redisTemplate;
10  }
11@Override
12public User add(User user) {
13// Save user to MySQL
14User savedUser = userRepository.save(user);
15
16// Adding the saved user to the Redis cache
17redisTemplate.opsForValue().set(USER + savedUser.getUserId(), savedUser);
18return savedUser;
19}
Add new User API
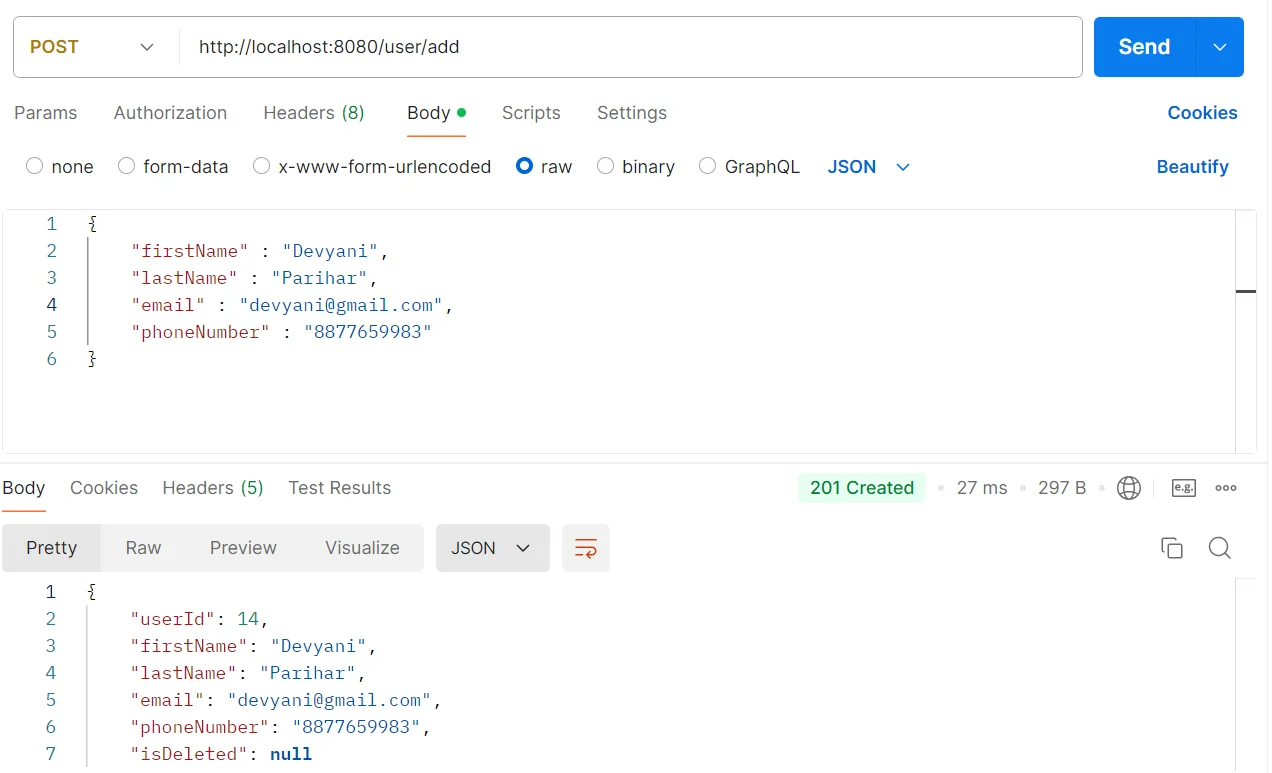
- To insert new customer data, select the POST method and send a request to http://localhost:8080/user/add, choosing Body > raw > JSON to include the customer data in JSON format.
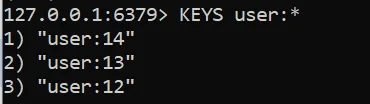
Database view of Customer Data into Redis Database.
- redis-cli – To open the Redis interface
- KEYS user:* – To get all KEYS associated with Users.
Fetching a User by ID from Cache and Database
In this step, we optimize user retrieval by first checking Redis cache. If the user isn’t found in Redis, we fall back to the MySQL database and cache the result for future requests.
1@Override
2public User getAllById(Long userId) {
3    // Try to get user from Redis cache
4    User user = (User) redisTemplate.opsForValue().get(USER + userId);
5    log.info("Getting data for cache {}",user.getUserId());
6
7    // If not found in cache, retrieve from MySQL and store in Redis
8    if (user == null) {
9        user = userRepository.findById(userId)
10                             .orElseThrow(() -> new RuntimeException("User not found"));
11        redisTemplate.opsForValue().set(USER + userId, user);
12    }
13    return user;
14}
Database view of Customer Data into Redis Database.
- redis-cli – To open the Redis interface
- KEYS Customer:* – To get all KEYS associated with Customer
- GET user:13 – Get User Data associated with id-13.

The log output shows whether the data is retrieved from Redis or MySQL. If found in Redis, a log confirms it; otherwise, a log indicates fetching from MySQL, followed by caching the result in Redis.

Deleting a User
In Redis, after removing data, you can verify its deletion by attempting to retrieve the same key and observing a null or “nil” result. Here’s how you can explain this in your blog:
1@Override
2public void delete(Long userId) {
3    // Find user in the database
4    User existUser = userRepository.findById(userId)
5                                   .orElseThrow(() -> new RuntimeException("User-id not found"));
6
7    // Mark user as deleted by setting the isDeleted flag
8    existUser.setIsDeleted(Boolean.TRUE);
9
10    // Save the updated user status in the database
11    userRepository.save(existUser);
12
13    // Remove user data from Redis cache
14    redisTemplate.delete(USER + userId);
15}
Delete User API
- To delete a user with ID 12, send a DELETE request to the URL http://localhost:8080/user/delete/12.
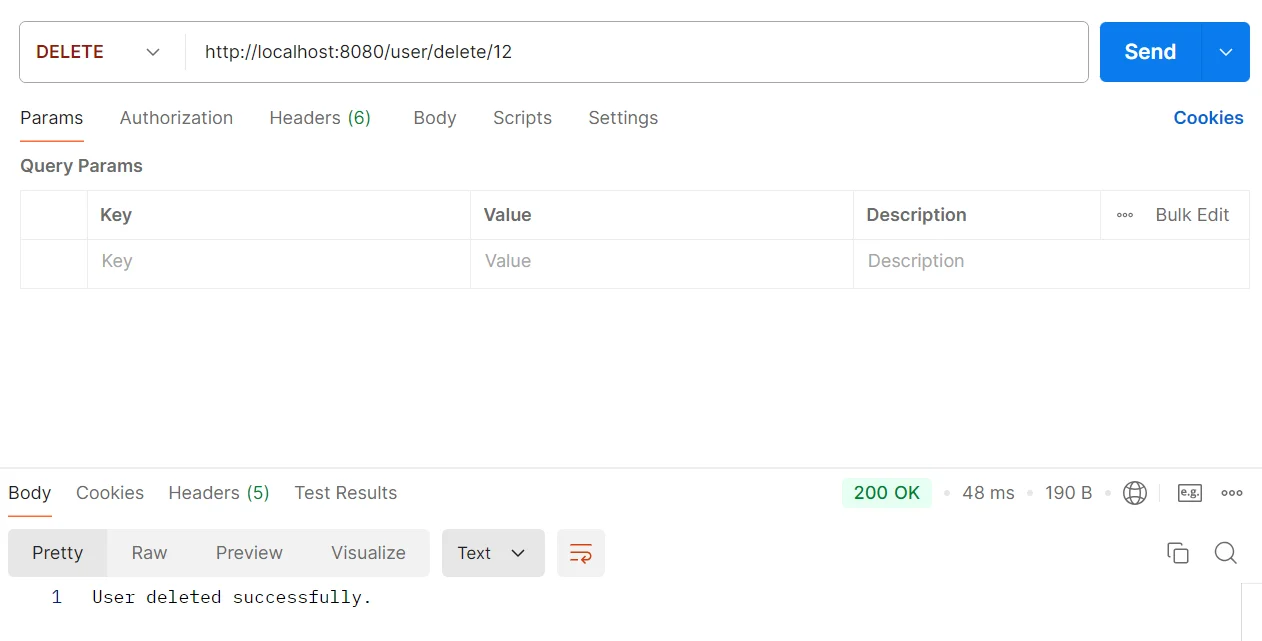
Before deletion, executing GET user:12 retrieves the user’s data from Redis. After deletion, the same command returns (nil) or null, confirming that the data has been removed.

Updating User Information
The update process involves modifying the user’s details in both the MySQL database and the Redis cache to ensure data consistency.
1@Override
2public User update(Long userId, User user) {
3    // Find the existing user in the database
4    User existUser = userRepository.findById(userId)
5                                   .orElseThrow(() -> new RuntimeException("User not found"));
6
7    // Update user details
8    existUser.setFirstName(user.getFirstName());
9    existUser.setEmail(user.getEmail());
10    existUser.setLastName(user.getLastName());
11    existUser.setPhoneNumber(user.getPhoneNumber());
12
13    // Save the updated user in the database
14    User updatedUser = userRepository.save(existUser);
15
16    // Update the user data in Redis cache
17    redisTemplate.opsForValue().set(USER + updatedUser.getUserId(), updatedUser);
18
19    return updatedUser;
20}
When the update method is executed, it retrieves the user from the database, and if found, it modifies the user’s details, such as first name and email. After saving the updated user back to MySQL, the Redis cache is refreshed with the new information, ensuring that subsequent requests retrieve the most current user data.

Conclusion
In this blog, we validated how to integrate Redis with the Spring Boot application and keep statistics in reminiscence. We use Redis to speak with the Spring Boot application, which improves boot efficiency by decreasing database load and improving data retrieval. Redis makes database queries greater efficient and person-pleasant, It can help to achieve our performance goal. Not best Redis is rapid and scalable, but also helps diverse information structures and use instances inclusive of caching, consultation control, actual-time analytics, and message brokering. Redis is a smooth device for integrating with Spring Boot making it critical for any developer seeking to improve software’s overall performance.